





Case Study · Toy Retail · United States
One Display Case, Flipped 180°, in Every Store Nationwide
A packaging-engineering consultancy brought us a full retail display case program: 2,620 diorama cases for a US toy manufacturer, headed to every store of a national big-box retailer.
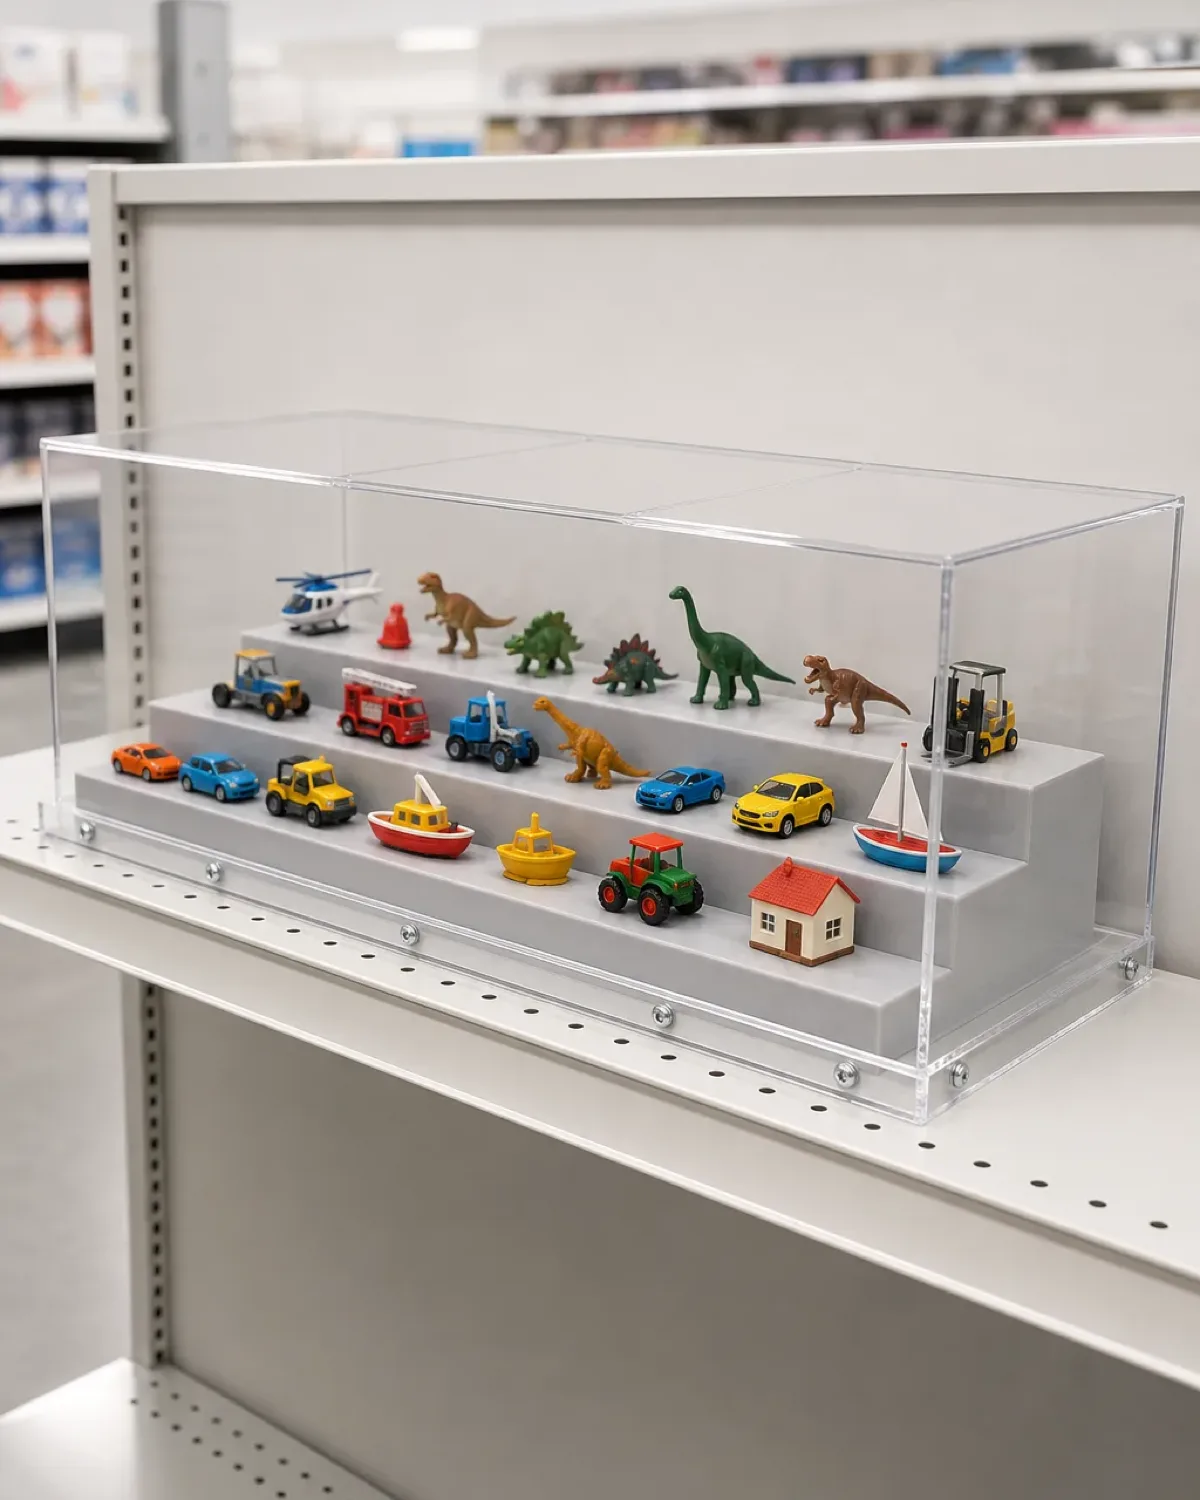
The cases had to arrive ahead of a summer retail set. We built the three-part case — clear acrylic cover, ABS riser, screw-secured base — caught a 7 mm tooling discrepancy before the mold cut steel, and handed every unit to carriers within 20 days of approval. The consultancy says five more programs are on its board.
- display cases shipped
- 2,620
- cavity gap caught pre-tooling
- 7 mm
- approval to final shipment
- 20 days
- ocean containers plus air waves
- 5 + air
Ordering a similar project
Current production starts at 100 pieces per design. Paid pre-production samples take 3–5 days; sample fees are paid separately and never credited. Standard production takes 15–20 days after the drawing, sample, artwork, packing, and release plan are approved.
Different-specification price reference: the acrylic cases hub lists a 300 × 200 × 250 mm case in 5 mm UV-filtering acrylic with mitered joints and a magnetic lid at 200 pieces from $15–30 per unit FOB Shenzhen. That smaller case is not this 610 × 305 × 305 mm acrylic-and-ABS program and is not a quote for it.
Key Takeaways
- A 2,620-unit program of three-part diorama display cases — 610 x 305 x 305 mm clear acrylic cover, vacuum-formed ABS riser insert, screw-secured base — shipped for a national big-box toy launch.
- The concept flipped a standard display case 180 degrees: the lid became the mounting base, so store staff could load the product, screw the cover down, and bolt the whole unit to the retail shelf.
- Overlaying the client’s 3D case file on the riser tooling model exposed a roughly 7 mm cavity discrepancy against an earlier drawing revision — two emails settled the critical 104.77 mm dimension before the mold cut steel.
- Bonded-sheet fabrication replaced injection molding for the case body, so the only tooling investment in 2,620 units was the ABS riser mold.
- Split logistics fed the client’s assembly line: ABS risers flew in staggered air waves while the acrylic cases sailed in five 40 ft containers — every unit was handed to carriers within 20 days of mass-production approval.
The Challenge
The inquiry came through our website form from a packaging-engineering consultancy that develops retail packaging for toy brands. Their client, a US toy manufacturer, had sold a national big-box retailer on a new in-aisle concept: a sealed clear display case holding a fully built miniature scene — a diorama — so shoppers could see the assembled product exactly as it looks out of the box, at every store in the chain. The consultancy needed thousands of cases at a West Coast assembly facility ahead of a summer retail set date, and the retailer’s pickup window at the end of that runway did not move.
The engineering concept was the interesting part. A standard acrylic display case is a five-sided cover that lifts off a flat base. The consultant’s idea flipped that architecture 180 degrees: the part that is normally the lid becomes the mounting platform. The riser insert carrying the toy scene screws down onto that base, the cover screws down over both, and the completed unit bolts through pre-drilled holes into the retail shelf itself. Store staff can open the case to load or service the product, then lock everything back down. Shoppers get a museum-style view; the store gets a fixture that cannot walk away.
Three constraints made the program harder than the sketch suggested:
- A fixed footprint with a molded reference. The retailer’s planogram fixed the outer case at 610 x 305 x 305 mm — a 24 x 12 x 12 in footprint — in 3 mm clear acrylic. The reference product the consultancy showed us was injection-molded, and molding a case that size means serious tooling money and weeks of lead time the schedule did not have.
- An assembly line waiting downstream. This was not a ship-and-forget order. The consultancy’s own team had to hand-secure 22 product pieces onto every riser insert at their facility, let adhesive cure, close the cases, and repack — before the retailer’s pickup date. Which parts arrived first mattered as much as when the last carton landed.
- Two artworks, one deadline. The program covered two product lines, each with its own printed back-panel artwork and insert graphics, produced and packed in parallel without mixing.
In other words: the consultancy was not buying boxes. It was buying a supplier who could carry structural engineering, one piece of custom tooling, print, packaging, and a two-mode freight plan on a schedule that fed someone else’s production line. That is what a retail display case program actually is, and it is a different job from quoting a display case.
Our Approach
Three decisions carried this project: challenging the manufacturing method before quoting it, interrogating the drawings before any steel was cut, and building the freight plan around the client’s assembly sequence instead of around what was convenient to ship.
Bonded fabrication instead of injection molding — and one mold where it counted
The first thing I told the consultant was that the case style he referenced is typically injection-molded, and that we would not build it that way. For a run of a few thousand large cases, fabrication — precision-cutting 3 mm cast acrylic sheet and solvent-bonding the panels — delivers the same clean look with polished bonded edges and zero case tooling. The math behind that trade-off is the same one we walk through in our zero-tooling CNC acrylic versus molded parts guide: below a certain volume, a mold is a cost you amortize; below this program’s volume, it is a cost you simply avoid. The one component that genuinely justified tooling was the ABS riser insert — a stepped, vacuum-formed platform that had to repeat identically 2,620 times — so that is the only mold the program paid for.
The screw-secured architecture was the other early conversation. Our standard case is fully bonded with a removable top, and I was direct with the consultant that a screw-assembled, shelf-bolted version is a custom structure we would not engineer from photos alone. We asked for drawings, and we proposed starting with a physical structural sample before anyone committed to the flipped design. To keep that sample off the critical path, we made one pragmatic call: the stepped sections were spec’d in white acrylic, which we would have had to order in, so we cut the first sample entirely from clear stock we had on hand and shipped it inside a week. The consultant reviewed structure, details, and dimensions on the clear version — his reply was that the sample arrived and looked great — and color decisions moved to the print stage where they belonged.
Hardware got the same treatment. Rather than specifying one screw and defending it, we shipped three screw styles with the pre-production sample, filmed the installation process for each, and prepared a longer flange screw as a fallback for the shelf-mount holes. The consultant picked his preferred style from the videos. On a program where someone else’s staff does final assembly, hardware is not a detail — it is the interface between our factory and their labor plan.
The 7 mm question we asked before the mold cut steel
While the riser mold was being machined, I did what I always do before tooling is committed: I placed the client’s 3D case file inside our cavity model and measured what was left over. The overlay showed a 6.9 mm blank on each side and 6.1 mm at the back — clearances that did not match an earlier drawing revision we had on file. A cavity gap of roughly 7 mm is invisible on a screen full of dimension lines, and it can be one of two very different things: deliberate breathing room, or a drafting error about to be baked into steel.
So I stopped and asked. The consultant confirmed the gap was intentional — tolerance to let light flow around the product — and that one product variant ran 6 mm wider than the other. I pushed once more to pin the number that actually mattered, and he gave it to us: the critical cavity dimension was 4.125 in, 104.77 mm, left to right. Two short emails, and the mold proceeded against a confirmed dimension instead of an assumed one. Had the discrepancy been an error, catching it after tooling would have meant a re-cut mold and 2,620 misfitting inserts; catching it before cost nothing but a day of correspondence.
A drawing review checks what is on the page. An overlay checks what the parts will actually do to each other — and that second check is the one that saves programs. If your case supplier has never pushed a question like that back at you, assume the overlay is not happening.
The shelf interface got the same scrutiny. The consultancy sent the retailer’s shelf hole pattern as a 1:1 printable PDF, and our production team cross-checked the base flange’s mounting holes against it before drilling anything. When our assembly review found that one side screw-hole position conflicted with the riser’s base flange, we proposed moving the holes inward 15 mm; the consultant countered with a 45-degree flange chamfer to avoid touching the tooling at all. The final answer was better than both first ideas: shift the hole 1.5 cm and drill it after fabrication, which changed no tooling and cost zero schedule days.
And when our line flagged that the vacuum-formed ABS walls felt thin, we loaded a sample riser with about 3 kg of acrylic stock — more than 25 times the roughly 110 g of product each platform would actually carry — photographed and filmed it, and sent the evidence rather than a reassurance. The engineering logic behind that kind of margin check is laid out in our acrylic sheet thickness guide.
Air freight for what gates the line, ocean for everything else
The freight plan started from one question: what does the client’s assembly line starve without? The answer was the risers. Their team could begin securing product to risers the day risers landed; the acrylic covers were only needed when finished dioramas were ready to close. So the two parts did not need to travel together, and treating them as one shipment would have meant the slowest part setting the pace for the whole program.
I was equally direct about what air freight really costs. These cases are bulky for their weight, and air is billed on volume: flying 1,000 complete units would have run in the neighborhood of USD 140,000, while an express-vessel 40 ft container carrying roughly the same 450 to 500 cases costs USD 14,500 door-to-door — around five times cheaper for about one week’s difference in transit. I told the consultancy plainly that we do not treat freight as a profit center and would not quote an all-air plan I did not believe in. The plan we recommended, and ran, split the program: every ABS riser flew, in staggered air waves deliberately sized to stay below the volume threshold that triggers in-depth customs inspection, while every acrylic case sailed in five 40 ft high-cube containers on express vessels, all of it delivered duty-paid so the consultancy never touched a customs form.
The packaging engineering went both ways — which is worth admitting. The consultant proposed nesting six risers per master carton for the air waves and sent a rendering. I initially pushed back, because the riser’s base flange looked like it prevented stacking. He pointed out that his layout seated each flange on the step of the riser below, with a 1/8 in clearance between units. We re-checked the geometry against his rendering, and he was right — my earlier read was wrong, and I told him so.
Six risers per 66 x 36 x 45 cm carton became the pack standard for the entire air program, cutting the carton count and the volumetric bill with it. A supplier who challenges your packaging concept and then concedes when your numbers hold is more useful than one who nods either way.
The last layer was making the goods legible on arrival. Every master carton was pre-printed for one specific model in exact quantity — no blank cartons, no mixed cartons — with markings the receiving team could route from: item, model, quantity, weights, carton size. We packed a carton of six spare risers for each artwork, added a box of spare screws beyond the sets already packed inside each case, and separated air and sea line items on the packing lists so the consultancy’s team could reconcile every batch against a document instead of a memory.
The Results
Every one of the 2,620 three-part cases was produced, printed, packed, and handed to its carrier within 20 days of mass-production approval — with the first air wave of risers landing at the consultancy’s dock ahead of schedule, right at the start of their assembly window.
The staggered plan did what it was designed to do. Air waves of risers arrived every few days while the containers were still on the water, so the client’s team trained, staged, and started securing product immediately instead of waiting for a single consolidated delivery. We even advised them to schedule their main assembly push to coincide with the first container’s arrival — unpacked risers are bulky, and we had fought the same floor-space battle in our own workshop weeks earlier.
One episode from the receiving dock says more about program discipline than any spec sheet. The consultancy’s team counted the first big air delivery three times with the driver: 127 master cartons, exactly as manifested — but only four cartons of one artwork where six were expected.
Instead of promising replacements on reflex, I reconciled the shipment against our records and walked the client through the logic: the received total matched the dispatched total to the carton, every carton was pre-printed for one model in exact quantity with no blanks and no extras, and nothing from that artwork had been diverted to the sea batch. The count could only balance one way — the two missing cartons had to be inside the 127 already on their floor. The next day, their team found both cartons mislaid in the receiving rush and wrote back to thank us for holding the line on the numbers. No replacement shipment, no insurance claim, no doubt left standing between the two teams.
The program also ended the way healthy programs end: with the next one already in view. The consultancy told us during the run that five more retail programs were under discussion on its side, and that this launch was the test of whether we could deliver consistently at national scale. On the evidence — a pre-tooling catch, a 20-day production sprint, a freight plan that fed an assembly line, and a carton count that survived a three-recount audit — we like our position.
"Wetop caught a cavity discrepancy in our tooling file that we would not have found until assembly. The sample arrived fast and looked great, the first air shipment landed ahead of schedule, and all 127 master cartons reconciled to the count."
What This Means for Your Project
If you are scoping a retail display case program of your own — hundreds or thousands of units, a national retailer’s set date, an assembly step between the factory and the shelf — two questions will tell you more about a supplier than any brochure.
First: what do they check that your drawings do not show? A drawing review reads dimensions off the page. The failure modes that kill programs live between parts — a riser cavity 7 mm off its case, a screw hole landing on a flange, a shelf hole pattern that almost matches. Ask a prospective supplier to overlay your 3D files against their tooling and production models before anything is cut, and listen for whether they have ever pushed a question back at you. Our custom acrylic display cases page covers the structures this program drew on, from bonded five-sided covers to screw-secured and shelf-mounted builds.
Second: does the freight plan start from your assembly line or from their loading dock? Any factory can book containers. A program supplier asks which component gates your downstream work, splits modes so that part lands first, sizes air shipments around customs-inspection thresholds, and prices the trade-offs honestly enough to tell you when air freight is a waste of your money. On this program that difference was roughly five-to-one in cost — and a launch that hit its window.
The pattern holds beyond toys: the same three-part logic — tooled insert, fabricated cover, engineered pack-out — fits collectibles, electronics, and any product worth showing assembled. If your program needs a supplier who challenges the drawing before the mold and the freight quote after it, send us what you have. A sketch and a store count are enough to start, and our custom acrylic fabrication process walks you through how we take it from there.
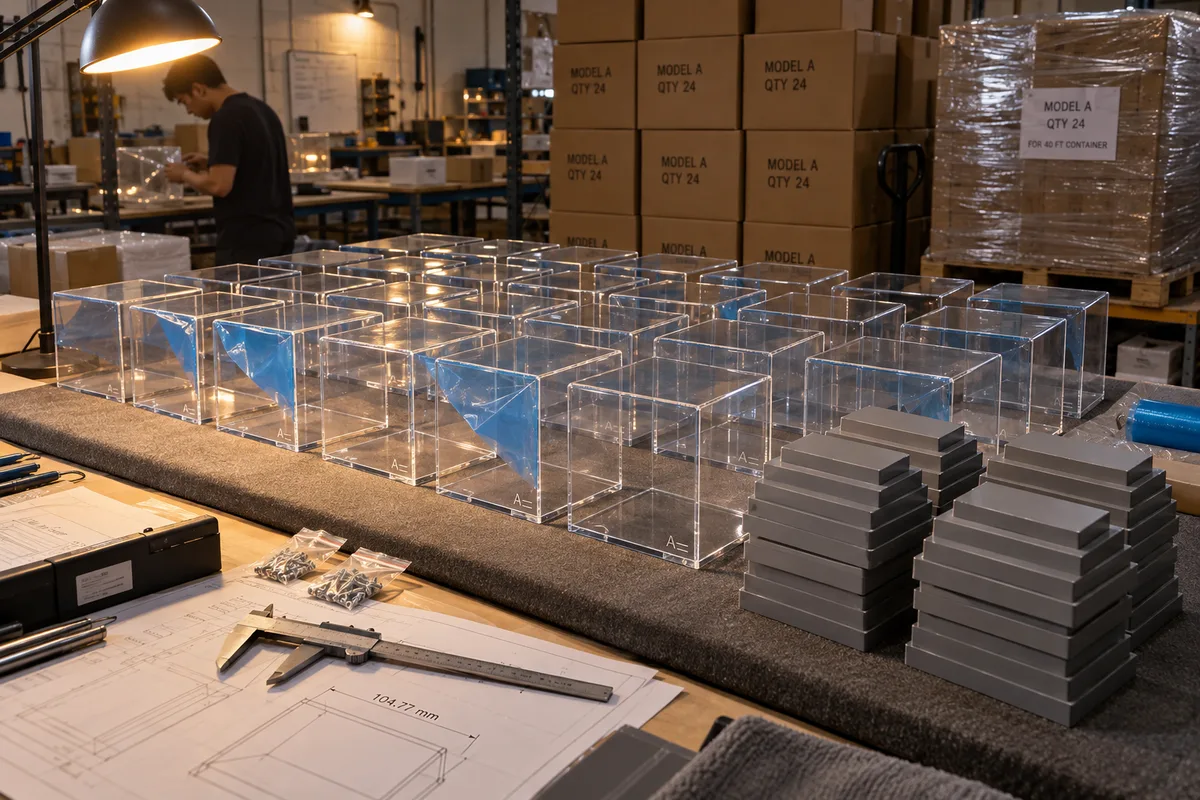
Planning a retail display case program?
Send us your drawings — or just a concept sketch, a store count, and your set date. We’ll come back with a DFM review, a tooling-versus-fabrication call, and a freight plan built around your assembly schedule.
Paid sample in 3–5 days · Sample fees paid separately and never credited · We reply within 24 hours