





Tray Insert Design: Liners, Fit & Compartments
The tray body gets a full drawing; the insert gets one word. Then the product rattles, the felt lifts, and the reorder goes to someone else.
Need this made?Custom acrylic trays →
Here is the engineering the brief leaves out.
Key Takeaways
- Tray insert design is a fit problem before it is a material problem: a drop-in insert wants about 0.5mm total clearance against a tray body cut to the ±0.2mm standard working tolerance, and the compartment recess wants 0.2-0.5mm per side around the product it holds.
- The four working liner families split by job: felt and velvet flock for presentation feel, closed-cell EVA foam for protective compartments, silicone for wet and washable zones — silicone food-contact compounds fall under FDA 21 CFR 177.2600.
- Removable inserts beat bonded compartments wherever cleaning or product changes are expected; bonded acrylic dividers win where the tray must read as one rigid piece and never migrate.
- One tray body can carry many SKUs by swapping die-cut inserts — and because both the body and the inserts are CNC- and die-cut rather than molded, there is usually no tooling fee when you add insert variant number five.
- Liners are the wear item. Spec insert replacement as a reorder line from day one instead of treating a worn felt as a failed tray.
On this page
- The insert is the half of the tray the brief forgets
- Liner materials: felt, velvet flock, EVA, and silicone
- Fit: clearance, tolerance, and how tight is right
- Removable insert vs bonded compartments
- One body, many SKUs: the shared-platform strategy
- Liners wear out: cleaning and replacement cycles
- Speccing an insert program
The insert is the half of the tray the brief forgets
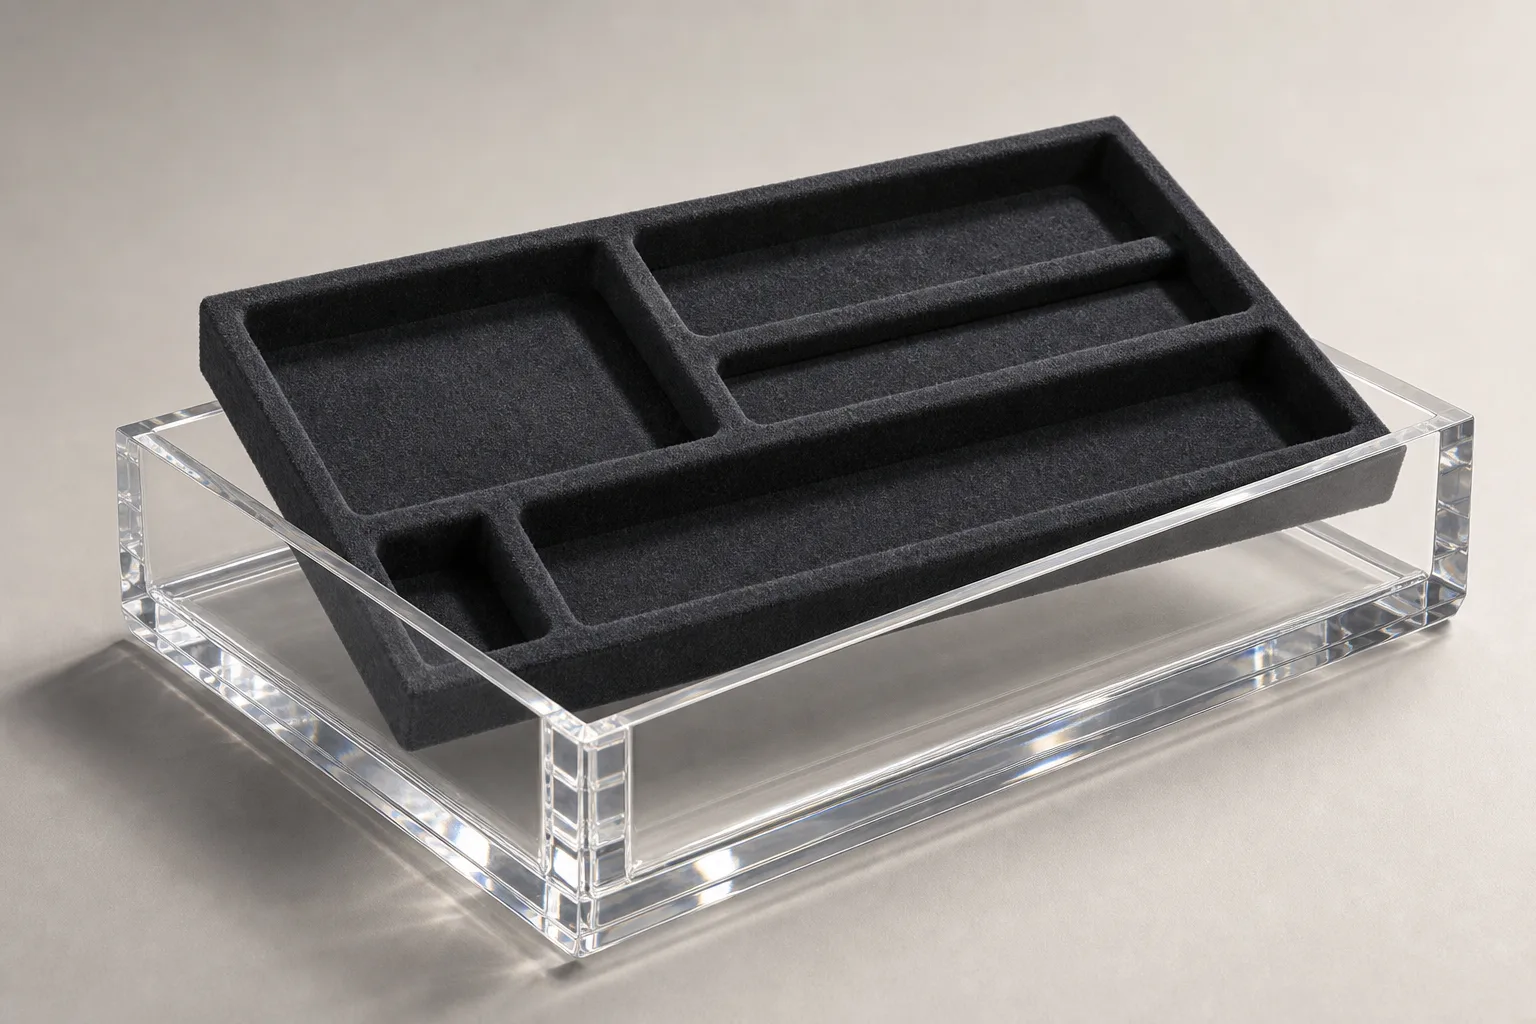
The tray briefs that cross my desk share one blind spot. The body arrives fully specified — outside dimensions to the millimeter, 5mm walls, polished edges, radius corners, logo position — and then the interior gets a phrase: “felt lined” or “with compartments.” A tray insert is the fitted interior component — felt, velvet flock, EVA foam, silicone, or acrylic dividers — that holds product in position inside the body, and tray insert design is the engineering that one-word phrase skips.
The skipped phrase is where the project’s real risk hides — a lesson running production since 2014 keeps repeating — because the body is the easy part. The engineering behind it covers liner material, compartment geometry, clearance, and whether the insert lifts out or bonds in permanently. Whether the finished tray feels right in a customer’s hands comes down to exactly those choices: whether the watch sits without sliding, the bottles lift out without fighting, the insert stays flat after a year of cleaning.
The cost of getting it wrong is quiet but compounding. A compartment cut 2mm too generous lets product rattle in transit and read as loose at retail. A felt glued edge-to-edge with the wrong adhesive lifts at the corners within months. An insert bonded in permanently turns a cleaning problem into a warranty conversation. None of these show up in the approval photo — all of them show up in whether the reorder happens. This guide covers the four decisions that make up tray insert design: liner material, fit and clearance, removable versus integral construction, and the shared-body strategy that lets one custom acrylic tray program carry many SKUs.
Liner materials: felt, velvet flock, EVA, and silicone
Four liner families cover nearly every tray insert design, and they split cleanly by job: felt and velvet flock for presentation surfaces, closed-cell EVA foam for protective compartments, silicone for wet and washable zones. Acrylic dividers — the tray’s own material — are the fifth option when the interior must stay hard and glossy.
| Liner | Surface & feel | Typical thickness | Water & cleaning | Best for |
|---|---|---|---|---|
| Felt (wool/rayon blend) | Soft, matte, premium | 1-3mm | Spot-clean only; replace when worn | Jewelry, coins, watches, giftware |
| Velvet flock (sprayed fiber) | Plush, dense, follows curves | Under 1mm build-up | Dust or brush; no liquids | Retail presentation, curved recesses |
| EVA foam (closed-cell, die-cut) | Firm cushion, precise walls | 2-10mm | Wipeable, doesn’t absorb | Protective compartments, kits, transit |
| Silicone | Grippy, dense, washable | 1-3mm | Fully washable, heat-tolerant | Serving trays, vanity wet zones |
| Acrylic dividers | Hard, glossy, rigid | 2-3mm walls | Wipe or wash like the tray | Organizers, food service, heavy retail use |
The physical properties drive those lanes. EVA is a closed-cell ethylene copolymer — low density, high flexibility — which is why a die-cut EVA block gives compartment walls that cushion without absorbing water or crumbling at the edges.1 Silicone earns the wet zones: compounds for repeated food-contact use are covered under FDA 21 CFR 177.2600, which is the line to cite when a hotel or food-service buyer asks whether the liner, not just the acrylic, is safe beside food.2 Felt and flock have no such story and should never be specced where liquid is routine.
Two production notes from the floor. First, flock is sprayed onto an adhesive coat, so it follows a CNC-machined curved recess perfectly — felt sheet does not; a felt liner wants flat-bottomed geometry. Second, dark liners hide wear and lint far better than pale ones: charcoal and navy stay presentable in daily retail handling where cream shows every touch. When a buyer’s brand palette calls for a light interior, I steer the spec toward silicone or acrylic dividers, which clean back to new.
How the liner attaches matters as much as what it is. Felt and EVA mount on pressure-sensitive adhesive backing, applied to the insert blank rather than the tray body so the wear item carries the glue; a liner glued directly into a polished tray leaves residue and lifted edges when it finally comes out. Silicone pads usually sit by friction and their own grip, which makes them the easiest liner to replace in the field — housekeeping can swap a pad without tools. Flock is permanent by nature: the fiber is bonded to the substrate it was sprayed on, so a flocked component is replaced whole, never re-lined. Your replacement strategy should be decided in the same breath as the material.
Fit: clearance, tolerance, and how tight is right
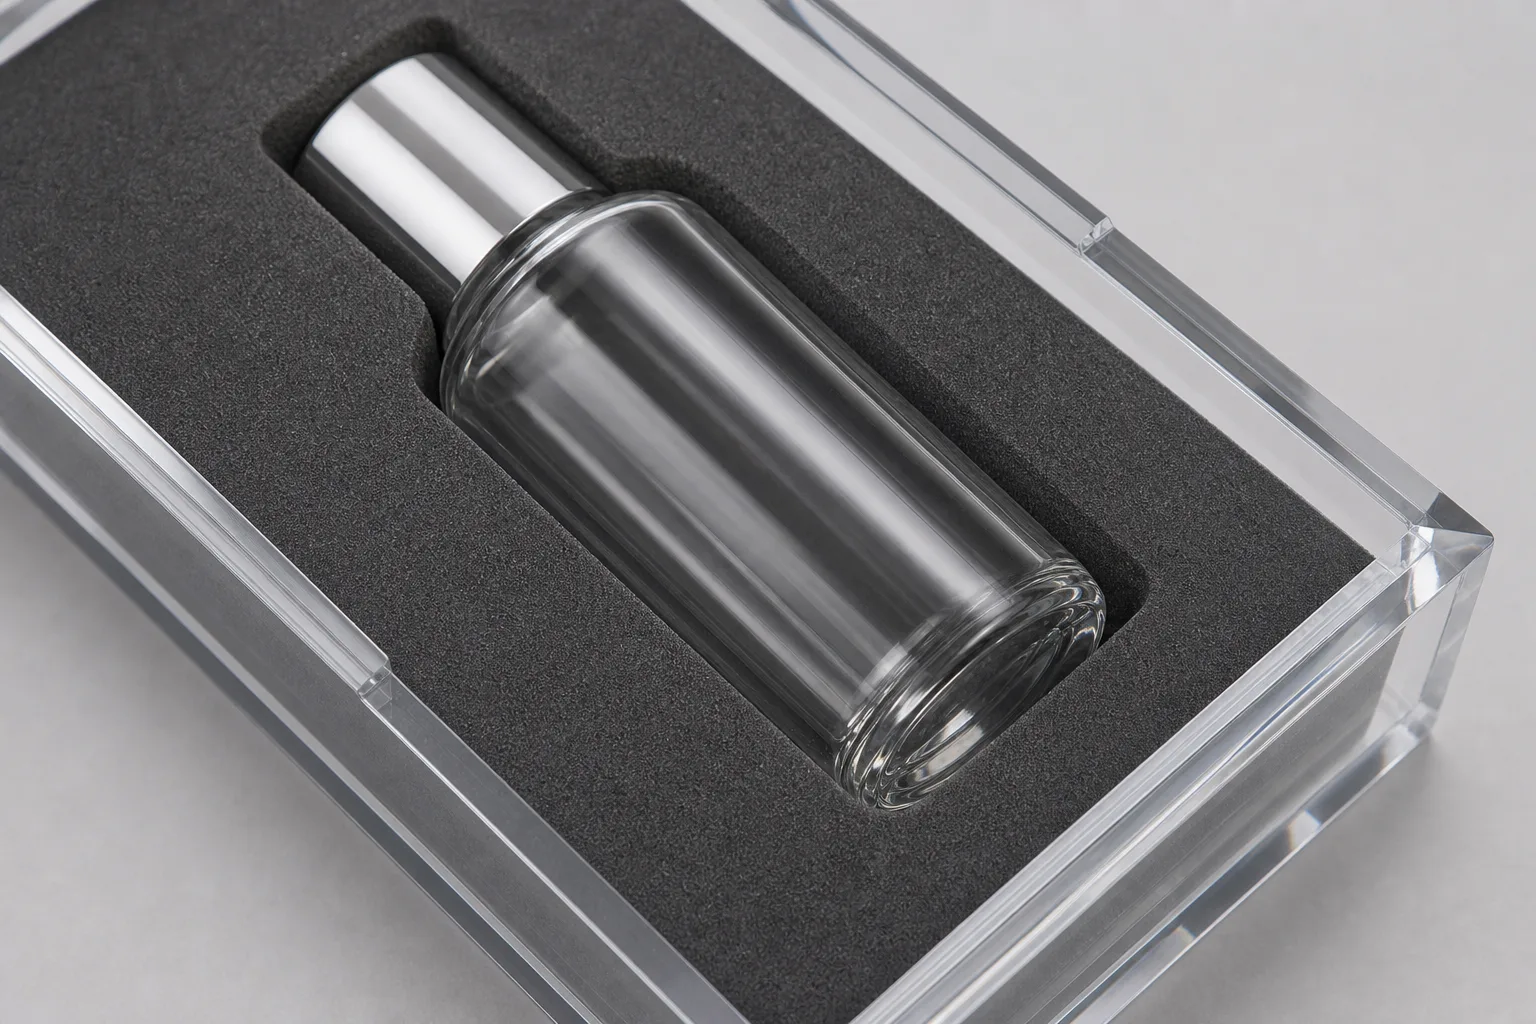
Fit in tray insert design is two nested clearances: the insert inside the tray body, and the product inside the compartment. The working numbers are about 0.5mm total clearance for a drop-in insert against the body walls, and 0.2-0.5mm per side between product and recess — tighter for hard goods that must not shift, looser for soft or handled items.
Those numbers only work because the cutting processes hold them. Laser-cut and CNC-machined acrylic parts are held to the ±0.2mm standard working tolerance, with ±0.1mm achievable on fit-critical 2D profiles after drawing review. Die-cut EVA and felt run looser than machined acrylic, which is why the compartment clearance range has a floor: cut a foam recess at nominal-zero and half the batch grips too hard while the other half rattles. The discipline that actually delivers fit is not a tighter tolerance claim — it is cutting the recess to the measured product, not the product’s published dimensions. Bottles, tins, and boxed goods routinely run 0.3-0.5mm off their datasheet, and packaging revisions move them again. Every compartment program we run starts with physical product samples on the bench.
Rattle is the failure buyers actually experience, and it has a formal benchmark: transit-simulation procedures published by ISTA are the packaged-goods standard for whether contents shake loose between the carton and the shelf.3 You do not need a lab program to use the logic — a compartment that holds product snug through handling, with liner compression taking up the last fraction of a millimeter, is what those tests reward. The liner is part of the fit budget: 1mm of felt or EVA compresses a few tenths under product weight, so the recess is cut allowing for it. That interaction between cut geometry and liner compression is exactly the detail a one-word “felt lined” brief cannot carry, and it is the first thing we resolve at the sample stage — samples ship in 3-5 days precisely so a fit argument happens on one piece, not five hundred.
Removable insert vs bonded compartments
The construction decision splits on one question: will the interior ever need to change or be cleaned separately from the tray? If yes, spec a removable insert. If the tray must behave as a single rigid piece whose interior never migrates, bond acrylic dividers into the body permanently.
Removable wins more often than buyers expect. A lift-out insert lets housekeeping wash a hotel amenity tray properly instead of dabbing around glued felt. It lets a retailer swap the compartment layout when the product lineup changes without rebuying trays. It contains wear: when the liner tires, you replace a die-cut insert, not a finished polished tray. The engineering cost is that clearance work from the previous section, plus a finger notch or lift recess so the insert comes out without prying — a two-minute design detail that we add to nearly every removable program because its absence is the number-one usability complaint on drop-in inserts.
There is also a shipping argument for removable construction that rarely makes the brief. Inserts packed separately protect both parts in transit — the acrylic body cartons flat and dense, the foam or felt inserts stack light on top — and a damaged component claims and replaces individually instead of writing off finished trays. On export orders where freight is priced by volume, separating the two can also pack meaningfully tighter than nested finished trays. We default to separate packing on removable programs unless you ask for retail-ready assembly.
Bonded construction earns its place where rigidity and permanence matter more than flexibility. Solvent-bonded acrylic dividers turn the tray into one structural unit — nothing shifts, nothing collects crumbs underneath, and the all-acrylic interior wipes down like the rest of the tray. That is the right call for heavy retail counter organizers, food-service trays, and anything customers handle roughly all day. The trade is final: layout changes mean new trays. A useful middle path we build regularly is a bonded divider frame with removable liner pads dropped into each compartment — the structure is permanent, the wear surface still replaces. For the printed-and-lined bottom panel variant, see the tray logo and insert options guide, which covers the artwork side of the same component.
One body, many SKUs: the shared-platform strategy
The strongest program economics in tray insert design come from sharing: one tray body specification, multiple insert layouts. The body — the expensive, polished, branded component — stays identical across the range; the die-cut insert is what differentiates the 6-ring jewelry SKU from the 3-watch SKU from the open vanity version.
The manufacturing logic makes this nearly free to set up. Tray bodies and inserts are laser-cut, CNC-machined, and die-cut — not injection molded — so adding insert variant number five means a new cutting file, not a new mold: no tooling fee on most designs. Your cutting files stay archived, so reorders of any variant repeat exactly. Compare that against molded trays, where every compartment layout is its own tooling investment, and the reason cut acrylic dominates multi-SKU tray programs is plain arithmetic.
The discipline the strategy demands is planning the body for its hardest-working insert. Depth must serve the deepest compartment in the range; the body’s internal radius must be checked against each insert blank’s corner radius; and if one SKU needs a lid, the body must account for its lid geometry. At the platform-design stage, document the tallest and heaviest item in the planned range, then verify each variant through drawings and samples. The custom acrylic packaging insert project shows how product fit, removal access, restraint, outer-package fit and any test scope were approved before production.
Liners wear out: cleaning and replacement cycles
Every liner is a wear item, and honest tray insert design plans for that instead of hiding it. Presentation felts in daily-touch retail look tired long before the acrylic body shows any age. Foam compartments under constant product load slowly take a compression set. Flock thins where fingers land a hundred times a day.
Cleaning is where most liners actually die. Felt and flock tolerate dusting and dry brushing; liquid cleaners mat the pile, lift edges, and leave tide marks — so a felt tray in a bar or bathroom context is a spec error, not a durability failure. EVA and silicone wipe clean indefinitely, and bonded acrylic interiors wash like the tray itself. Match the liner to the venue’s real cleaning regime, not the showroom’s: I have watched a beautiful felt spec survive one quarter of hotel housekeeping before the program switched to silicone pads on the reorder.
The program answer is to treat inserts as consumables with their own reorder line. A removable insert that replaces for a fraction of the tray’s cost resets the product to new — same body, fresh interior — which is dramatically better economics than replacing trays and dramatically better optics than letting worn felt represent the brand. Because your die-lines and cutting files stay on record with us, an insert-only reorder is a repeat run, not a redesign.
A realistic replacement rhythm helps the budget conversation. High-touch retail presentation felt is commonly refreshed on a seasonal or annual cycle; back-of-house and low-touch trays stretch much longer; silicone and acrylic interiors generally live as long as the tray. You do not need to predict the exact interval — you need the insert to be orderable on its own, in your quantities, without re-engineering. Build that into the first purchase order and the second one writes itself.
Speccing an insert program
A complete tray insert design brief fits on one page: the products each compartment holds (send physical samples — we cut to measured parts, not datasheets), liner family per zone, removable or bonded construction, replacement expectations, and how many insert variants the shared body should anticipate.
From there the path is standard: quote within 24 hours, a production sample in 3-5 days with your actual product seated in the actual compartments, then a 15-20 day production run after approval, with 30% deposit and the balance before shipment. MOQ is 100 pieces, and every insert and body is checked in our ISO 9001-certified factory against the approved sample before it ships. Send us your tray and insert spec — or start from the acrylic trays hub to see body formats the insert program builds on.
Footnotes
-
Ethylene Vinyl Acetate (EVA) — MakeItFrom — material profile documenting EVA as a low-density, high-ductility ethylene copolymer, the property set behind die-cut closed-cell foam compartment inserts. ↩
-
FDA 21 CFR 177.2600 — Rubber articles intended for repeated use — the US federal regulation covering rubber and silicone compounds for repeated food-contact use, the compliance reference for silicone tray liners in food-adjacent service. ↩
-
ISTA Test Procedures — International Safe Transit Association — the packaged-goods industry’s transit-simulation protocols, the formal benchmark behind designing compartment fit that keeps product from shaking loose in shipment. ↩
Frequently Asked Questions
Can you make acrylic trays with custom compartments and lids?
Yes — compartment layout, count, and depth are cut to your product's measured dimensions, either as bonded acrylic dividers or as a removable die-cut insert, with hinged or lift-off lids on top. We build from your product samples: send the items the tray must hold, and each recess is cut to fit them with 0.2-0.5mm clearance per side.
Which insert liner should I choose — felt, velvet, EVA, or silicone?
Match the liner to the job. Felt and velvet flock give the soft presentation surface jewelry, coins, and giftware want. Closed-cell EVA foam gives firm protective compartments for tools, bottles, and transit. Silicone is the washable, grippy choice for serving and vanity trays that meet water. If the tray gets cleaned with liquid regularly, do not spec felt.
Should a tray insert be removable or glued in?
Removable when the insert will be cleaned, replaced, or swapped between products — most hospitality, vanity, and retail programs. Bonded when the tray must behave as one rigid piece with no movement, such as heavy retail counter use. Removable inserts also let one tray body serve several SKUs, which is usually the stronger program economics.
Can one tray body work for different products or counts?
Yes — that is the shared-platform approach: one tray body specification, multiple die-cut inserts with different compartment layouts. Because tray bodies and inserts are cut, not molded, a new insert layout adds no tooling fee; you order the same body and a new insert pattern. Many of our repeat tray programs run 3-6 insert variants on one body.
How long do felt or foam inserts last, and can I reorder just the insert?
Liners are the wear item — presentation felts in daily-touch retail typically look tired well before the acrylic shows any age, and foam compartments slowly take a set under constant load. Spec the insert as a separate replaceable part and reorder it alone; our 100-piece MOQ applies per production run, and insert-only reorders repeat from your archived cutting files.
Explore Custom Acrylic Products
Browse product categories to compare formats, materials, and customization options before choosing the closest fit for your project.