





Floating Shoe Display: Acrylic Effect & Walls
The levitating sneaker on the wall is not magic — it is one of three clear-acrylic mounting methods, each with a different load limit, SKU density, and seasonal-swap workflow.
Need this made?Acrylic shoe displays →
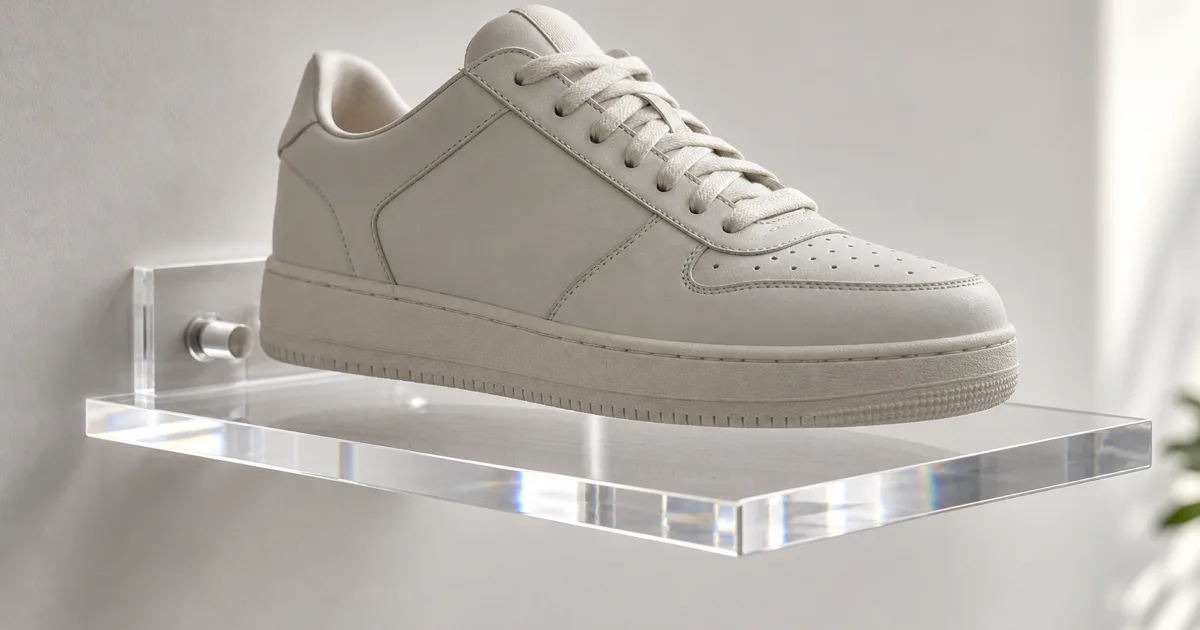
Pick the wrong one and the wall sags by week three.
Key Takeaways
- The floating shoe display effect is not one product — it is one of three clear-acrylic mounting methods (cantilevered clear shelf, standoff-mounted riser, or hidden L-bracket), and which one you spec sets your load limit, SKU density, and how fast a store team can swap a season.
- The 'levitation' comes from optical clarity plus a concealed mount: cast PMMA transmits up to about 92% of visible light, so a clear shelf or standoff nearly disappears and the shoe reads as floating — the shoe is carried by the acrylic and its wall anchor, never by the illusion.
- Wall-system SKU density is a math problem, not a taste one: fix your shoe pitch (center-to-center spacing) and your row height to the tallest SKU you carry — boots need more vertical clearance than sneakers, heels need an angled seat — and the grid falls out of those two numbers.
- Angled risers need anti-slip seating or the shoe walks forward and drops; a shallow lip, a frosted/textured seat, or a discreet clear retainer holds an angled sneaker or heel in place without hiding the product.
- A mirror-finish back panel doubles the perceived depth and shows the sole; an edge-lit or LED-base option adds a glow line — both are add-ons to the mount you already chose, not a different display, and both raise per-unit cost and lead time.
On this page
- The short answer — the floating shoe effect is a hidden mount, not magic
- The three ways the floating effect is built
- Why acrylic makes it “float” — the optical part
- Wall-system SKU density — the two numbers that set the grid
- Anti-slip seating — the detail that keeps angled shoes on the wall
- The wall behind the display — where the load really goes
- Sizing for sneakers vs heels vs boots
- Mirror-finish and LED-base options
- The seasonal-swap workflow — designing for the store team
- MOQ, rollout, and getting the sample right
- How we sourced the specs in this guide
The short answer — the floating shoe effect is a hidden mount, not magic
A floating shoe display is a clear-acrylic shelf or riser that carries the shoe while its mount stays hidden, so the shoe appears to levitate on the wall. The effect comes from two things together: cast acrylic’s optical clarity, which makes the clear part nearly vanish, and a concealed anchor — a bonded cleat, a standoff barrel, or a tucked-away L-bracket — that actually bears the load.
I scope footwear and apparel wall programs for a living, and this is the first thing I explain to a buyer who saw a sneaker “floating” in a flagship and wants it for their own stores. The shoe is not defying gravity. It is sitting on clear cast PMMA, and that acrylic is fixed to the wall by hardware you were never meant to notice. Once you see it as clear part plus hidden mount, every downstream decision — load, SKU density, seasonal swaps, mirror or LED add-ons — gets easier to spec, because you are choosing a mounting method first and dressing it second.
The three ways the floating effect is built
There are three fabrication methods behind almost every floating acrylic shoe display, and they differ in load path, how far the shoe stands off the wall, and how quickly a store team can restock. Pick the method to the wall and the workflow, and the look follows — all three read as “floating” when the acrylic is clear cast PMMA.
The three methods, and what each one is for:
- Cantilevered clear shelf. A clear acrylic shelf bonded or slotted into a wall cleat, projecting straight out. The shoe sits flat on a nearly invisible ledge. Best for a clean, minimal sneaker wall where you want the shoe level and the shelf to disappear. The load runs through the bond line and the cleat, so shelf thickness and cantilever depth matter most here.
- Standoff-mounted riser. A clear acrylic riser (flat or angled) held off the wall by metal standoff barrels — the same hardware used for acrylic signage. The barrel spacer creates a visible float gap between panel and wall, which reads as deliberate and premium. Best when you want an obvious “held off the wall” look and easy front-access swaps. A single sign-style standoff is commonly rated to about 11 lbs (5 kg) per mounting point on a solid substrate,1 and shoes are light, so one or two barrels per position is usually plenty.
- Hidden L-bracket shelf. A clear or partly frosted shelf carried by a small L-bracket concealed under or behind it. Best for heavier or deeper shelves — display boxes, boots, multiple pairs — where you want more load capacity than a pure cantilever and don’t mind a mount you hide rather than one that floats visibly.
The distinction to carry into your RFQ: a cantilever hides the mount by making the shelf itself the visible element; a standoff turns the mount into a deliberate design gap; a hidden bracket trades a little of the pure-float illusion for more load and depth. None is “best” in the abstract — the right one depends on your wall, your shoe weight, and how often a store team touches the wall.
Side by side:
| Mounting method | Where the mount goes | Load path | Best for | Restock speed |
|---|---|---|---|---|
| Cantilevered clear shelf | Hidden inside the shelf — the ledge is the only visible element | Through the bond line into a wall cleat; shelf thickness and cantilever depth set the limit | A clean, minimal sneaker wall with the shoe sitting level | Fast — the shoe rests on top, nothing to release |
| Standoff-mounted riser | Visible on purpose: a barrel spacer holds the panel off the wall | Through the standoff barrels; a sign-style standoff is commonly rated to about 11 lbs (5 kg) per point on a solid substrate1 | A deliberate “held off the wall” look with front-access swaps | Fastest — lift the old shoe off, set the new one on |
| Hidden L-bracket shelf | Tucked behind and under the shelf | Through the concealed L-bracket into the wall; carries more than a pure cantilever | Heavier or deeper shelves — boots, display boxes, multiple pairs | Slower where a retainer or bracket has to be released |
Why acrylic makes it “float” — the optical part
The float illusion depends on clarity: clear cast acrylic (PMMA) transmits up to about 92% of visible light, so a clear shelf, riser, or standoff nearly disappears against the wall and the shoe is what your eye registers. That is the whole optical trick — the acrylic is present and load-bearing, but so transparent it drops out of the picture.
Two material choices protect that read. First, use cast PMMA, not extruded: cell-cast sheet is produced in batch molds with lower internal stress and better optical clarity,2 which matters because any haze or waviness in the sheet breaks the “invisible shelf” effect the moment a spotlight hits it. Second, the edge finish does a lot of the work — a diamond-polished, flame-clear edge reads as a crisp line of light, while a saw-cut or lightly sanded edge looks frosted and gives the clear part away. When a buyer tells me the floating look “didn’t come out” on a sample, I check the sheet grade and the edge first — it is almost always an extruded sheet or a dull edge, not the design. For a deeper look at how clarity is engineered into a clear panel, our clear vs frosted vs colored acrylic guide walks the finish choices. The point for a shoe wall: the mount does the holding, but the cast sheet and the polished edge do the floating.
Wall-system SKU density — the two numbers that set the grid
Wall-system SKU density comes down to two numbers: the horizontal pitch (center-to-center spacing per shoe) and the row height. Fix both to your actual size run and the grid is decided — wall width divided by pitch gives shoes per row, wall height divided by row height gives the number of rows.
Row height is where I see footwear buyers under-plan most often, because they size the wall to a sneaker and then try to merchandise boots on it. A high-top or a boot needs meaningfully more vertical clearance than a low sneaker, so a boot wall runs fewer rows than a sneaker wall of the same overall height. If your assortment mixes both, size the rows to the tallest SKU you will ever display in that position, or split the wall into a tall-SKU zone and a sneaker zone with different row pitches. Horizontal pitch is simpler: it is the shoe footprint plus the breathing room you want between pairs — tight pitch maximizes count and reads as a “grid of product,” generous pitch reads as premium and gives each pair its own moment. There is no single right answer; there is the answer that matches your merchandising density and your average SKU size. When we scope a footwear wall, we ask for your size run and the tallest and widest shoe in it, then design the pitch and row height from that. The mirror-finish sneaker pillar project applied that exercise to buyer-defined pillar geometry, finish, sampling, inspection, and packing.
For the modular building blocks a wall grid is assembled from, our acrylic shelves and acrylic risers product pages cover the standard shelf and riser formats that repeat across a wall.
Anti-slip seating — the detail that keeps angled shoes on the wall
An angled riser makes a shoe look better and slide worse — on a tilt, the shoe wants to walk forward and drop, so an angled acrylic shoe riser needs anti-slip seating to hold the product in place. Skip it and a glass-smooth polished seat becomes a slide; the shoe creeps toward the edge over a day of store vibration and foot traffic.
Three anti-slip details solve it, and each keeps the product fully visible:
- A shallow front lip. A small raised edge across the front of the seat that catches the sole or the shoe’s front edge. Simplest and cheapest; nearly invisible; works for sneakers and most flats.
- A frosted or lightly textured seat. Where the shoe sits, a matte or micro-textured surface raises friction versus a mirror-polished seat, so the shoe grips instead of glides. The rest of the riser can stay clear so only the seating patch is frosted.
- A discreet clear retainer. A thin clear bar or hook across the toe or over the instep, in the same clear acrylic so it reads as part of the piece rather than a strap. Best for steep angles, heels, or heavier shoes.
Match the detail to the shoe. A heel wants a heel-cup or a rear stop so it doesn’t tip backward and a toe retainer so it doesn’t slide forward; a sneaker is usually happy with a lip or a textured seat; a boot — tall and top-heavy — often needs both a seat detail and a discreet upright support. I always ask a buyer for the steepest angle they plan to use and the heaviest shoe, and the anti-slip method gets specified to that, not left to chance on the store floor.
The wall behind the display — where the load really goes
The floating shoe display carries the shoe, but the wall carries the display — so the wall type decides the mount as much as the shoe does. The acrylic and its bracket are only as strong as what they anchor into, which is why I put the wall type on the spec sheet before I finalize a mount.
Three substrates cover most stores, and each changes the anchor. Solid masonry or concrete takes almost any mount at full rated load — a standoff barrel or a bracket driven into concrete reaches its published rating, so a concrete wall gives you the most freedom on shelf depth and shoe weight. Drywall is the common case and the one that traps buyers: a fastener into bare drywall holds very little, so a drywall wall needs the load run into the studs behind it, or into rated drywall anchors, and it favors shallower shelves and lighter loads per point. Slatwall and gridwall — the merchandising panels many footwear stores already use — accept bracket-mounted acrylic shelves and risers directly, which is often the fastest path to a floating look in an existing fixture, since the panel is built to be loaded.
The practical rule I give buyers: name the wall type up front, and if it is drywall, expect the design to lean toward standoffs into studs, shallower cantilevers, or a bracket that spreads the load. A gorgeous deep cantilever that would float beautifully on concrete can sag or pull out of bare drywall by week three — not because the acrylic failed, but because the wall was never asked to hold it. Spec the mount to the wall you actually have, and the display stays put.
Sizing for sneakers vs heels vs boots
Different footwear needs different acrylic geometry, so a display sized for sneakers will fail a heel and a boot. Sneakers want a flat or gently angled seat; heels want an angled seat with a heel detail; boots want depth, height, and often an upright support — three distinct specs, not one shelf you stretch to fit.
The practical differences, position by position:
- Sneakers and low shoes. Flat or lightly angled seat, a lip or textured patch for grip, and a shelf depth that fits the shoe with a little margin. The most forgiving SKU — most floating-wall photography is sneakers for exactly this reason.
- Heels and dress shoes. An angled seat shows the profile and the sole, but a heel is unstable, so the seat needs a heel cup, a rear stop, or a shaped cradle so the shoe doesn’t tip. A polished angled seat without a heel detail is the single most common reason a heel display looks great in the render and slides on the floor.
- Boots. The demanding SKU: tall, deep, and top-heavy. Boots need more vertical clearance (which cuts your row count), a deeper seat or shelf, and frequently a discreet clear upright or backstay so the boot stands rather than slumps. Plan a boot wall around the boot from the start; don’t retrofit a sneaker wall.
In my experience, “one universal shoe display” rarely survives contact with a real assortment. If a line mixes footwear types, the right move is a small family of acrylic units — a sneaker shelf, a heel riser, a boot cradle — that share a visual language and a mount so the wall looks like one system while each position fits its shoe.
Mirror-finish and LED-base options
A mirror-finish back panel and an LED or edge-lit base are the two most-requested upgrades on a floating shoe wall, and both are add-ons to the mount you already chose — not a different display. A mirror back doubles perceived depth and reveals the sole; an LED base or edge-lit riser adds a glow line that lifts the shoe off the wall visually. Each raises per-unit cost and lead time.
Mirror-finish back panels or bases turn a single wall of shoes into a wall that looks twice as deep, and they let a customer see the sole — a real selling point for sneakers where the outsole is part of the design. Acrylic mirror is lighter and more shatter-resistant than glass mirror, which matters on a wall unit. The tradeoff is that a mirror shows everything: fingerprints, dust, and any misalignment in the grid, so a mirror wall raises the store’s housekeeping bar. The mirror-finish shoe display project covers buyer-defined heights, material and finish selection, shoe-fit sampling, inspection, and packing.
LED and edge-lit options add light. An edge-lit clear riser glows along its polished edges when LEDs are hidden in the base, and the effect leans on the same optical clarity as the float itself — cast PMMA piping light to its edges. Because this is its own spec discipline (panel thickness, edge polish, LED placement, and driver certification all matter), ask about it through our custom fabrication page; for a floating shoe wall, treat the LED base as a cost-and-lead-time add-on layered onto your chosen mount. Our acrylic display pedestals show the non-illuminated riser version of the same idea. Neither upgrade changes how the shoe is held — the standoff, cantilever, or bracket still does that — so choose the mount first and the finish second.
The seasonal-swap workflow — designing for the store team
A footwear wall is restocked constantly, so the floating shoe display has to be designed for how fast a store associate can swap a shoe or a whole season — not just how it looks on opening day. The mounting method you pick largely decides that swap speed, which is why swap workflow belongs in the spec, not as an afterthought.
Standoff-mounted risers and shelves that load from the front are the fastest to restock: an associate lifts the old shoe off and sets the new one on, no tools, no disassembly. Cantilevered shelves are similarly quick if the shoe simply rests on top. The slower designs are ones with retainers that clip or brackets that have to be released — great for security or steep angles, but every extra motion multiplies across a wall of positions and a store team on the clock. For a seasonal reset, the question is whether your team swaps shoes on a fixed grid (fast — the acrylic stays, only product changes) or reconfigures the grid itself (slower — set your wall up as a modular system with repeatable shelf and riser units so a reset is rearranging parts, not rebuilding). When I scope a rollout, I ask how often the wall turns over and who does it; a wall that a store associate resets weekly is a different design from a merchandiser-installed flagship fixture, even if they look identical in a photo.
MOQ, rollout, and getting the sample right
A custom acrylic shoe display program runs on a 100-piece MOQ with samples in 3–5 days and production in 15–20 days once the design and material are locked — and the single highest-leverage step in a multi-store rollout is approving one physical sample before bulk. The float look, the seat fit, and the anti-slip feel are all things you confirm by hand, not from a render.
For a footwear rollout across stores, the sample stage earns its keep more than on almost any other product, because three things can only be judged in person: whether the clear shelf truly “disappears” under your store’s lighting, whether the anti-slip seat actually holds your specific shoe on your specific angle, and whether the mount installs cleanly on your wall type. We build the exact shelf, riser, or wall unit — mount, anti-slip detail, and any mirror or LED add-on included — and once it is approved, we produce the run under our ISO 9001 system with piece-by-piece inspection before ship. To see how a footwear-specific program comes together end to end, the applications page for shoe displays collects the display types and the rollout considerations in one place, and the acrylic display stands hub shows the shelf and riser formats the program draws from. When you’re ready to scope yours, send us the wall dimensions, your size run, and the shoe types and we’ll come back with the mount, the SKU-density grid, and the anti-slip plan sized to your assortment.
How we sourced the specs in this guide
The two hard numbers in this guide come from third-party references, not from internal Wetop testing. The floating effect’s reliance on optical clarity is anchored on published PMMA light-transmittance data — clear acrylic transmitting up to about 92% of visible light3 — and the reason to use cast rather than extruded sheet on the lower internal stress and better optical clarity of cell-cast PMMA.2 The per-mount load reference — roughly 11 lbs (5 kg) per sign-style standoff on a solid substrate — is a published hardware rating,1 cited to make the point that the wall, the shelf thickness, and the cantilever depth are the real limits, not the acrylic. Everything about the mounting methods, SKU-density math, anti-slip seating, and per-footwear sizing is general fabrication and merchandising practice, and the cost statements are deliberately factor-level (which upgrades add cost and lead time) rather than fabricated figures, because a real acrylic shoe display is quoted per project against size, thickness, finish, quantity, and terms.
What we bring is the buyer-facing pattern of which mount, grid, and anti-slip detail fit which footwear program, scoped across 600+ retail rollouts. We manufacture custom acrylic shoe displays under our ISO 9001 system with a 100-piece MOQ, samples in 3–5 days, and production in 15–20 days, and we inspect every piece before it ships. We review this guide against its cited sources periodically and update it when a referenced figure changes.
Footnotes
-
Clear Acrylic Display Sign Standoff 19mm x 25mm — Picture Hang Solutions — hardware product page listing a per-standoff rating of up to 11 lbs (5 kg) per mounting point on a solid substrate, cited for the standoff-mount load reference on a floating shoe riser. ↩ ↩2 ↩3
-
PMMA (Acrylic) material properties — MakeItFrom — materials database entry for cast PMMA, cited for cast acrylic’s optical clarity and low internal stress versus extruded sheet, which is why the floating effect requires cast rather than extruded acrylic. ↩ ↩2
-
Light transmission — PLEXIGLAS® (Röhm) — manufacturer product-information page stating clear-transparent PLEXIGLAS (PMMA) achieves up to 92 percent light transmittance in the visible range, cited for why a clear acrylic shelf or standoff nearly disappears and produces the floating read. ↩
Frequently Asked Questions
How is the floating effect on an acrylic shoe display actually made?
By carrying the shoe on a clear cast-acrylic element whose mount is hidden. Three methods do it: a cantilevered clear shelf bonded to a wall cleat, a standoff-mounted clear riser held off the wall by a barrel spacer, or a clear shelf on a concealed L-bracket. Because cast PMMA transmits about 92% of visible light, the clear part nearly disappears and the shoe reads as floating — but the load always runs through the acrylic into a real wall anchor.
How much weight can a floating acrylic shoe shelf hold?
It depends on the mount and the wall, not the acrylic alone. A single sign-style acrylic standoff is commonly rated to about 11 lbs (5 kg) per mounting point on a solid substrate, and shoes are light, so one or two anchors per position is usually ample. The real limits are the wall (drywall needs proper anchors), the shelf thickness, and the cantilever depth — a deeper shelf puts more leverage on the same anchor. Tell your fabricator the shoe weight, shelf depth, and wall type so the mount is sized to all three.
How do I stop shoes from sliding off an angled acrylic riser?
Add anti-slip seating. On an angled riser the shoe wants to walk forward and drop, so the seat needs one of three things: a shallow front lip that catches the sole, a frosted or lightly textured seating surface that raises friction versus a glass-smooth polish, or a discreet clear retainer bar across the toe. All three hold sneakers, heels, or boots in place while keeping the product fully visible. Match the method to the shoe — a heel wants a heel-cup detail, a sneaker wants a lip or textured seat.
How many shoes fit on an acrylic shoe wall system?
Work it from two numbers: horizontal pitch (center-to-center spacing per shoe) and row height. Set row height to the tallest SKU you display — boots need the most vertical clearance, sneakers less, so a boot wall runs fewer rows than a sneaker wall of the same height. Then divide the wall width by your pitch for shoes per row. Fixing pitch and row height to your actual size run is how the SKU-density grid gets designed, rather than guessed.
What is the MOQ and lead time for a custom acrylic shoe display rollout?
We produce custom acrylic shoe displays at a 100-piece MOQ, with samples in 3–5 days and production in 15–20 days once the design and material are locked. For a multi-store footwear rollout, we recommend approving one physical sample of the exact shelf, riser, or wall unit — including the mount and any anti-slip detail — before bulk, because the seat fit and the floating look are things you confirm by hand, not from a render.
Explore Custom Acrylic Products
Browse product categories to compare formats, materials, and customization options before choosing the closest fit for your project.