





Magnetic Acrylic Display Mounting & Anti-Theft Guide
Two questions decide most display-hardware RFQs: how does it stay on the wall, and how do you keep the product from walking out the door.
Need this made?CNC acrylic machining →
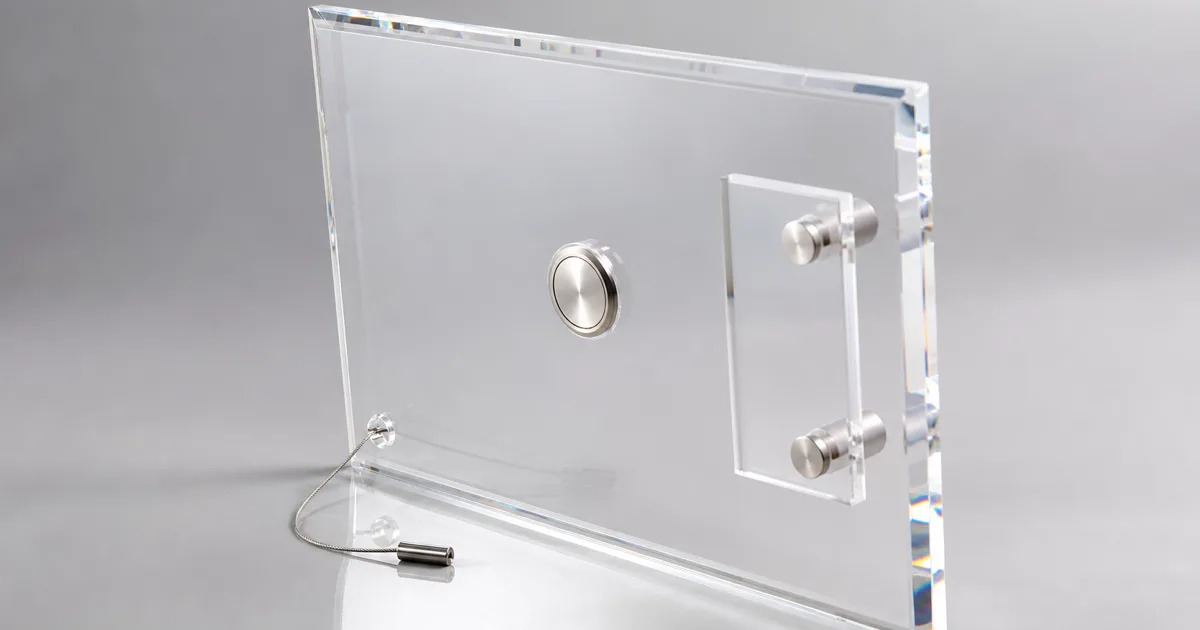
Buyers usually name one and forget the other.
Key Takeaways
- Yes — the magnet footprint on the back of an acrylic display can usually be made smaller by moving up a magnet grade: a higher-grade neodymium disc (say N52 vs N42) delivers the same pull from a smaller diameter, so you shrink the visible pocket without losing hold.
- Magnetic mounting comes in three footprints: embedded neodymium (flush, cleanest look, needs a milled pocket), surface-bonded magnet (fastest, adhesive shows a bond line), and magnetic tape (lowest hold, only for lightweight signage) — pull force and footprint trade against each other.
- Magnets are for repositionable, swappable displays; standoffs, hidden brackets, and VHB adhesive are the right call for permanent installs — a magnet that has to hold a heavy panel through daily handling is often the wrong tool.
- Anti-theft is a separate layer from mounting: tethers and recoilers keep a product attached while shoppers handle it, locking bases and lockable enclosures physically block removal, and alarm/EAS hardware deters — these are sourced retail-fixture components, not the acrylic itself.
- Acrylic secures the presentation, not the product — a clear case makes high-value merchandise visible and tamper-evident, but the actual theft resistance comes from the lock, tether, or enclosure hardware you spec into it.
On this page
- The short answer — mounting and security are two different questions
- Magnetic mounting: three methods, three footprints
- Can the magnet footprint be made smaller?
- When NOT to use magnets: standoffs, brackets, and adhesive
- Anti-theft layer one: tethers and recoilers
- Anti-theft layer two: locking bases and pegs
- Anti-theft layer three: alarm pucks and EAS tags
- Anti-theft layer four: lockable acrylic enclosures
- Combining layers — when one isn’t enough
- The decision matrix — mount and security by use-case
- How we sourced the facts in this guide
The short answer — mounting and security are two different questions
A magnetic acrylic display attaches with magnets so it can be repositioned or swapped without tools, while an anti-theft acrylic display adds security hardware — a lock, tether, or enclosure — so high-value product can’t simply be lifted and pocketed. They are separate decisions, and most display RFQs I handle name one and leave the other blank. Nail both before you quote.
I get versions of this question every week from retail and brand buyers: “How does it stick to the wall?” and, much less often but more urgently, “How do we stop people walking off with the product?” The honest framing is that acrylic is the transparent shell around your merchandise — how it mounts is a hardware choice, and how it secures is a different hardware choice layered on top. This guide walks both: the three magnetic mounting methods and their footprint-versus-hold tradeoffs (including the one buyers ask me most — whether the magnet on the back can be made smaller), the non-magnetic alternatives for permanent installs, and the four anti-theft layers for high-value retail. Spec the right pair and the display does its job on the shelf.
Magnetic mounting: three methods, three footprints
Magnetic mounting for acrylic comes in three forms — embedded neodymium magnets, surface-bonded magnets, and flexible magnetic tape — and they trade footprint against hold force in a predictable way. Embedded gives the most pull per visible area and the cleanest look; surface-mount is fastest to build; magnetic tape holds the least and suits only lightweight signage. Pick the method to the weight and the look you need.
Here’s how each behaves in practice. Embedded neodymium sits flush in a pocket milled into the back of the acrylic, so the only thing on the rear face is the magnet face itself — no protruding hardware, no bond line to see through the panel. It carries the strongest hold and the most durable one, because the magnet is captured in the material rather than relying on an adhesive bond that can creep. The cost is a machining step: someone has to pocket-mill the recess and bond the magnet in. Surface-mount magnets are bonded straight onto the rear face with adhesive — no milling, quick to build, and easy to retrofit onto an existing panel — but the magnet and its bond line are visible from the front on a clear panel, and adhesive bonds can loosen over time under load. Magnetic tape is a flexible magnetic strip; it’s the cheapest and thinnest, but its pull force is a fraction of a solid neodymium disc, so it belongs on lightweight signage, paper-thin panels, or point-of-sale graphics — never on a loaded display that has to hold weight through daily handling.
Can the magnet footprint be made smaller?
Yes, in most cases the magnet footprint on the back of an acrylic display can be made smaller — the usual lever is magnet grade, not magnet count. Pull force depends on the magnet’s size, its grade, and the air gap to the target, so a higher-grade neodymium disc delivers the same hold from a smaller diameter. Tell your fabricator the maximum footprint you’ll accept and the weight it must hold, and the magnet gets sized to that box.
This is the single most common hardware question I field on magnetic displays, and it usually comes from a designer who’s seen a prototype and thinks the magnet pockets look too big on the back of a clear panel. The physics gives you room to shrink them. Neodymium magnets are graded — N35, N42, N52 and so on — and a higher grade carries a higher residual flux density: an N42 disc sits around 13,200 Gauss while an N52 can reach roughly 14,800 Gauss.1 Because the stronger material packs more magnetic energy into the same volume, you can hold the same weight with a physically smaller N52 disc than an N42 one — a documented way to trade grade for size.2 So the practical answer to “can it be smaller” is: step up a grade and the diameter comes down for the same pull.
Two other levers help. Embedding the magnet flush means the pocket is the only footprint — there’s no surface-mounted magnet or bond line spreading across the back — so the same magnet reads smaller. And substrate thickness matters: pull force falls off steeply with the air gap, so a magnet buried under thick acrylic has to be oversized to compensate. Thin the material above the magnet face, or embed from the back so it sits closer to the mating surface, and a smaller magnet reaches the target with hold to spare.1 The one honest caveat: there’s a floor. Shrink too far and you lose the hold the display actually needs, and the panel drifts or drops. That’s why I always ask two numbers up front — the footprint you can live with and the weight it must carry — so we size to the smallest magnet that clears both, not the biggest one that’s easy to spec. The full grade-versus-thickness math, with pull-force figures across 3–12 mm cast acrylic, lives in our acrylic magnet mount spec chart.
When NOT to use magnets: standoffs, brackets, and adhesive
Magnets are the right mount for displays that get repositioned, swapped, or removed for cleaning — but for permanent installs and heavier panels, standoffs, hidden brackets, or structural adhesive carry the load more reliably. A magnet holds by an air gap to a steel target, and that gap only ever weakens as paint, labels, or substrate thickness grow; a mechanical mount doesn’t drift.
The alternatives each suit a different install. Standoffs are the barrel-shaped metal spacers that hold an acrylic panel off the wall with a polished, architectural look — they carry real weight, they’re permanent, and they read as premium, which is why signage and menu boards use them. Hidden brackets (a French cleat, a Z-bar, or a slot-and-tab bracket bonded to the back) let a panel hang cleanly with no visible hardware from the front and support more weight than a magnet — good for larger wall displays that stay put. VHB structural adhesive — a high-bond double-sided tape — bonds a lightweight panel directly to a smooth surface with no drilling; it’s fast and invisible, but it’s effectively permanent and only as strong as the surface it’s stuck to. The decision I walk buyers through is simple: if the display needs to move — modular fixture, seasonal graphic, something restocked often — magnets win on convenience. If it needs to stay and it’s heavy, a bracket or standoff wins on load and longevity. A magnet asked to hold a heavy panel through daily handling is usually the wrong tool for the job. Our acrylic display manufacturer page shows the range where each mount fits.
Anti-theft layer one: tethers and recoilers
A tether or recoiler is a cable that keeps a product physically attached to the display while a shopper still lifts and inspects it — the lightest anti-theft layer, and the right one when touch-and-try matters. A recoiler adds a retractable spring so the cable stays tidy and pulls the product back to the fixture when released. It deters walk-off theft without locking the product away.
This is the layer you see on phones, tools, and demo units — anything a buyer needs to hold before they buy. Retractable security tethers attach to a display and let customers interact with tethered merchandise while it stays anchored to the fixture, and they come in a range of lengths, colors, and configurations, some with built-in alarms.3 On a custom acrylic display, the tether anchors to a discreet point on the base or panel, and the recoiler body tucks behind or under the acrylic so the clean look survives.
The tradeoff versus a lock is access: a tether keeps the product reachable — which is the point for a try-me display — but a determined thief with a cutter can defeat a bare cable, so tethers pair best with an alarm or an attentive floor. When we spec a tethered display, the two details we settle first are cable length (long enough to lift and turn the product comfortably, short enough that it can’t be carried out of sight) and the anchor point (a metal insert bonded into the acrylic, not a raw hole, so repeated pulling doesn’t stress-crack the panel). When shoppers must handle the product, this is the layer to reach for; when they only need to see it, step up to a lock or an enclosure. The phone display stand project covers the tether, cable path, anchor, test method, device fit, and packing as buyer-approved inputs.
Anti-theft layer two: locking bases and pegs
A locking base or locking peg holds the product in place until a staff member releases it with a key — a firmer layer than a tether, because the shopper can’t remove the item at all without help. It suits mid-value goods where you’ll trade a little browsing friction for real removal resistance, and it keeps the product on open display rather than behind glass.
The familiar version is the anti-theft peg hook: a locking hook on a slatwall or pegboard that requires its specified release key.4 An acrylic base or holder can use keyed or magnet-release hardware, but the buyer must approve the mechanism, cutout, access procedure, and local requirements. Fit and operation should be checked on a paid sample before production. The pharmacy OTC locking acrylic display project shows that approval process; it does not prove a loss-prevention outcome.
Anti-theft layer three: alarm pucks and EAS tags
Alarm pucks and EAS (electronic article surveillance) tags don’t physically restrain the product — they trigger an audible alarm or store-exit sensor when the item is removed or carried past a gate. They’re the deterrent layer: cheap to fit, they scale across many units, and they turn a quiet grab into a loud one. Use them where the value-per-unit doesn’t justify a lock but shrink is still a problem.
In practice these ride alongside acrylic rather than inside it. An alarm puck adheres to the product or the display and sirens if the connection is broken; an EAS tag pairs with pedestals at the door. Retail loss-prevention programs layer these sensor-based systems with physical fixtures precisely because deterrence and restraint solve different halves of the problem — a determined thief is slowed by a lock, an opportunist is scared off by an alarm.5 On a custom display we leave a clean spot for the puck or route the sensor wire out of sight, so the alarm hardware doesn’t fight the clarity of the acrylic. The limit is honest: an alarm deters and alerts, it doesn’t stop — so for genuinely high-value merchandise, pair it with a lock or an enclosure rather than relying on the noise alone.
Anti-theft layer four: lockable acrylic enclosures
A lockable acrylic enclosure is the heaviest layer — a clear case with a keyed or cam lock that physically blocks access to the product inside. It’s the right — and often only — choice for high-value merchandise where the item must be seen but not touched until a staff member opens the case. The clarity sells the product; the lock secures it.
This is where acrylic earns its place in loss prevention: a transparent enclosure keeps expensive goods fully visible and shoppable-by-eye while a lock keeps hands out. The mechanism is usually a keyed cam lock set into the case or a hasp that takes a padlock, and the same fitting discipline applies — the lock cutout has to be precise so the case stays secure and the panel doesn’t crack.
This layer may suit watches, electronics, collectibles, or controlled-access goods when the buyer accepts the added service friction. A clear enclosure separates the shopper from the goods, but neither acrylic nor a sourced lock establishes a security rating unless the buyer specifies and approves the required evidence. Wall thickness, lock cutout, point loads, and service access belong in the drawing and sample review. For mechanism options and cost drivers, see our lockable display case page. The university athletics trophy display project covers a non-electrical build with buyer-controlled hardware, keying, material, and installation requirements.
Combining layers — when one isn’t enough
The four anti-theft layers aren’t mutually exclusive, and high-value floors routinely stack two or three. A tether keeps a product handled but attached; an alarm makes removal loud; a lock or enclosure stops removal outright. Stacking them covers both the opportunist and the determined thief, because each layer solves a different failure mode.
The pairing I see work best in practice depends on how much shoppers need to touch the product. A try-me phone that’s also high-theft gets a tether and an alarm puck — the tether lets the shopper handle it, the alarm covers the cut-cable case. A locked cosmetics shelf gets a locking base and an EAS tag on the packaging, so even a product that somehow leaves the base still trips the door. And a premium watch or graded-card display usually goes straight to a lockable enclosure, sometimes with an EAS tag inside as a backstop. What we counsel against is over-securing a low-value item — a $5 accessory doesn’t need an enclosure, and the friction of a lock costs you sales you’d never lose to shrink. Match the stack to the product’s value and the store’s tolerance for friction, and don’t pay for a layer the merchandise doesn’t warrant. When a buyer isn’t sure how far to go, we walk the product value against the store’s shrink history and recommend the lightest stack that actually holds.
The decision matrix — mount and security by use-case
The right combination of mount and security follows from two things: whether the display needs to move, and how much the product is worth stealing. The matrix below pairs each common use-case with a mounting method and a security layer, so you can match your project to a row and see the tradeoff before you send an RFQ.
| Use-case | Mount method | Security layer | Why this pairing |
|---|---|---|---|
| Modular retail fixture, swapped often | Embedded magnets | Tether/recoiler if handled | Repositionable mount; light security keeps product reachable |
| Permanent wall display, mid-weight | Hidden bracket or standoff | Alarm/EAS tag | Load-bearing mount that stays put; deterrent scales cheaply |
| Phone / tool try-me display | Standoff or bracket base | Tether/recoiler | Shopper must handle; tether keeps it attached while browsing |
| Cosmetics / accessories open shelf | Surface-mount or base | Locking base or peg | Seen and reached, but lock blocks lift-off of high-shrink items |
| Watches, premium electronics | Bracket or bonded base | Lockable enclosure | Seen not touched; lock is the actual theft resistance |
| Graded collectibles, regulated goods | Bonded base in enclosure | Lockable enclosure + EAS | Full enclosure for value; alarm as a second layer |
| Lightweight POS signage | Magnetic tape or standoff | None | No product to steal; footprint and cost drive the mount |
The pattern to read: mounting is chosen by movement and weight, security by value and touch. Displays that move want magnets; displays that stay and carry weight want brackets. Products that must be handled want tethers; products that only need to be seen want locks. When a use-case pulls two ways — say a try-me phone that’s also high-theft — the security requirement you can’t drop wins, so it goes to the heavier layer. Once you’ve placed your project on a row, send us the display brief with the mount and security named and we’ll pressure-test the pairing against the product weight and the store environment before quoting.
How we sourced the facts in this guide
The engineering claims here come from third-party magnet and retail-fixture references, not from internal Wetop testing. The neodymium grade figures — that N42 sits near 13,200 Gauss and N52 near 14,800, and that a higher grade lets a smaller magnet hold the same weight — come from published magnet specifications;1 the grade-for-size tradeoff from magnet-grade guidance;2 the tether and recoiler behavior from retail security-tether product references;3 the anti-theft peg-hook mechanism from a retail-fixture supplier;4 and the layered deterrence-plus-restraint approach from a retail loss-prevention reference.5 The anti-theft components themselves — tethers, recoilers, locks, alarm pucks, EAS tags — are sourced retail-fixture hardware we fit to the acrylic, not parts we manufacture; we build the clear display and integrate the security component you spec.
What we bring is the buyer-facing pattern of which mount and which security layer fit which job, learned across 2,000+ custom projects for buyers in 25+ countries since 2008. We manufacture custom acrylic displays under our ISO 9001 system with a 100-piece MOQ, samples in 3–5 days, and production in 15–20 days, and we fit and function-check any lock or magnet on a sample before the order runs. For the display range and a hardware recommendation on your project, start at our acrylic display manufacturer page or, for handled electronics, our electronics, phone & watch displays application page. We review this guide against its cited sources periodically and update it when a referenced figure changes.
Footnotes
-
Neodymium Magnet Specifications — K&J Magnetics — supplier specification table showing residual flux density (Br) by grade, cited for the N42 (~13,200 Gauss) versus N52 (~14,800 Gauss) figures and the air-gap-versus-pull relationship behind footprint sizing. ↩ ↩2 ↩3
-
Magnet Grades — K&J Magnetics Blog — explains that pull force depends on size, shape, and magnetic circuit rather than grade alone, and that a higher grade lets a physically smaller magnet match a lower-grade one’s hold, cited for the “can the footprint be smaller” answer. ↩ ↩2
-
CIS Security Solutions: From Receipts to Recoiling Tethers — LP Magazine — loss-prevention trade article describing recoiling security tethers that let shoppers handle tethered merchandise while it stays anchored, cited for the tether/recoiler anti-theft layer. ↩ ↩2
-
Anti-Theft Peg Hook-Lock — Clip Strip Corp — retail-fixture supplier page for a locking peg hook released only with a magnet key held by staff, cited for the locking-base/peg anti-theft layer. ↩ ↩2
-
Preventing Retail Theft Through Retail Display Security — Taylor — retail loss-prevention reference on layering physical fixtures with sensor-based systems, cited for the deterrence-versus-restraint framing across the anti-theft layers. ↩ ↩2
Frequently Asked Questions
Can the magnet footprint on the back of an acrylic display be made smaller?
Usually yes. Pull force depends on magnet size, grade, and the air gap — not grade alone — so the common way to shrink the footprint is to move up a grade. A higher-grade neodymium disc (for example N52 instead of N42) carries a higher residual flux density, so a smaller-diameter magnet delivers the same hold. You can also embed the magnet flush so the pocket is the only thing on the back, or reduce substrate thickness above the magnet face so a smaller magnet still reaches the target. Tell your fabricator the maximum footprint you'll accept and the weight it must hold, and the magnet gets sized to fit that box rather than defaulted oversized.
What's the difference between embedded, surface-mount, and magnetic-tape magnets on acrylic?
Embedded magnets sit flush in a milled pocket in the acrylic — the cleanest look and the strongest, most durable hold, but it adds a machining step. Surface-mount magnets are bonded to the back face with adhesive — fastest to make and easy to retrofit, but the magnet and bond line are visible and the adhesive can creep over time. Magnetic tape (flexible magnetic strip) has the lowest hold force and suits only lightweight signage or paper-thin panels, not a loaded display. Footprint and pull trade off: embedded gives the most hold per visible area, tape the least.
Should I use magnets or standoffs to mount an acrylic display?
Use magnets when the display needs to be repositionable, swapped, or removed for cleaning and restocking — magnetic mounting shines on modular retail fixtures and seasonal graphics. Use standoffs, hidden brackets, or VHB structural adhesive for permanent installs and heavier panels, because those carry more load without relying on a magnet-to-steel air gap that weakens as substrate or paint thickness grows. A heavy panel that gets handled daily is often better on a bracket than on magnets.
How does acrylic help prevent retail theft of high-value products?
Acrylic secures the presentation, not the product itself. A clear case or enclosure makes merchandise visible and tamper-evident and physically separates shoppers from the goods, but the theft resistance comes from the security hardware you build in — a keyed lock, a tether or recoiler that keeps a handled product attached, or an alarm/EAS component. Acrylic is the transparent shell; the lock, tether, or enclosure does the securing. For genuinely high-value items, spec a lockable enclosure or a locking base rather than relying on the case being clear.
What anti-theft options work with a custom acrylic display?
Four common layers, from light to heavy: (1) tethers and recoilers — a retractable cable that lets a shopper lift and inspect a phone or tool while it stays attached; (2) locking bases and pegs — a base or peg-hook that needs a staff key to release the product; (3) alarm pucks and EAS tags — sensors that trigger an alarm on removal; and (4) lockable enclosures — a clear acrylic case with a keyed or cam lock that physically blocks access. These are sourced retail-fixture components fitted to the acrylic, chosen to the product's value and how much shoppers need to touch it.
Explore Custom Acrylic Products
Browse product categories to compare formats, materials, and customization options before choosing the closest fit for your project.