





Acrylic Tray Printing — Bottom-Print Quality Spec Guide
One bubble under the ink fails the whole tray. Here is how a second-surface print earns 'watertight, no bubbles, A+' — and how to spec it.
Need this made?Custom acrylic trays →
Key Takeaways
- Second-surface printing puts the artwork under the acrylic, so the tray itself is the protective layer — the serving surface is bare PMMA, not ink.
- Three defects decide pass or fail at our inspection table: bubbles, pinholes, and misregistered color layers — all three are visible in good supplier photos.
- A watertight bottom-printed acrylic tray is a sealing spec, not a default — ask the supplier to state how the ink stack is sealed against wash water.
- A correct-size bottom-printed tray sample in 3-5 days is the cheapest insurance a market deadline can buy; production takes 15-20 days after approval.
- Direct print, bottom insert, and etched logo fail differently — choose by failure mode and artwork type, not by price alone.
On this page
- What bottom printing actually is — second-surface anatomy
- The three defects that fail our QC — and how to spot them in photos
- “Watertight” — how the print layer gets sealed
- Adhesion and durability — surviving washing, alcohol wipes, and daily service
- Photo-grade artwork — what “A+ print quality” requires from your file
- The sample gate — correct-size samples, vector checks, and market deadlines
- Direct print vs bottom insert vs etched logo — the decision table
- The pre-ship QC checklist we run on every printed-tray order
What bottom printing actually is — second-surface anatomy
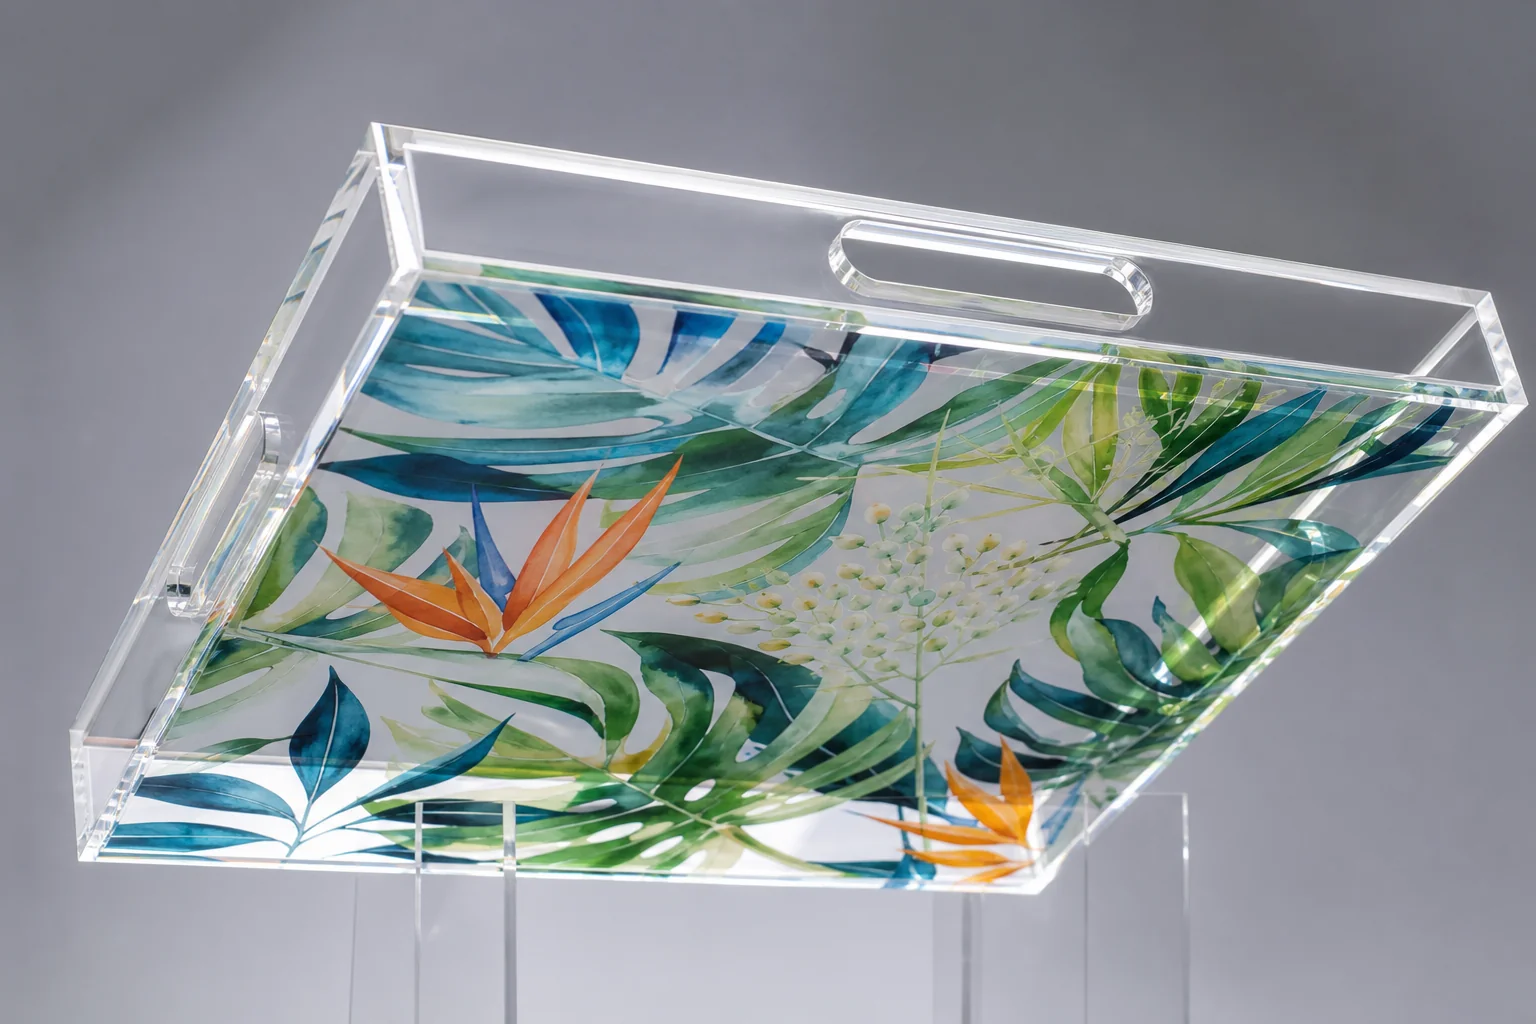
Bottom printing — second-surface printing, in trade language — puts the artwork on the underside of the tray base, reversed, so it is viewed through the acrylic from above. In acrylic tray printing done this way, the acrylic itself becomes the protective layer: the serving surface is bare, glossy PMMA, and the ink never touches food, glassware, or a cleaning cloth. That is why a well-made bottom print looks wet-glossy and deep, and why buyers describing what they want keep landing on the same three words: watertight, no bubbles, A+.
It is also why the inspection standard is severe. The defect that stops my hand at the inspection table is usually smaller than a sesame seed: a single bubble sitting under the artwork, caught only when the tray tilts through the light. One bubble fails the whole piece, because there is no touching up a print that lives underneath the material.
The stack has four working parts, top to bottom: the clear cast acrylic sheet, the reverse-printed artwork laid down by UV-cured inkjet (the same core process broken down in our UV printing on acrylic guide), an opaque white backing ink that makes the colors read vivid instead of ghostly, and a sealing layer that closes the whole stack off. Every quality question a buyer can ask about acrylic tray printing (bubbles, waterproofing, color, durability) maps to one of those four layers, and the rest of this guide walks them in order.
The three defects that fail our QC — and how to spot them in photos
Three defects account for nearly every bottom-print rejection at our inspection stations: bubbles trapped between ink and acrylic, pinholes in the white backing layer, and misregistered color layers. All three are permanent (sealed inside the stack), and all three are visible in a decent photograph if the supplier knows how to take one.
Bubbles are air pockets between the acrylic and the first ink layer. Tilted through raking light, they read as bright dots or lens-like circles inside the print. One is enough: a bubble breaks the optical bond that makes a second-surface print look deep, and on a serving tray it sits exactly where the eye lands.
Pinholes are gaps in the white backing ink. Held up against a light source, they show as tiny bright pricks through an otherwise solid print. On a shelf they are subtler (small dull spots where the artwork loses opacity), but a backlight test finds every one in seconds.
Misregistration is color layers landing out of alignment, and it shows as fringing: a thin halo of one color escaping an edge, text with a colored shadow, fine lines gone soft. Check the smallest text in your artwork first; registration errors hide in broad color fields and announce themselves in details.
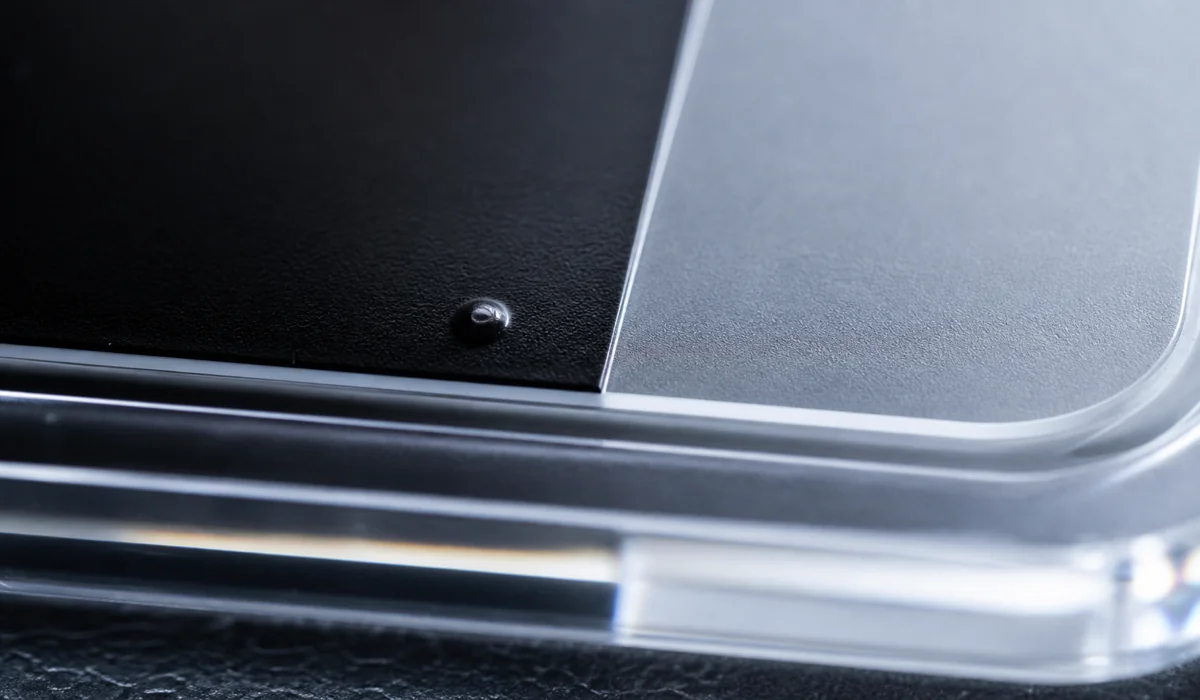
Use this as a remote-QC protocol before bulk approval. Ask the supplier for three photos of the actual sample: one at 45 degrees in raking light (bubbles), one backlit from below (pinholes), one straight-down macro of the finest text (registration). Twelve-plus years on the print lines, and I have never seen a defective panel survive all three photos. A supplier who will not send them has told you something useful too.
“Watertight” — how the print layer gets sealed
Watertight is a sealing spec, not an automatic property of bottom printing. Ink cured onto acrylic is durable, but a tray lives a wet life (drink spills, wipe-downs, wash water), and moisture that creeps into an unsealed ink edge lifts the print from its border inward. The seal layer exists to close that door.
The buyers who taught us to lead with this were the premium ones. The phrase that recurs in serious tray inquiries, the ones with high-end clientele behind them, is some variation of “it must be watertight, no bubbles, A+ print quality.” That is a buyer who has seen the failure: a beautiful tray whose artwork clouded or lifted at the edges after a season of service. The failure point is almost never the middle of the print; it is the perimeter, where the ink stack terminates and water finds the seam.
So make the seal an explicit line in the spec. Our bottom-printed trays get the ink stack sealed behind a protective backing, and finished trays must survive wet cleaning without edge lift, clouding, or color bleed before they pass inspection. The material side is already handled: cast acrylic itself is approved for food-contact articles under FDA 21 CFR 177.10101, and the second-surface build keeps ink off the food side entirely. The seal is what extends that integrity to the underside. Ask for it in writing; a supplier who seals properly will say so without hesitation.
Adhesion and durability — surviving washing, alcohol wipes, and daily service
A bottom print that passes visual QC still has to stay bonded through months of handling, and adhesion is the property that decides it. The industry’s reference method is the cross-cut test (scoring a lattice through the ink and checking how much detaches per ASTM D33592), and it is the right vocabulary to use when a supplier makes durability claims.
In practice, we treat durability as a wash-and-wipe question, because that is how trays actually fail. Our print QC includes in-house wet-cleaning and wipe-down checks on finished bottom prints — water, then the harsher case of alcohol-based cleaners, which soften a poorly cured ink long before water does. I keep the protocol directional here rather than quoting internal numbers, but the pass standard is plain: no softening, no color transfer to the cloth, no edge lift. A tray that marks a white cloth during an alcohol wipe fails, full stop.
Two things a buyer can do with this section. First, ask the durability question in cleaning terms — “does the print survive alcohol wipes?” gets a more honest answer than “is the print durable?” Second, remember the second-surface geometry is doing most of the protective work for the visible side: the artwork sits under millimeters of PMMA, so scratches from daily service land on polished acrylic (which can be buffed) rather than on ink (which cannot). Durability engineering concentrates on the underside, which is exactly where the seal layer at the print perimeter takes over.
Photo-grade artwork — what “A+ print quality” requires from your file
An A+ bottom print is decided in the artwork file before any ink is jetted. The formula is short: raster images at high resolution sized to the final print dimensions, vector files for logos and text, and realistic color expectations set by a physical proof rather than a screen.
Resolution is the usual casualty. A photo that fills a phone screen can still be a small file, and enlarging it to an 8x10 tray base is what produces the muddy, soft prints buyers describe as “not A+.” The fix costs nothing: supply your image at the size it will print, and if the source is small, say so early; we would rather flag a marginal file at quote stage than argue about softness at sample stage. The two most common requests here, “photo on bottom” family gifts and branded hospitality artwork, both live or die on this one habit.
Logos and text are different animals: they should arrive as vector files, which print with knife-edge cleanness at any size. The full file-anatomy conversation — formats, outlined text, the fixes we request most — runs the same as for any custom print work: we print from your supplied vector files and do not redraw raster logos.
Color deserves its own sentence: a backlit screen and pigmented ink viewed through acrylic can differ, so color-critical work needs an approved printed proof or physical sample rather than a screen-only sign-off. The bespoke printed tray project shows the controls for artwork integration. A separate artist tray brand repeat-order record concerns 4 × 4 inch engraved trays, not bottom printing; it documents another 1,000 pieces and a buyer-requested engraving-size revision.
The sample gate — correct-size samples, vector checks, and market deadlines
The sample gate is where acrylic tray printing risk actually gets retired: a physical, correct-size sample approved before bulk production. Samples ship in 3-5 days after artwork approval, production takes 15-20 days after sample approval, and freight rides on top: three numbers that, worked backward from a launch date, tell you exactly when artwork must be final.
Two buyer requests define this gate, and we honor both. The first: “I would like the sample to be the correct size.” Right instinct. A scaled-down sample tests nothing: print density, color depth, and defect visibility all change with area, so the real test is a sample at final dimensions with the real artwork. The second is the vector-logo check: before the sample runs, we confirm every logo and text element is vector (or flag what you need to resupply), because a sample printed from a compromised file just approves the compromise.
For deadline-driven projects (a market date, a seasonal launch, a trade show), the planning move is to separate the layers of your artwork file when you send it: print art, cut lines, and any etch marks each on their own layer. Merged files are the most common cause of a lost proof round, and a proof round is usually the buffer. I tell buyers to treat the sample gate as one calendar week including the courier, and to protect it: every deadline failure I have watched in tray printing happened before production started, not during it.
Small-batch note, since it comes up in half of these inquiries: buyers often want to start with a handful of printed trays. Our production MOQ is 100 pieces per design; the correct-size sample is how the design gets validated before that commitment, and it is a far better risk instrument than a tiny batch would be: it exists precisely so the first real order is a confident one. Our custom serving tray spec guide covers the dimensional side of the same quote.
Direct print vs bottom insert vs etched logo — the decision table
Bottom printing is one of three ways to put branding or artwork on an acrylic tray, and the right choice depends on artwork type and failure mode more than on price. The table below is the whole decision; the two sibling guides carry the depth.
| Decision axis | Direct second-surface print | Bottom insert | Etched logo |
|---|---|---|---|
| Artwork type | Full-color photos, gradients, dense art | Full-color, printed on a separate sheet | Single-color line art, logos, monograms |
| Permanence | Bonded to the tray — permanent | Removable sheet under the tray | Cut into the acrylic — permanent |
| Failure mode | Print defects locked in at production | Insert can shift, wrinkle, or trap moisture | Almost none — no ink to fail |
| Update the artwork later | No — reprint means new trays | Yes — swap the insert | No |
| Wet-service behavior | Sealed stack; spec the watertight line | Insert must stay dry to stay flat | Unaffected by water |
| Best for | Photo-grade retail and gift trays | Rotating menus, seasonal artwork | Understated branding, “just an etching” |
The other two columns are covered in our tray logo options guide: insert sizing and the moisture question, plus etch depth, frosting, and the “not a color logo, just an etching” request we hear from minimalist brands. If your artwork is a photograph or full-color design that must feel permanent and premium, second-surface printing is the lane, and the rest of this guide is its spec.
The pre-ship QC checklist we run on every printed-tray order
Every bottom-printed tray we ship passes 100% piece-by-piece inspection — no batch sampling, no skip-lot. For printed trays the checklist runs seven points: bubbles under raking light, pinholes against backlight, registration on the finest artwork detail, color against the approved sample, seal coverage at the print perimeter, edge and corner finish, and packing that protects the print face in transit.
The approved sample is the quiet hero of that list. Inspection is only as good as its reference, which is why the sample gate earlier in this guide matters twice: once to de-risk your decision, and again as the physical standard every production tray is compared against. When inspectors check “color against approved sample,” they are holding your sign-off in their hands.
If a project like this is on your desk — retail trays, hospitality amenity pieces, a photo-gift line — the fastest route is to send your artwork and target size for a quote, or start with our custom acrylic fabrication overview if the spec is still forming. The full range of blanks, sizes, and handle options lives at the acrylic trays hub. For a photo-gift line that needs a freestanding piece rather than a tray, see our acrylic photo block page. Send the file even if it is imperfect; flagging what needs fixing is the first thing we do, and it costs nothing.
Footnotes
-
FDA 21 CFR 177.1010 — acrylic and modified acrylic plastics in food-contact articles (eCFR) — the US federal regulation covering acrylic polymers used in food-contact articles, supporting the claim that the cast acrylic serving surface of a second-surface printed tray is a regulated food-contact material. ↩
-
ASTM D3359 — Standard Test Methods for Rating Adhesion by Tape Test — the cross-cut adhesion protocol referenced as the industry vocabulary for verifying that cured ink stays bonded to a substrate, cited here as the method itself. ↩
Frequently Asked Questions
I have a market deadline — how should I plan samples for a bottom-printed tray?
For a bottom-printed acrylic tray, work backward from the deadline: production takes 15-20 days after sample approval, samples take 3-5 days after artwork approval, and freight transit is on top. Send artwork with the layers separated — print art, cut lines, and any etch marks on their own layers — so the proof round does not eat the buffer.
Are bottom-printed acrylic trays dishwasher safe and BPA free?
Acrylic (PMMA) is BPA-free, and on a second-surface printed tray the serving face is bare cast acrylic — a regulated food-contact material under FDA 21 CFR 177.1010 — with the ink sealed underneath. For cleaning we recommend hand-washing with mild soap over dishwasher cycles: repeated commercial dishwasher heat stresses both the acrylic and the sealed print stack, while hand-washing is exactly what the watertight spec is tested against.
Is the artwork printed on the bottom actually watertight?
A bottom-printed acrylic tray is watertight when the ink stack is sealed — and that is a spec to confirm, not assume. On our bottom-printed trays the artwork is sealed behind a protective backing layer, and finished trays must survive wet cleaning without edge lift or clouding. Ask any supplier to state, in writing, how the print layer is sealed.
What is the difference between printing on the tray and a bottom insert?
Direct second-surface printing bonds ink to the underside of the tray base — permanent, seamless, nothing to shift. A bottom insert is a separately printed sheet placed under the tray — replaceable and good for rotating artwork, but it is a second part with its own tolerances. Different failure modes, different best uses.
What does my artwork need for photo-grade, A+ print quality?
A+ acrylic tray printing needs high-resolution image files at the final print size — enlarging a small file is what makes prints muddy — plus vector formats for any logos or text. Color-critical projects should add a printed proof or physical sample check, because a backlit screen will not match pigmented ink under room light.
Have specs in hand? Get a quote for your specific project.
Send us your drawings, reference photos, or a description of what you're making. We reply within 24 hours with a material recommendation, thickness, fabrication method, and a per-unit quote.