





How to Hang Acrylic Frame — Standoffs, Magnets & Rails
Most fallen frames were never the frame's fault. The mounting system was mismatched to the weight before the first hole was drilled.
Need this made?Custom acrylic frames →
Key Takeaways
- Most acrylic frame falls trace to a hardware-weight mismatch, not the frame: compute panel weight from size × thickness × PMMA density (~1.2 g/cm³) before choosing a mounting system.
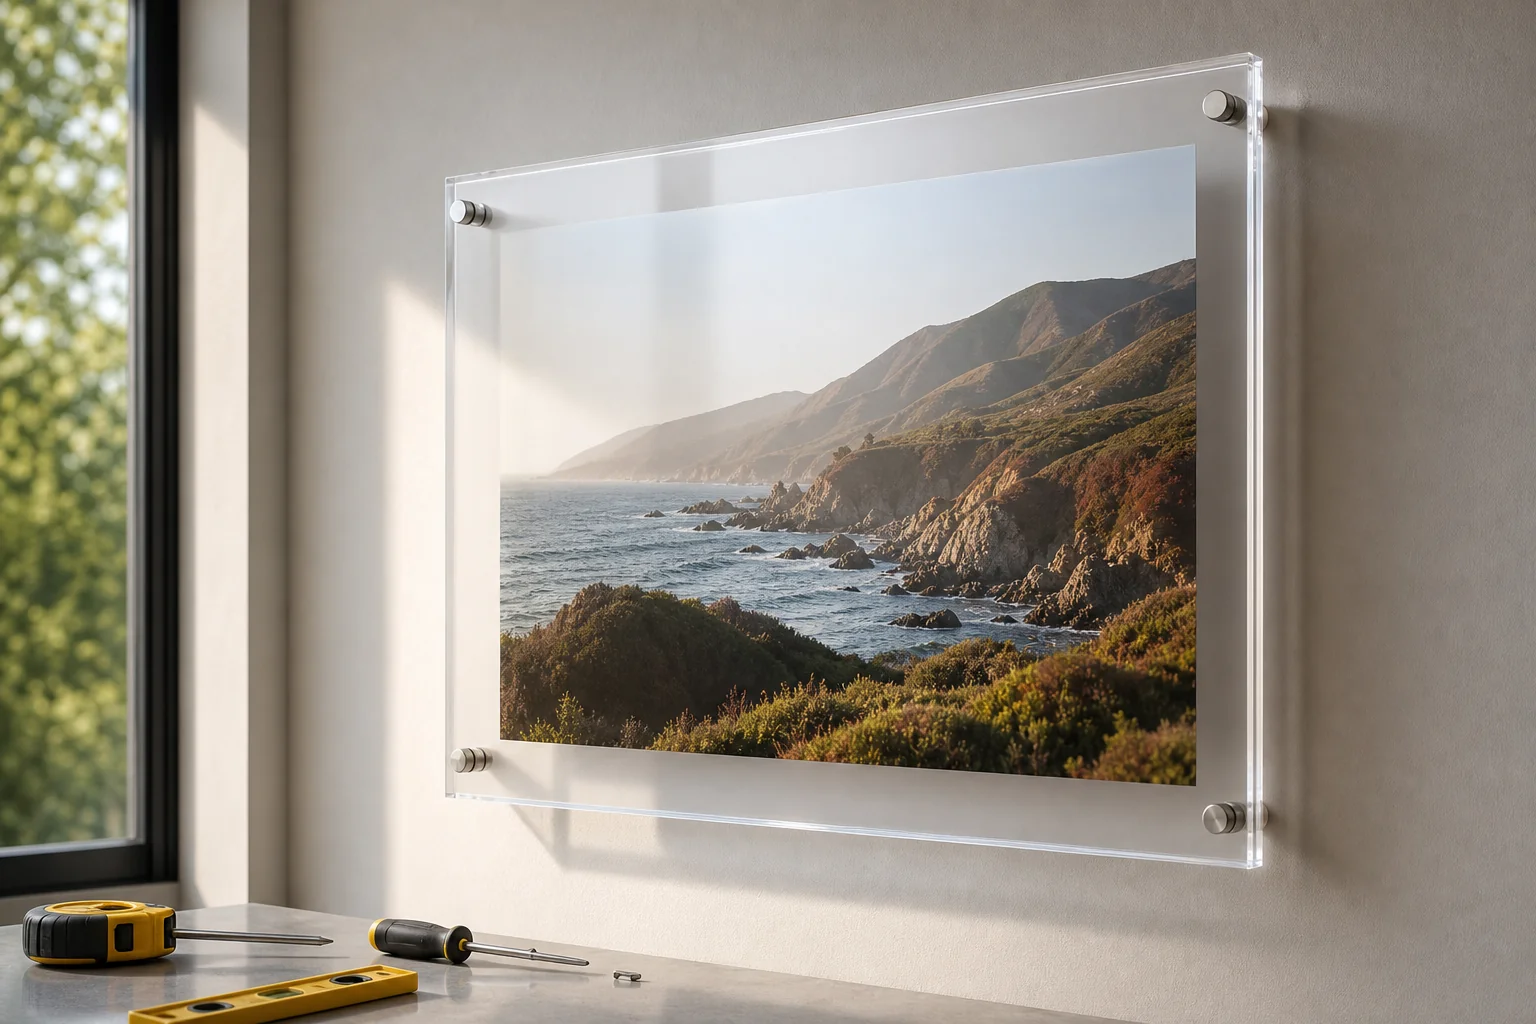
- Standoffs are the default for acrylic frames — four barrels through pre-drilled corner holes carry the load into the wall anchor, and the offset creates the floating look.
- Magnetic wall mounting needs a known magnet footprint: confirm plate size and placement at order time so nothing telegraphs through the visible face.
- Adhesive strip systems carry hard weight ratings (3M's large picture-hanging strips are rated at 15 lb a set), so check the rating against computed frame weight, never against a guess.
- Frames can ship install-ready: pre-drilled standoff holes, matched hardware kits, and per-SKU install sheets are factory options at order time.
On this page
- How to Hang Acrylic Frame Programs Without Changing the Spec
- Order frames with the mounting built in — holes, hardware kits, install sheets
- Start with frame weight — thickness, panel count, and the math
- Standoff mounting — the hardware stack, step by step
- Magnetic wall mounting — footprint and plate placement
- Rails and French cleats — gallery walls and rotating displays
- Adhesive mounting — when strip systems work and when they don’t
- Wall type decides the anchor — drywall, concrete, tile
How to Hang Acrylic Frame Programs Without Changing the Spec
A US giftware and home-decor brand retained approved acrylic-frame specifications through 4 production runs over 3 order years; a how to hang acrylic frame brief must still define the wall, hardware and installer approval separately.
A safe mounting brief starts with the finished frame weight, wall construction, orientation, environment, hardware maker’s current rating and installer approval. Do not infer the anchor or adhesive system from a catalog photo or from a different wall type.
Common review risks include hardware selected before the finished weight is known, anchors not approved for the actual substrate, and adhesive systems used outside their published instructions. Record each input instead of publishing a universal mounting recipe.
The cleanest fix happens before anyone touches a drill, so this guide starts there — ordering custom acrylic frames with the mounting already built in — and then works through the install itself: weight first, the four mounting systems we build frames around (standoffs, magnets, rails, adhesive), and finally the wall.
Order frames with the mounting built in — holes, hardware kits, install sheets
Everything in the sections below gets easier when it’s decided at order time instead of at the wall. We build frames install-ready as a factory option: corner holes CNC-drilled to the hardware’s datasheet, a matched standoff or magnet kit packed with each frame, and a printed install sheet per SKU stating hole spacing, our anchor recommendation by wall type, and the computed frame weight. That last line item costs almost nothing and, in our experience, prevents the most failures per dollar of anything in this guide.
This is the option we quote for program buyers — hotels rolling frames across properties, offices standardizing a certificate wall, resellers whose end customers install unsupervised. When I sign off a hardware-inclusive order, the kit is part of the 100% inspection: we gauge hole positions against the drawing, test-thread the barrels, verify magnet polarity, and pack an install sheet into every carton. Your install then inherits our factory tolerances instead of the installer’s improvisation. Hardware-inclusive orders run under the same terms as any custom frame: 100-piece MOQ, samples in 3–5 days, production in 15–20 days, 30% deposit with the balance before shipment.
If the frames are already on your wall side of the ocean, or your end customers do their own installs, the rest of this guide is the working manual.
Start with frame weight — thickness, panel count, and the math
Every mounting decision downstream depends on one number: the frame’s weight. It is the first number we compute on any wall-mounted frame quote, and for acrylic it is pure arithmetic: length × width × total thickness × PMMA density, about 1.2 g/cm³1. A two-panel frame doubles the panel thickness in the formula. No scale needed; your spec sheet already contains the answer.
We ran the math for common size and thickness pairings; panel thicknesses follow our acrylic thickness guide bands of 3 mm lightweight, 5 mm standard, and 8–10 mm premium floating:
| Frame size | Panel pairing | Computed weight | In pounds |
|---|---|---|---|
| 8×10” (20.3 × 25.4 cm) | 3 + 3 mm | ~0.37 kg | ~0.8 lb |
| 11×14” (27.9 × 35.6 cm) | 5 + 5 mm | ~1.19 kg | ~2.6 lb |
| 16×20” (40.6 × 50.8 cm) | 5 + 5 mm | ~2.48 kg | ~5.5 lb |
| 16×20” (40.6 × 50.8 cm) | 8 + 8 mm | ~3.96 kg | ~8.7 lb |
| 24×36” (61 × 91.4 cm) | 8 + 8 mm | ~10.7 kg | ~23.6 lb |
Read the bottom two rows carefully, because they are where intuition fails. A 16×20” frame jumps almost 60% in weight moving from 5 mm to 8 mm panels, and a 24×36” premium floating frame weighs more than two full gallons of water. None of us would tape two gallons of water to drywall, yet that is functionally what an adhesive mount attempts on a frame that size. At 24×36” you are in acrylic poster frame sizes, where the mounting should be planned with the frame.
When we quote a frame program, this table is the first thing our team reproduces for the actual sizes on the order. When a “failed mount” claim reaches us, recomputing this number is my first diagnostic step, and I’ve closed most of those cases at the calculator, before the hardware was even examined. Run the math for your largest frame before picking any mounting system in the sections below; every recommendation we make from here keys off that number.
Standoff mounting — the hardware stack, step by step
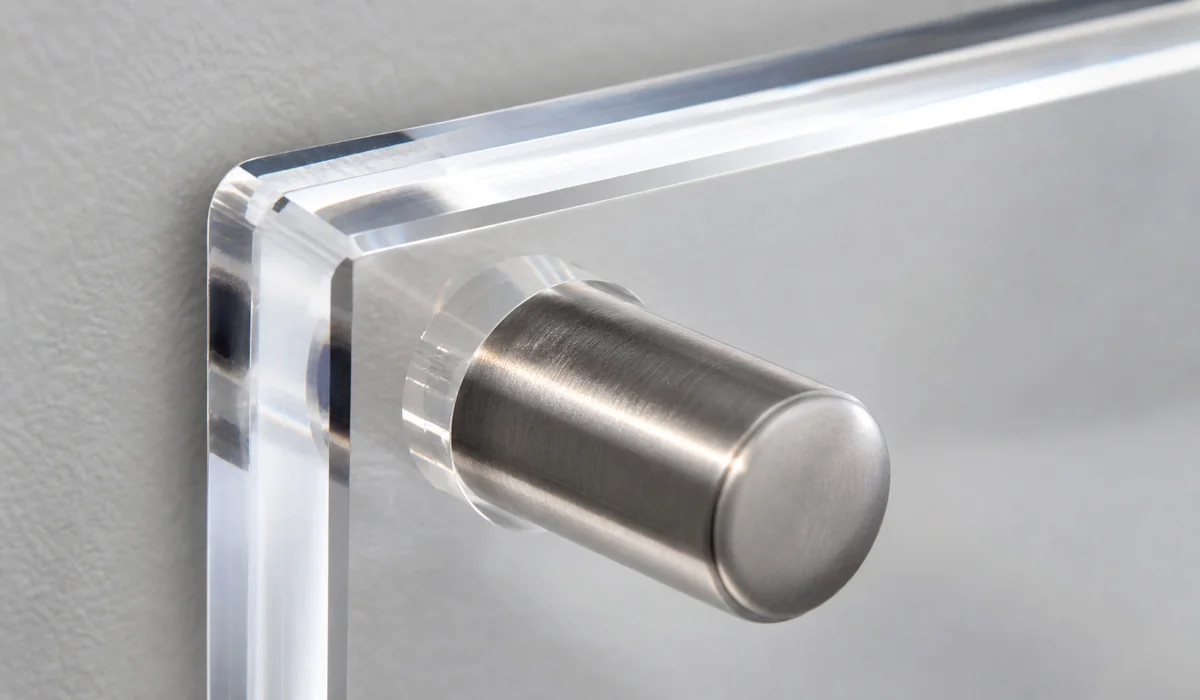
Acrylic frame standoffs are the default answer we give for wall-mounted frames: four metal barrels pass through pre-drilled corner holes, thread into wall anchors, and clamp the panel between barrel shoulder and cap. The load path is fully mechanical — panel to barrel, barrel to anchor, anchor to wall — and the barrel length holds the frame about 19 mm off the wall, creating the floating shadow line our floating frames are built around.
The install sequence we print on our install sheets follows the stack. Mark your four hole centers on the wall using the frame’s real hole spacing: measure the drilled panel in your hands, not the catalog drawing. Set anchors matched to your wall type (the wall-type section below covers the choice). Thread the barrels onto their studs, hang the panel over the barrels, and drive the caps home finger-tight plus a quarter turn. Overtightening is the classic acrylic mistake: the cap should clamp the panel firmly, and when I examine a cracked corner hole, the radial stress marks almost always say someone torqued a polymer panel like sheet steel.
One spec detail decides whether this goes smoothly: the clearance hole. It must pass the cap’s stem with 1–2 mm of room — around 7 mm for common M6-class hardware — while staying fully covered by the 13 mm barrel and cap. We pre-drill those holes on our CNC line before polishing, to the datasheet of whichever hardware your order ships with. Field-drilling acrylic with a hand drill is where most of the chipped corners we get shown come from.
Magnetic wall mounting — footprint and plate placement
The magnet footprint scales with frame weight: a light tabletop-size frame can hang on small corner magnet pairs, while a larger frame needs bigger plates or more of them, with placement engineered around the print area. Magnetic frame mounting replaces visible hardware with concealed steel plates on the wall and magnets set into or behind the frame, and the footprint is the one part of the system that can telegraph through the visible face if it’s planned casually — which is why “how large is the magnet footprint, and will it show?” is the buyer question I hear most, often word for word.
We keep the sizing discussion qualitative on purpose. We specify magnet count, position, and polarity per order, draw them on the approval drawing, and check them again at final inspection so that nothing reads through the front. Polarity is a real QC item on my checklist, by the way: a magnet set in backwards turns a satisfying snap into a frame that pushes itself off the wall, and it is far cheaper for us to catch that on the bench than for anyone to discover it on site. Our magnet mounting spec chart covers how magnet size and count get matched to panel weight in detail.
Magnetic mounting earns its complexity where your content rotates. The wall plates stay put; the frame lifts off and snaps back with no tools, which is why hotels and galleries that re-hang frequently spec it. If that describes your program, the frame itself should probably be magnetic-closure too — the magnetic picture frames buyer’s guide covers that decision from the frame side.
Rails and French cleats — gallery walls and rotating displays
A French cleat splits the load across the frame’s full width: one beveled strip on the wall angled upward, a mating strip on the frame angled downward, gravity locking the two together. For wide frames, heavy frames, and walls where the exact hang height needs adjusting after the fact, a cleat beats four point-loads on separate anchors, because the frame slides laterally on the cleat until the composition is right.
Gallery rail systems solve a different problem: walls that cannot be re-drilled for every exhibition. A horizontal rail mounts once near the ceiling; frames hang from adjustable cables or rods. Re-hanging becomes a no-drill operation, which is why galleries and corporate art programs standardize on rails. The colored floating frames we built for art galleries hang in rooms that rotate work on both systems: cleats for the permanent pieces, rails where shows change monthly.
For acrylic specifically, cleats and rails carry the bonus I flag for every gallery buyer: no through-holes in the panel at all. We bond or screw the cleat to the frame’s back panel at the factory, so the visible faces stay untouched. The trade-off is depth: a cleat adds its own thickness behind the frame, so a flush look means speccing the frame’s offset with the cleat included. State the total wall-to-face depth on your order drawing and there are no surprises at install.
Adhesive mounting — when strip systems work and when they don’t
Adhesive strips are legitimate hardware inside their ratings and a failure generator outside them. We treat the rating as the whole story: 3M’s large Command picture-hanging strips, the category benchmark, are rated at 15 lb for a full set2. Check your frame’s computed weight against that number and the boundary draws itself: an 8×10” or 11×14” frame sits comfortably inside the rating; a 24×36” premium floating frame at 23.6 lb is past it before the backing paper comes off.
Ratings also assume the wall the manufacturer tested on: smooth, painted, clean drywall. Texture is the silent killer: on orange-peel or knockdown finishes the strip contacts a fraction of its surface area, and the real capacity drops to an unknowable number. The rule we put on install sheets: smooth painted walls only, degrease the spot first, press for the full dwell time, and load your frame gently after the adhesive’s cure window. Renters and short-term installs are the honest use case: no holes in the wall, clean removal.
I’ll add the inspection-side view: adhesive failures are slow, not instant. The frame holds through the demo, then creeps for weeks as the foam relaxes under sustained load, and lands during a quiet afternoon; the photos usually reach us long after the install crew has left. If your frame is heavy enough that the strip count feels like a workaround, it is. Move up to standoffs or a cleat.
Wall type decides the anchor — drywall, concrete, tile
The same standoff behaves completely differently in different walls, because the anchor — not the barrel — is what actually carries the frame. Hollow drywall needs an anchor that spreads load behind the board: a toggle-type anchor is the benchmark, and a leading manufacturer publishes an ultimate load of 238 lb for its heavy-duty toggle in 1/2” drywall3. Published figures like that are ultimate test loads, not working loads; your install should stay far below them, but the headroom is exactly why toggles are the drywall default for anything heavier than a small frame.
Concrete and masonry flip the logic. Expansion plugs and sleeve anchors that would spin uselessly in drywall grip solid substrate with enormous capacity; here the anchor is rarely the weak point, and your job is mostly drilling clean holes at the marked centers with a masonry bit. Tile deserves respect at the surface: drill the tile itself with a tile bit and no hammer action, then anchor into whatever sits behind it, because the tile is a finish layer, never the structure.
The failure photo from the top of this guide is almost always this section’s mistake in disguise. Nearly every “pulled clean out” anchor we’ve been shown was a friction plug in hollow drywall, doing exactly what physics said it would. I have yet to see a properly weight-matched toggle let go of a frame — and we’ve been inspecting how our frames live after delivery for over a decade. Match the anchor to the wall before trusting it with the frame, whatever the mounting system above it.
A closing note if you searched how to hang acrylic prints rather than frames: the logic transfers directly. A face-mounted print is a single panel (lighter than a two-panel frame at the same size), but the weight math, the standoff stack, and the wall-type rules are identical. Compute the weight, match the hardware, then pick the wall anchor.
Building a frame program and want the mounting engineered before it ships? Send us your sizes and wall situation and we’ll return a frame spec with hole layout, hardware kit, and per-SKU install sheet included in the quote — within 24 hours.
Footnotes
-
PMMA (acrylic) density ~1.2 g/cm³ — MakeItFrom material data — independent materials database displaying the PMMA density behind every frame-weight calculation in this guide. ↩
-
Command 15 lb Large Picture Hanging Strips — 3M product page — manufacturer page for the category-benchmark adhesive strip system, stating the 15 lb rated capacity used as this guide’s adhesive-mounting ceiling. ↩
-
SNAPTOGGLE heavy-duty toggle bolt — TOGGLER product data — anchor manufacturer’s page publishing the 238 lb ultimate load in 1/2” drywall cited for toggle-type drywall anchors. ↩
Frequently Asked Questions
How to hang acrylic frame programs consistently across locations?
A US giftware and home-decor brand retained its approved frame specifications across 4 production runs over 3 order years. For a mounting program, document the frame drawing separately from the site-specific wall, anchor and installer approval.
Can I hang an acrylic frame without drilling?
The giftware repeat program retained approved frame specifications, but its case record does not establish a mounting method. A no-drill system is only an option when the exact frame weight, wall surface, environment and hardware maker's current instructions support it; the installer must approve the application.
How big is the magnet footprint on a magnetic wall mount?
The giftware buyer's 4 runs show that approved frame specifications can be retained; the case does not establish a universal magnet layout. Magnet count, plate footprint and placement must be approved for the complete panel weight, with the wall connection rated separately.
Do bulk acrylic frame orders come with the mounting hardware included?
The giftware program's 4 production runs support retaining the approved frame specification, not assuming one hardware kit fits every wall. Hardware can be quoted as an option; local installers still select or approve anchors for the actual wall construction.
Can we approve the mounting system on a sample before committing to a bulk order?
The repeat giftware buyer kept one approved specification across seasonal runs, which is the control a sample should establish. A mounting sample is normally produced in 3-5 days, paid separately and not credited to production; test it on the intended wall before releasing the bulk drawing.
Lock the mounting system into the frame order.
Send the frame size, wall construction, orientation and quantity for a quote. A paid mounting sample is produced separately and is not credited to production.