




Acrylic Sample Approval vs. 3D Render: Real Rework Costs
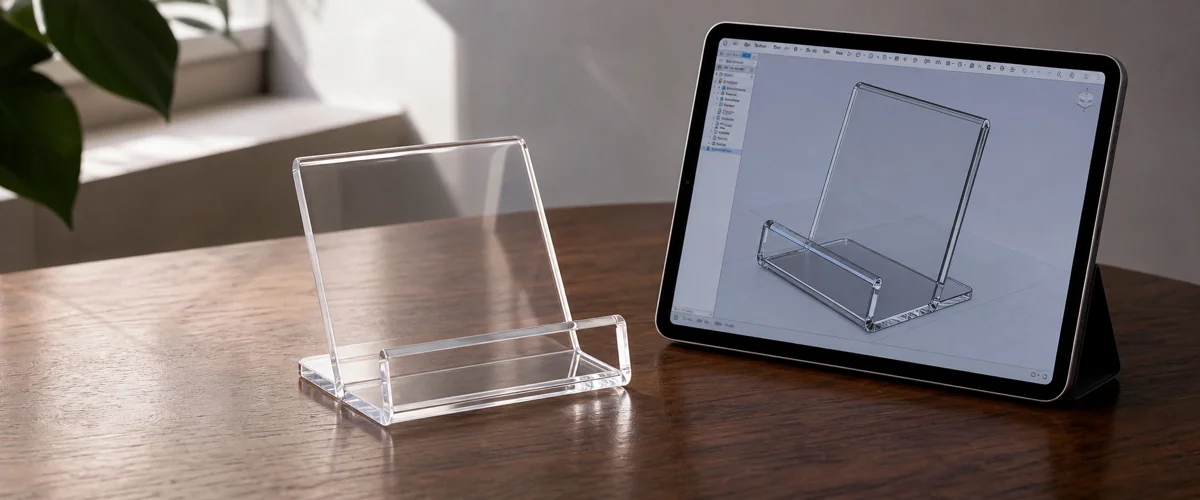
A 3D render approves the look. A physical acrylic sample approves the part — this guide walks the risk dimensions that get missed when buyers skip that step.
Key Takeaways
- Render-only approvals routinely trigger rework cycles that cost far more than a sample — a re-print, a re-finish, or a full re-spec at thicker stock, any of which a 5–7 day physical sample would have caught first.
- Print on acrylic can drift well past a delta-E of 4 versus an on-screen render — a mismatch visible to any human eye standing two feet from the part, since a render is RGB on a backlit screen and a printed part is pigment on a textured substrate.
- 3D renders cannot simulate four risk dimensions buyers consistently underweight: edge finish, surface gloss under store lighting, joinery feel, and material weight perception in the hand.
- A physical acrylic sample costs roughly USD 200–500 depending on complexity plus 5–7 days; a single rework cycle on a bulk run typically runs into four figures. The ROI math is one-sided.
- Skip the sample only when geometry is trivial, the spec is a confirmed reorder, and color is non-critical — and even then, request a material chip for the file.
On this page
- Why a Physical Acrylic Sample Beats Any 3D Render — The Rework-Cost Case
- What 3D Renders Show vs. What Acrylic Actually Feels Like
- Color Register Risk — Why Render-to-Print Delta-E Runs High
- Edge Finish and Joinery — The Texture That Renders Can’t Show
- Rework Cost Math — 5–7 Day Sample Timeline vs. Typical $1k–$8k Rework
- When to Skip the Sample (and How to Mitigate)
- What to Send Us So Sample Production Starts on Day One
- A Quick Note on Sample Approval as a Supplier Test
- Related guides
Why a Physical Acrylic Sample Beats Any 3D Render — The Rework-Cost Case
A 3D render approves the look. A physical acrylic sample approves the part. The gap between those two sentences is where most rework costs come from in custom acrylic — and in our production experience it is one of the most consistent, most avoidable sources of rework we see.
I run acrylic sample approval on every order that crosses my desk, and I’ve watched first-time buyers do something I disagree with: they look at a photoreal render, mentally check “approved,” and skip to bulk. The render is not wrong. It is just not enough. The render is rendering pixels; the factory is cutting cast PMMA, flame-polishing edges, printing pigment on a textured substrate, and bonding panels with a chemical that flashes off in 90 seconds. Those four physical realities show up in the part. None show up in a render.
This guide walks through the five risk dimensions where renders mislead buyers, the rework-cost math that makes sampling pay, and the narrow set of cases where skipping the sample is defensible.
What 3D Renders Show vs. What Acrylic Actually Feels Like
A 3D render shows geometry, color, and an interpretation of light. It does not show weight, edge sharpness, surface micro-texture, optical depth through clear cast PMMA, or the way frosted acrylic shifts under tungsten versus LED retail lighting. Those five attributes are where buyers most often disagree with their own approved render once the bulk lands.
Across the cosmetics, electronics, awards, and food-service display work we handle, material weight is one of the most consistently cited surprise factors on first-bulk-receipt. A render of a 5mm riser looks identical to an 8mm one. Hold both and you know which feels “premium” in front of a $200 skincare jar and which feels like a prototype. It is a common pattern for a buyer to approve a render-based thin-stock spec, receive bulk, then immediately ask to step up a thickness grade — a full re-spec at thicker stock that a sample on the desk would have prevented before tooling.
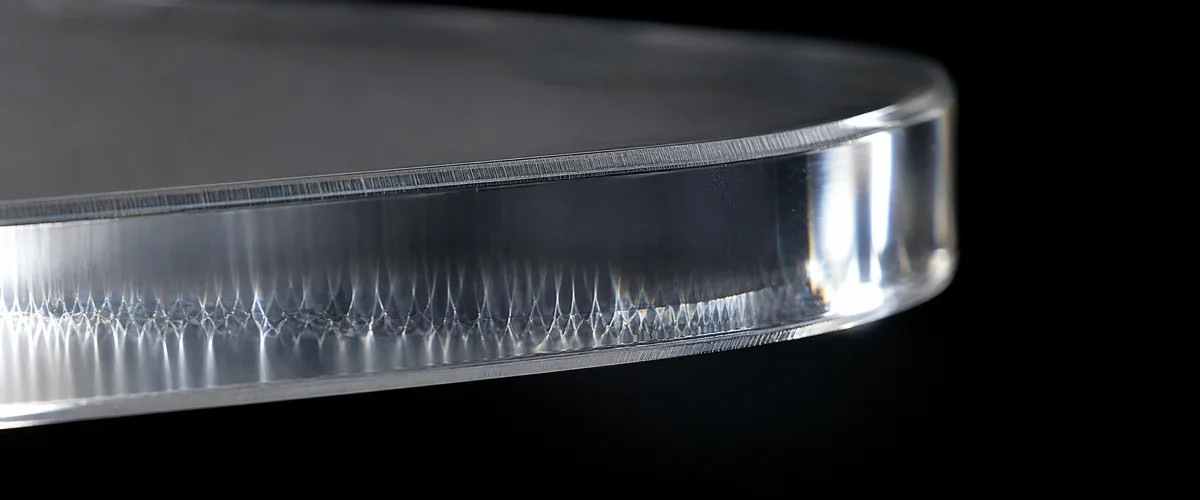
The other consistent gap is optical depth. Clear cast PMMA carries light through its body in ways render engines do not capture — the edge glow on backlit display, the way an internal engraving catches studio versus showroom lighting, the faint green tint stacked thicknesses produce. Buyers who approved a render and then held the part often reach for the same phrase: “I didn’t realize it would feel like this.” That reaction is the cost of skipping the physical acrylic sample.
Color Register Risk — Why Render-to-Print Delta-E Runs High
Color is where the numbers get concrete, because delta-E is a published, measurable scale. Industry color-tolerance guidance treats a delta-E of about 2 as the typical commercial threshold for “acceptable match” — above 4 is visibly different to the human eye at normal viewing distance1. A render-to-print comparison lives at the wrong end of that scale by construction: you are comparing an emissive RGB image on a 6500K monitor to reflective CMYK pigment on a textured substrate under room light. Those are two different color models in two different lighting conditions, so a gap past delta-E 4 is not a fluke — it is the expected result. Past delta-E 5 the mismatch is obvious in good light; past delta-E 7, on a retail floor it reads as a different color, full stop.
The reason is structural, not sloppy. A render is RGB pixels on a backlit screen at ~6500K. A printed acrylic part is CMYK pigment on a textured substrate, viewed under whatever ambient light is in the office, the studio, the store, the trade-show booth. None of those environments match each other or the monitor that approved the render. Layer in pigment-substrate interaction — UV-cured ink prints differently on frosted versus polished acrylic — and you have a color register problem no render workflow can fully predict.
If your design has any brand color that matters — a Pantone match for beauty, a corporate red for a booth, a gradient the marketing team obsessed over — request a printed acrylic sample with the actual ink, on the actual substrate, under the actual finish. That sample is the only object that lives in the same physical world as your bulk part.
Edge Finish and Joinery — The Texture That Renders Can’t Show
Render engines model edges as mathematical lines. Cast PMMA edges are not lines. They are a real surface produced by a specific process — laser cutting leaves a flame-polished glassy edge with subtle ripples, CNC leaves a finer matte that needs hand-polishing on visible faces, diamond-polishing produces near-optical clarity that catches showroom lighting like jewelry. None are interchangeable. None render identically.
Take a common scenario on premium display cases: a render shows mirror-clear edges, the buyer signs off in under an hour, and the laser-cut method specified produces edges that are beautiful by laser standards but show visible torch ripple under a store’s overhead spots. The fix is switching to CNC plus diamond-polishing on customer-facing edges — real finishing labor and a delay to re-jig polishing fixtures. A physical sample would have answered that question in ninety seconds.
Joinery is the same coin’s other side. Solvent-bonded acrylic joints range from invisible (proper Weld-On 4 on square edges) to visible white capillary lines (rushed application or imperfect edge prep). Renders show a clean joint or no joint. Buyers who approve a render of a multi-panel case and then receive first article are frequently surprised that the joints are visible at all. With a sample in hand, the conversation shifts from “is this a quality problem” to “do we need premium bonding on the front panel” — a far cheaper conversation at sample stage than after a full bulk run.
Rework Cost Math — 5–7 Day Sample Timeline vs. Typical $1k–$8k Rework
First-time buyers need to see the math. A render-versus-physical gap that survives to bulk can cost anywhere from a few hundred dollars for a single-color print correction on a small run, up to the low five figures for a worst case — think a thermoformed enclosure whose approved render hid a tight corner radius that bent acrylic can’t hold, forcing a new mold and a multi-week delay. The common cases land in four figures per cycle, driven mostly by re-print, re-finish, or a re-spec at thicker stock.
Compare that to a physical acrylic sample at the acrylic sample approval stage: a single-piece sample costs USD 200–500 depending on complexity plus 5–7 days door-to-door for US and EU buyers. The sample fee is paid separately and is not credited to production. You are buying a week of controlled validation against a rework cycle that costs both money and weeks.
The pattern we see again and again: buyers who push hardest to skip the sample are usually under the most schedule pressure — and also the most likely to absorb a rework cycle costing more time than the sample would have. Schedule pressure does not change the physics of color register, edge finish, or material feel. It just shifts where the delay falls. The sample is a smaller, predictable delay you choose. The rework is a larger, unpredictable delay imposed on you.
Sample vs Render — 5 Risk Dimensions
| Risk Dimension | What the Render Shows | What a Physical Sample Shows | Typical Rework Cost If Missed |
|---|---|---|---|
| Color register | Idealized RGB on a 6500K monitor | Actual CMYK pigment on actual substrate under ambient light | $400–$2,000 (re-print or re-pigment run) |
| Edge texture | Mathematical line, no process artifact | Laser ripple, CNC matte, or diamond-polish clarity | $1,200–$3,500 (re-finish or re-cut) |
| Surface gloss | Synthetic specular reflection | Real specular gloss reading under target lighting (ASTM D523, 60° geometry)2 | $600–$2,800 (finish change on bulk batch) |
| Material weight | Not modeled | Hand-felt mass and rigidity at exact thickness | $1,500–$4,200 (full re-spec at thicker stock) |
| Joinery feel | Clean joint or no joint | Visible/invisible bond line, fit-up tightness, audible click | $800–$8,000 (re-tool jigs, full bulk re-bond) |
When to Skip the Sample (and How to Mitigate)
Skipping the sample is defensible in a narrow set of cases. Three conditions need to be true simultaneously.
First, the geometry is trivial. Flat-cut single-panel parts — a sign holder face, a flat shelf insert, a rectangular tray with no bends or joinery — have very few variables to get wrong. Cut, polish, ship. If you have ordered this exact shape before, the toolpath and finish are locked.
Second, the spec is a confirmed reorder. If we produced this part in the last twelve months and you approved a sample on that run, the file exists with all process notes consolidated. A reorder is reproducing a known-good part, not approving a new one.
Third, color is non-critical. Clear or frosted acrylic with no print, single-color cast with a neutral tint — these have low color-register risk because there is no pigment-substrate interaction. Anything with a printed brand color, gradient, multi-color graphic, or Pantone reference fails this condition.
When all three are true, you can move from quote to bulk without a fresh sample — but I still recommend a small material chip from the actual sheet lot. A chip costs roughly $20 and confirms substrate clarity, color, and any batch variation in the cast PMMA. A five-day insurance policy on the material.
For everything else — the 95% case — sample first, bulk second. That ordering is how our customization process flows: a paid sample or 1–5-piece pre-production trial first, then production starting at 100 pieces per design, with the approved sample spec sheet locked as the production reference.
For how sample approval feeds into clean RFQ-to-production handoff, see our custom acrylic quote guide. For a worked example of a sample-stage check changing a bulk outcome, see our cosmetic organizer with velvet inserts case study — the velvet color-bleed risk was caught at sample stage, not at first article.
What to Send Us So Sample Production Starts on Day One
A clean sample request needs the same information as a clean bulk RFQ — only quantity differs. To start a 5–7 day sample window the day we receive your inquiry, send: final dimensions in millimeters with critical-fit tolerances, thickness per panel, material grade (cast or extruded PMMA, color, finish), surface treatment (polished, matte, as-cut, printed, engraved), and a dimensioned drawing or DXF for any non-flat geometry.
If color register is critical-to-quality, include the exact Pantone reference or a printed swatch you consider correct. If you are unsure whether your design needs a sample, send the file anyway — I will tell you the same day whether the spec is sample-required, sample-recommended, or sample-skippable per the three conditions above.
Sample fees are quoted alongside bulk pricing, paid separately, and not credited to the bulk order. The fee buys a controlled approval gate before production, and the calendar week spent on it is often the highest-ROI week in the engagement.
A Quick Note on Sample Approval as a Supplier Test
The sample is a supplier test as much as a part test. How a fabricator handles your sample tells you almost everything about how the bulk run will go: did the spec sheet arrive with the sample listing every variable, did it arrive on the promised date, did the edges look like the finish you specified, does the supplier respond to feedback with specifics or hand-waving?
A sample that arrives exactly as specified, with documentation, on time, from a fabricator who answers spec questions in technical detail — that is the strongest signal the bulk run will land the same way. Treat the sample-to-bulk approval step as a two-way audit: you are evaluating the part, and you are evaluating the supplier. What to actually measure and look at once the box is open — dimensions, edge finish, color against the reference, joinery, packing — is written out step by step in our pre-production sample approval checklist.
Nearly every render-versus-part rework we see shares one feature: the buyer skipped the sample and moved straight from render approval to bulk PO. These are rarely caused by fabricator error alone. They come from a missing physical-world data point that a five-day sample would have surfaced. That is the argument for the sample step in one sentence.
Related guides
- Pre-Production Sample Approval: Buyer Checklist
- Acrylic Block RMA — Defect Categories We Accept Returns On
- Pantone Matching Acrylic: An OEM Color Guide
Footnotes
-
Delta E is the standard measurement of perceptible color difference: below 1 is generally imperceptible; 1–2 is perceptible only on close inspection; 2–4 is the typical commercial threshold for acceptable match; above 4 is visibly different at normal viewing distance. See Wikipedia: Color difference for the CIE ΔE formulas, and Konica Minolta Sensing’s “Identifying Color Differences Using L*a*b* or L*C*H* Coordinates” for how these thresholds are applied on production parts. Haze and clarity on clear acrylic are separately governed by ASTM D1003, which is why a printed graphic and its substrate have to be evaluated together. ↩
-
Specular gloss is quantified in gloss units on a black-glass reference (100 GU) using ASTM D523, read at 20°, 60°, or 85° geometry. See Konica Minolta Sensing’s gloss standards and units primer for the measurement basis. A gloss-unit reading turns “matte” vs “polished” vs “diamond-polished” into a number both buyer and fabricator can hold the bulk run to — something a render’s synthetic specular highlight cannot provide. ↩
Frequently Asked Questions
How long does an acrylic sample take to produce and ship?
Production of a physical acrylic sample is 3–5 days at our Shenzhen facility; international air freight adds 2–3 days for a typical 5–7 day door-to-door window for US and EU buyers. We can compress the production side to 48 hours for urgent reorders, but freight transit is freight transit — that part is outside our control.
Can a 3D render replace an acrylic sample for color approval?
No. A render works in RGB on a backlit screen; a printed acrylic part reflects ambient light off pigment, edges, and substrate texture. Print on acrylic can easily drift past a delta-E of 4 versus the on-screen render — a visible mismatch, since the industry commercial-match threshold sits around delta-E 2. Color register on acrylic should always be approved against a physical chip or sample.
What does a physical acrylic sample cost?
A standard single-piece acrylic sample costs USD 200–500 depending on complexity. The sample fee is paid separately and is not credited to the bulk order. For complex multi-part assemblies, sample cost can run higher because each component is set up individually — we quote sample cost at the same time as bulk pricing so you can see both upfront.
When is it safe to skip the physical sample step?
Only when three conditions are true at once: the geometry is trivial (flat-cut, no joinery), the spec is a confirmed reorder of a part we have produced before, and color is non-critical. Even then, ask for a small material chip from the actual sheet lot to confirm the substrate matches your file. The other 95% of the time, sample first, then bulk.
What does sample-to-bulk approval actually look like in practice?
We ship the sample with a written spec sheet listing every variable that drove that piece — material lot, cut method, edge finish, print settings. Once you approve the sample, the bulk run is locked to that spec sheet. Any change buyers request after sample approval triggers a re-quote, because at that point we are no longer making the part you signed off on.
Approve the part, not the picture.
Send us your design and we'll quote a physical acrylic sample alongside the production run — typical sample lead time is 5–7 days, and the sample fee is paid separately and is not credited to production.