Acrylic Color Matching: Pre-Check Protocol for Production
Color approved on the swatch and color shipped from the cast room are not the same thing. Here's the spectrophotometer-based protocol we run before tooling is cut, and the delta-E thresholds we hold to.
Key Takeaways
- Acrylic color matching fails most often after buyer sign-off — pigment behaves differently in cast PMMA than in the printed swatch the buyer approved, and the gap only shows up after the first plate is cured.
- The thresholds we hold to: delta-E ≤1.5 for brand-grade work where the panel sits next to a reference logo, ≤3.0 for standalone accents, and >3.0 is a hard reject regardless of how good it looks under shop light.
- A 5-stage pre-check workflow — Pantone target capture, dispersion trial, cured sample read, D65 visual sign-off, batch retain — moves the color decision to a cured PMMA sample before tooling is cut, catching the great majority of mismatch risks while they are still cheap to fix.
- Batch-to-batch drift on a single brand color comes from pigment dispersion and the cure curve, not the masterbatch certificate — which is why a retained physical master, read against each new run, beats re-reading against the Pantone target.
- What buyers should send before we cut tooling: Pantone Solid Coated reference, a physical printed or painted swatch, the substrate the panel will sit next to in final use, and the lighting the panel will be photographed or merchandised under.
On this page
- Why Acrylic Color Mismatch Happens AFTER Buyer Approval
- Delta-E Thresholds — What 1.5 vs 3.0 Actually Looks Like
- Wetop’s 5-Stage Pre-Check Workflow
- Batch-to-Batch Variance — Why Pigment Dispersion Drifts
- Spectrophotometer vs Visual Sign-Off — When Each Is Enough
- Buyer-Side Prep — What to Send Us Before We Cut Tooling
- Related guides
Why Acrylic Color Mismatch Happens AFTER Buyer Approval
Acrylic color matching failures are the single most painful complaint I see — ten years of running QC on custom acrylic orders has not produced a close second. Not a dimensional miss or a poorly polished edge, but a buyer opening the first carton and saying “this red is wrong.” The carton arrives on a Tuesday, the brand team holds the panel next to their store fixture, and the color they approved on a printed swatch in March looks visibly different in cast PMMA in May.
It happens to disciplined factories when the pre-check is shortcut. The mechanism: the approved swatch is CMYK ink on coated paper, or spot ink on a brand book, or pigmented paint on a chip. The cast acrylic is pigment dispersed into liquid PMMA monomer, then polymerized through a 4–8 hour cure curve at controlled temperature. Two substrates, two chemistries, one Pantone target — the gap between them is where acrylic color matching either holds or breaks.
The cure curve is the part most buyers haven’t seen. As the plate polymerizes, the resin slightly amber-shifts in the first 90 minutes — neutral whites pull warm, blues pull green, certain reds deepen. Pigment that looked uniform in the mixing tank can settle in the bottom 20% of the plate during cure. A reliable acrylic color matching workflow has to put a cured sample, not a printed proof, in front of the buyer before tooling is cut.
What separates factories that hold brand-grade color from factories that approximate it is whether they run a cured-sample pre-check at all, and whether they read it on a spectrophotometer or eyeball it under shop fluorescent. The eyeball method works the morning the cast leaves the oven. It does not survive a brand audit four weeks later under different store lighting.
Delta-E Thresholds — What 1.5 vs 3.0 Actually Looks Like
Delta-E is the standardized number for how far one color is from another in CIE color space. The version everyone in serious color work uses now is CIE Delta E 2000 (often written ΔE2000 or dE00) — it weights perception more accurately than the older 1976 formula and is the reference most spectrophotometers report by default.1 The plastics-industry equivalent, ASTM D2244, defines the same calculation specifically for plastic substrates and is the standard most lab reports cite.2
The numbers below are the thresholds I hold our cast room to, calibrated against what brand teams actually accept versus reject.
| Delta-E | Visual perception | Use case | Decision |
|---|---|---|---|
| 0.5 | Imperceptible — even side-by-side under D65, trained observers struggle to call which is which | Premium luxury cosmetics, jewelry, where the panel sits inside a back-lit display next to printed brand reference | Pass — exceeds normal brand-grade requirement |
| 1.0 | Detectable only by trained eyes in side-by-side comparison; invisible at arm’s length | Brand-grade retail, store fixtures with adjacent logo or printed signage | Pass — recommended target for brand-grade work |
| 1.5 | Visible to trained eyes side-by-side; most consumers do not flag at arm’s length | Standard brand-grade ceiling — our default acrylic color matching threshold for projects with adjacent brand reference | Pass — accept |
| 3.0 | Visible to most observers in side-by-side comparison; acceptable when the panel stands alone with no brand reference adjacent | Standalone accent panels, props, fixtures with no brand color nearby | Pass — borderline, requires buyer visual sign-off |
| 5.0 | Clearly different colors to any observer — looks like a different SKU | Any case | Reject — re-cast required |
The 1.5 threshold tracks working consensus across automotive interior color matching, cosmetics packaging, and signage, where teams have been measuring perception thresholds for two decades. Most observers detect delta-E 2.0 side-by-side; trained brand teams reliably flag 1.0 differences. Setting the brand-grade threshold at 1.5 leaves a small margin without crossing into the visible-to-everyone zone above 2.0.
What the table doesn’t capture: lighting changes the reading. A panel that reads delta-E 1.2 against Pantone under D65 can read 2.4 under warm 3000K store lighting because warm light pulls reds toward orange and dulls blues. This is why our pre-check includes both the D65 spectrophotometer reading (objective) and a buyer visual sign-off under their actual store lighting (contextual). Either alone is incomplete.
Wetop’s 5-Stage Pre-Check Workflow
The acrylic color matching workflow we run on every brand-color project has five stages, in this order. Skipping any of them shifts the failure to a later, more expensive step — usually the first production carton on the buyer’s dock.
Stage 1 — Pantone target capture. Reference hierarchy, best to worst: physical Pantone Solid Coated chip, physical brand-book swatch (printed or painted), Pantone code only, CMYK breakdown, screenshot. We read every physical reference with the spectrophotometer under D65 and record Lab* values into the project file. When chip and brand-book swatch disagree, we email both readings back and ask which the cast acrylic should match. Having that conversation before tooling — rather than after the first carton lands — is where most color disputes are quietly avoided.
Stage 2 — Pigment dispersion trial. Our cast room runs a small dispersion trial — 200×200mm cured plate at the target thickness, with the candidate pigment loading and dispersion ratio. The plate polymerizes through the same cure curve the production batch will use, not a faster proxy curve. This is the step that kills “the swatch matched but the cast doesn’t” surprises, because we are measuring cured PMMA, not unpolymerized monomer.
Stage 3 — Cured sample spectrophotometer read. The cured trial plate is read against the Pantone target under D65. We report the delta-E to the buyer in writing, with the Lab* numbers, before any tooling is committed. Reads above 3.0 trigger pigment-loading adjustment and re-cast; 1.5–3.0 reads go back to the buyer to confirm tolerance (most don’t); ≤1.5 moves to Stage 4. A first trial rarely lands dead-on — the first cured read is what tells you which direction to correct (a warm-shifted red, a green-drifted blue), so budget for one adjustment cycle rather than expecting the opening trial to pass.
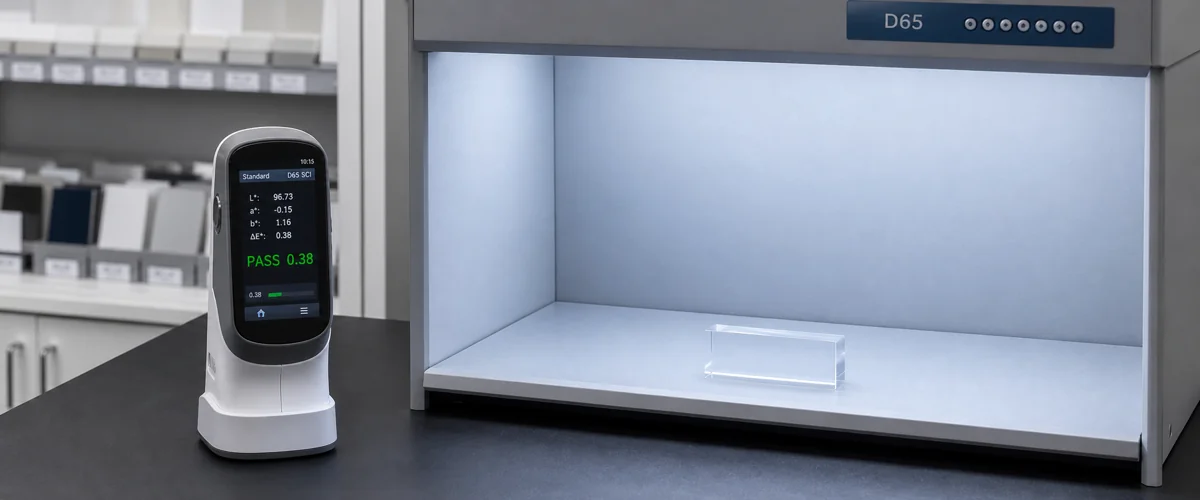
Stage 4 — D65 visual sign-off. The cured trial plate ships to the buyer with a Pantone reference chip and the written delta-E report. The buyer signs off under D65 plus, ideally, their actual store or photography lighting. This is where a panel that passed spectrophotometer can still get rejected — the instrument doesn’t know your store runs warm 3000K LED that pulls red toward orange.
Stage 5 — Batch retain. Once the buyer signs off, we cut a 100×100mm retain piece from the approved cast plate, label it with project number and approval date, and file it in the QC retain library. Every subsequent production batch is read against the retain piece under D65, not just the original Pantone target. This is what keeps a repeat order anchored to the color the buyer actually approved: cast PMMA drifts run to run, and re-reading only against the original Pantone target lets those small drifts accumulate unnoticed until the gap is wide enough for a brand team to catch. Anchoring to a physical retained master closes that loop.
The whole workflow adds 7–10 calendar days before tooling and moves the color decision to a cured sample, catching the great majority of acrylic color mismatch risks before they become production cartons.
Batch-to-Batch Variance — Why Pigment Dispersion Drifts
A common buyer assumption I have to disassemble on brand-color projects: “the masterbatch certificate is the same, so the color is the same.” It isn’t. The certificate tells you the pigment formulation entered the production room at spec; it does not tell you what came out of the cast room as polymerized PMMA. Three mechanisms drive the drift, roughly in order of how much they move the needle:
Pigment dispersion uniformity. Pigment well-dispersed in the mixing tank can settle during the long cure, especially in heavy-load colors like deep reds and deep blues. The bottom of a poorly-mixed plate cures darker than the top. This is the largest contributor on most colors, and disciplined mixing plus recirculation is the main lever against it — we hold a longer mix time on thicker cast plates than the pigment supplier’s minimum, because settling scales with plate depth.
Cure curve drift. Small oven drifts — stuck thermostat, door opened twice in one shift, back-of-room cold spot — shift the cured color. Blues drift green if cure runs long; reds deepen if cure runs hot. A tight, repeatable cure curve is what keeps this from stacking on top of dispersion variation.
Pigment loading variance. Two batches of the same masterbatch from the same supplier can read slightly apart from raw pigment lot variance upstream — a small effect, but real. The answer is the retained physical master, not chasing a tighter spec the supplier already delivers against.
The implication: if you are sourcing brand-color acrylic and the supplier doesn’t keep retain pieces project by project, batch variance will surface as a brand audit issue within the first year. For pigment chemistry in specialty acrylic finishes — metallic, pearlescent, color-shift — see the companion guide on specialty acrylic finishes, which covers the additional dispersion and metamerism problems those finishes introduce.
Spectrophotometer vs Visual Sign-Off — When Each Is Enough
The two QC methods serve different purposes; the right answer is almost always both, in sequence. Buyers occasionally ask whether one alone is sufficient, usually to compress lead time. The honest answer depends on project tier.
Spectrophotometer alone is sufficient when the panel is a standalone accent — props, set-dressing, retail elements with no brand color adjacent — and the project tolerates delta-E up to 3.0. A tradeshow prop at delta-E 2.5 won’t generate a complaint; the same panel next to a printed brand logo will.
Visual sign-off alone is sufficient when the buyer has already approved an identical color from the same retain piece on a previous project, and the new project is a repeat order at the same thickness, pigment, and cure spec.
Both are required when the project is brand-grade with adjacent brand reference (most retail, cosmetics, hospitality, signage), the color is new to our retain library, or the buyer’s store lighting is unusual (warm 2700K, cool 5000K, RGB-tunable LED). The spectrophotometer prevents bad rejects; the visual prevents bad accepts.
For brand-color projects that also involve UV-printed graphics on the same panel — common in acrylic organizers and cosmetics displays where cast color and printed logo have to harmonize — printing introduces a second color-matching layer. Our UV printing on acrylic guide walks through that workflow and the metamerism risk where two color systems (cast pigment and UV ink) read different under different lighting.
Buyer-Side Prep — What to Send Us Before We Cut Tooling
The single biggest accelerator of a clean acrylic color matching outcome is what shows up in the project folder on day one. Buyers who send a physical reference — a Pantone chip or an approved brand-book swatch we can read on the spectrophotometer — set an unambiguous target and typically land a usable sample on the first trial. Buyers who send only a Pantone code and a description leave 1–2 delta-E of ambiguity in the target itself, which almost always forces at least one re-trial and adds 5–7 days.
Here is the request list I email back when a buyer asks how to prep for color-critical work.
1. Pantone Solid Coated reference (best: physical chip; acceptable: code). The chip is what we read with the spectrophotometer to set the target. If your brand book references Pantone Uncoated, send that — they read differently. Spot color codes (PMS) are specific; CMYK breakdowns are not equivalent.
2. A physical printed or painted swatch from your brand book. This catches the case where the Pantone code on file disagrees with the physical brand reference your team has actually been using — a surprisingly common gap, since brand books drift from their nominal codes over reprints and vendor changes.
3. The substrate the panel will sit next to in final use. If the panel goes on a walnut fixture, send a walnut sample. If it sits next to a printed banner, send a banner cutoff. The panel that reads clean against white card stock can read wrong against the substrate it will actually live with.
4. The lighting the panel will be merchandised under. Color temperature in K (2700, 3000, 3500, 4000, 5000), CRI rating if you have it, ideally a photo of the fixture under that lighting. We use this to predict whether the D65 reading will translate to the buyer’s environment.
5. The tolerance you actually need. Tell us straight: “delta-E ≤1.5 against Pantone 186C under D65” or “delta-E ≤3.0 acceptable, this is a standalone accent.”
The five items together take roughly 30 minutes to assemble. Sending them up front is the cheapest way to compress color-revision lead time, because every one of them removes a specific ambiguity — target color, brand-reference conflict, adjacent substrate, final lighting, and tolerance — that would otherwise only surface after a trial plate is already cured.
For broader context on how our QC team runs the rest of the inspection cycle around the cast room — dimensional, edge, bonding, and packing checks alongside color — see our quality control overview and the custom acrylic fabrication process it sits inside. For a worked example of acrylic color matching on a real retail project with adjacent fabric and printed branding, the cosmetic organizer case study covers the velvet-insert color-coordination end to end.
If you have a brand-grade project coming up and want a second opinion on whether your reference materials are tight enough before you commit to tooling, send what you have to our color-matching desk — I’ll review the references and tell you directly what’s missing, no sales pitch.
Related guides
- Acrylic Block RMA — Defect Categories We Accept Returns On
- Physical Acrylic Sample vs. 3D Render: Real Rework Costs
Footnotes
-
CIE Delta E 2000 — International Commission on Illumination — the current reference formula for measuring perceived color difference, replacing the 1976 ΔE76 standard with perception-weighted lightness, chroma, and hue terms. Used as the default delta-E mode on most modern spectrophotometers. ↩
-
ASTM D2244 — Standard Practice for Calculation of Color Tolerances and Color Differences from Instrumentally Measured Color Coordinates (ASTM International) — the plastics-industry standard that defines color tolerance calculations for cast and extruded plastic substrates including acrylic; cited on most third-party color-test lab reports. ↩
Frequently Asked Questions
What delta-E is acceptable for acrylic color matching against a Pantone reference?
Industry consensus and our internal threshold: delta-E ≤1.5 for brand-grade work where the acrylic sits next to a logo, signage, or printed brand element on the same fixture. Delta-E ≤3.0 is acceptable for standalone accent panels with no adjacent brand reference. Anything above 3.0 is a hard reject in our QC, regardless of how close it looks under one specific lighting condition. The thresholds align with CIE Delta E 2000 perception research — most observers can detect a delta-E of 2.0 in side-by-side comparison, and trained eyes flag 1.0 differences.
Why does the acrylic color sometimes shift after the buyer approves a digital or printed swatch?
Three reasons. First, the printed swatch uses CMYK or spot-ink chemistry; cast acrylic uses pigment dispersed into liquid PMMA monomer. The same Pantone target rendered through two different physical substrates will not match without active correction. Second, pigment loading and dispersion in the cast room varies batch to batch — even with the same masterbatch certificate, residence time and temperature can shift the cured color by 1–2 delta-E. Third, the cure curve itself slightly amber-shifts certain pigments, especially blues and greens, which the printed swatch does not anticipate. The fix is a cured-sample pre-check, not a faster swatch approval.
Do I need to send a physical Pantone book, or is the Pantone code enough?
The Pantone code is the starting point, but the physical Pantone Solid Coated chip is what we read with the spectrophotometer to set the target. If you can send the chip, send it. If you can't, send the code plus a physical printed or painted swatch from your brand book — anything physical that you have already approved as 'this is the brand color.' We then read both targets, reconcile them, and confirm with you which one the cast acrylic should be matched to. Pantone codes alone leave 1–2 delta-E of ambiguity that surfaces later as a complaint.
How do you handle batch-to-batch consistency across multiple production runs?
We retain a cured master sample from the approved first batch and record its L*a*b* values into the project file. Every subsequent batch is compared against that retained master under D65 illuminant, not just against the original Pantone target. The reason this matters: cast PMMA drifts slightly run to run from pigment dispersion and cure-curve variation, so re-reading only against the original Pantone target lets small drifts stack up until the accumulated difference becomes visible to a brand team. Anchoring to a physical retained master keeps each run referenced to the color the buyer actually signed off on. ASTM D2244 defines the tolerance calculation used to make that batch-to-batch call for plastic substrates.
Is a spectrophotometer reading enough, or do I still need a visual sign-off?
Both, in sequence. A spectrophotometer reading is the objective decision — pass or reject against the delta-E threshold under D65. The visual sign-off under D65 plus your store lighting is the contextual decision — does the color read correctly next to the brand logo, the wood fixture, the LED strip it will live with. A panel can read clean on the instrument at delta-E 1.2 under D65 and still look wrong to the buyer once warm 3000K store lighting pulls the red toward orange — a metamerism effect the instrument, reading under one fixed illuminant, does not capture. The instrument prevents bad rejects; the visual check prevents bad accepts.
Need brand-grade color matching on your next acrylic project?
Send us your Pantone reference, a physical swatch, and a photo of where the finished panel will sit. We'll run a dispersion trial, send a cured sample with a delta-E reading against your target, and confirm before any tooling is cut.