





How to Remove Protective Film from Acrylic (and Which to Specify)
Peel from a corner at room temperature, pull steadily, and keep blades and acetone away.
Need this made?Custom acrylic fabrication services →
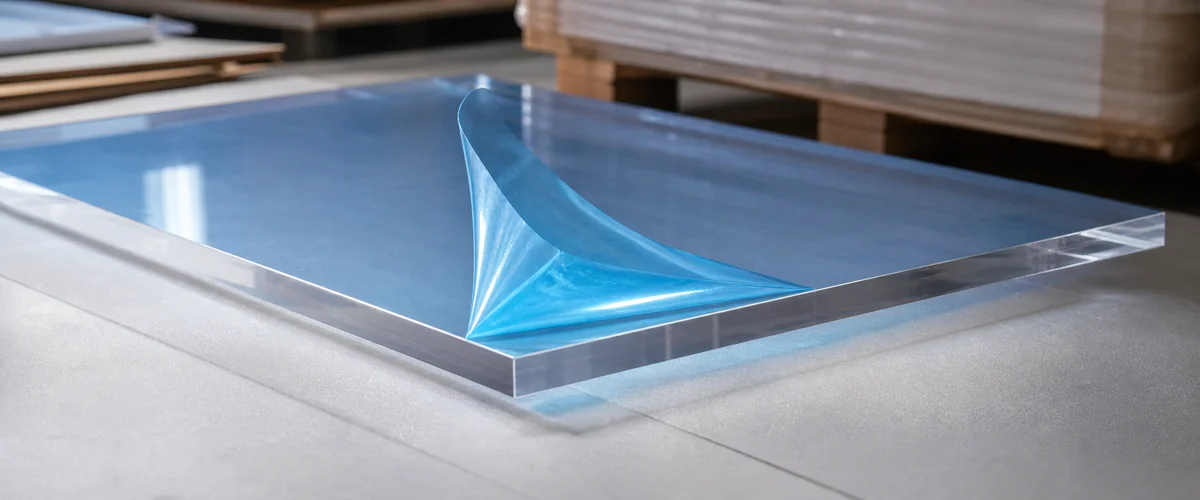
Then specify the film by SKU, lane and dwell time so the next shipment peels the same way.
Key Takeaways
- To remove protective film from acrylic, let the part reach room temperature, lift a corner with a fingertip or plastic card, and pull slowly at about 90° to the surface. Clean residue with mild soap and water, never acetone or a blade.
- Approve the exact protective-film SKU against the named acrylic surface, finish, shipping lane and expected dwell time.
- ASTM D3330 provides a peel-adhesion test method; it does not create one universal pass range for every film and acrylic combination.
- Temperature exposure and storage time belong in the approval brief because producer limits differ by film chemistry and carrier.
- Compare film cost with buyer-specific removal labor and scrap exposure instead of relying on a generic savings claim.
On this page
- How to Remove Protective Film from Acrylic in 6 Steps
- Which Film to Specify: Approval Depends on the Shipping Brief
- Film Tiers Compared — Peel Residue + Adhesion Data
- Validating the Removal Method on a Sample
- Temperature Limits and Storage Conditions
- Total Cost — Premium Film vs Rework Cost
- Related guides
How to Remove Protective Film from Acrylic in 6 Steps
To remove protective film from acrylic, let the part reach room temperature, start at a corner, and pull the film slowly at about 90° to the surface. Blades, fingernails on a flat edge and solvents cause most of the damage, not the film itself. We ship a short version of these steps on a laminated card with every order.
- Let the part reach room temperature. Cold film goes stiff and can tear, and film peeled while still hot from a container or sunny dock is more likely to leave adhesive. If the film label or data sheet states a removal range, follow it.
- Work on a clean, soft surface. Once the film is off, the bare face scratches on grit like any acrylic, so clear the bench and lay down a soft cloth or the packing foam.
- Start at a corner, not a flat edge. Lift the corner with a fingertip or the edge of a plastic card. Never use a knife, razor blade or fingernail along a flat edge; that scratches the acrylic the film was protecting.
- Pull slowly at about 90° to the surface. Keep an even speed in one direction. A jerk, a change of direction or a flat pull folded back over itself is more likely to tear the film or leave adhesive tracks. Stop if the film tears, tracks or resists.
- If the film tears, restart from the nearest corner. Do not pick at the torn edge in the middle of the panel.
- Clean off any residue with mild soap and water. Use dish soap in lukewarm water on a soft microfiber cloth, rinse and blot dry. Do not use acetone, ammonia glass cleaner, razor blades or abrasive pads. If residue remains, photograph the film label and surface and contact the supplier; our acrylic display cleaning guide covers the next steps.
Leave the film on until the display is in position if you can, because setup handling is when most scratches happen. On multi-part fixtures, check the packing diagram for which faces arrive filmed so staff do not peel a surface meant to stay protected until installation.
Which Film to Specify: Approval Depends on the Shipping Brief
Acrylic protective film performance depends on the exact carrier, adhesive, acrylic grade, surface finish, temperature exposure, storage time and removal method. A short domestic lane and a long international program can therefore require different approval conditions even when the fabricated part is identical.
Write the expected lane and dwell window into the request for quotation. If customs, distribution-center storage or delayed installation may extend that window, include those conditions rather than assuming a nominal transit time covers the full period.
Producer data sheets describe compatible surfaces, peel-test conditions and temperature limits for the named SKU.1 Use those documents to choose candidates, then approve the actual film on a representative acrylic sample. The supplier data sheet and buyer-approved test together are stronger evidence than a generic commodity-versus-premium label.
Put the lane and surface in the RFQ
The film line item cannot be reviewed in isolation. Give the supplier the acrylic grade and brand if known, surface finish, printed or polished areas, fabricated-edge condition and any surface that must remain film-free. A matte face, a polished edge and a printed panel may require different contact rules even when they travel in the same carton.
Then describe the route from packing to removal. Include the transport mode, expected warehouse stops, possible customs delay, receiving environment and the party that removes the film. If the final installer is different from the buyer, decide who owns the removal instruction and who reports a problem. These inputs let the quote identify assumptions instead of hiding them behind a generic film description.
The RFQ should also state the required evidence. That may include the current producer data sheet, a film label on the packing list, an approved sample, a packout photo and a written removal method. If the buyer names a transit test, record the edition, sample count and acceptance criteria rather than writing only the standard’s name.
Film Tiers Compared — Peel Residue + Adhesion Data
Protective films differ by carrier, adhesive chemistry and producer-rated conditions. ASTM D3330 defines a peel-adhesion test method, but the reported result only has meaning with its substrate, dwell time, temperature and procedure. Compare the actual SKUs named on the quote.
| Approval field | What to record | Release evidence |
|---|---|---|
| Film identity | Producer and exact SKU | Current technical data sheet |
| Acrylic surface | Grade, finish and fabricated-edge condition | Named sheet record and sample |
| Shipping exposure | Lane, storage window and temperature assumptions | Buyer-approved brief |
| Removal | Starting point, pull direction, speed and allowed tools | Signed sample or removal test |
| Packout | Contact points, separators and final carton | Approved packout sample and named test scope |
Named examples in each tier are available in producer data sheets, including Tredegar surface-protection PE lines, 3M protective tapes and Nitto SPV films. Each product publishes its own peel-adhesion test conditions. Buyers should approve film against the named sheet surface, temperature range, dwell time and removal method rather than applying a universal adhesion threshold. Film specification is one half of transit protection; insert architecture is the other. The custom acrylic packaging insert project shows how surface protection, packout and a written test scope were approved before production.2
The released specification should name the film SKU and approval conditions. Buyers asking for a quote on custom acrylic blocks or display fixtures can then compare the proposed film against the actual surface, lane and storage plan instead of accepting a generic “PE film” callout.
Read the data sheet with its test conditions
A peel value without its test conditions is incomplete. Confirm the substrate used by the film producer, dwell time before testing, pull direction, test speed and temperature. If those conditions differ from the buyer’s acrylic part or receiving process, treat the number as screening information, not final approval.
Compatibility language also needs careful reading. A data sheet may list broad material families while excluding coated, printed, textured or recently fabricated surfaces. Ask the film producer or converter to confirm the exact application in writing when the part includes printing, coating or polished edges.
Finally, record the revision date of the data sheet. Film product names can stay constant while the carrier, adhesive or published conditions change. The release packet should preserve the document used for approval so a later reorder can be checked against the same evidence.
Validating the Removal Method on a Sample
The six steps above are the general method. For a production order, validate the pull direction, speed and allowed tools on the named film and surface during sample approval, because an approved film can still be damaged by an untested tool, solvent or pull method.
The receiving instruction should identify the film, approved starting point, pull method, allowed tools and escalation step. Confirm whether that instruction and any special labeling are included in the quote.
Build a removal record during sample approval
The sample review should document more than appearance. Photograph the starting tab or edge, note the approved pull direction and record any tool that is allowed. Check the surface under consistent light after removal, including printed areas, bends and polished edges. If the buyer expects the film to remain through assembly or installation, repeat the review after that handling step.
Define what receiving staff should do when the result differs from the sample. The instruction can require them to stop, isolate the part, photograph the film label and affected surface, and contact the named buyer or supplier representative. This prevents an improvised solvent or scraper from turning a film concern into permanent acrylic damage.
For multi-part fixtures, identify which components arrive filmed and which do not. A clear packing diagram helps staff avoid peeling a surface that should remain protected until later installation. It also gives the buyer a practical way to audit whether the approved protection plan reached the production carton.
Temperature Limits and Storage Conditions
Temperature limits must come from the named film’s current producer data sheet and the approved acrylic-surface test. Do not copy a range from another carrier, adhesive family or substrate.
For cold exposure, record the lowest expected shipping and storage condition, handling method and dwell time. For heat exposure, include loading docks, containers, warehouses and any sunlight-exposed holding area. The supplier can then propose a candidate SKU, but the buyer should release it only after the agreed sample or packout test.
UV exposure, storage time and fabricated-edge condition may also affect the approval plan. The supermarket-chain shelf-edge sign holder project illustrates how material, artwork, packing and handling inputs were separated, rather than treating one film choice as universally suitable.
If the lane or dwell window is unknown, record that uncertainty in the quote and agree on a conservative test condition. The quote should identify any assumption that could change the film SKU, packout or removal instruction.
Total Cost — Premium Film vs Rework Cost
Compare candidate films with the buyer’s own quote and risk inputs. A useful worksheet separates the film line item from receiving labor, inspection, approved cleaning, replacement fabrication and schedule exposure.
| Cost input | Buyer entry | Evidence |
|---|---|---|
| Film price | Quoted amount per part or sheet | Supplier quote with named SKU |
| Removal labor | Local loaded labor rate and tested time | Buyer receiving trial |
| Inspection | Sampling plan and disposition time | Approved QC plan |
| Replacement exposure | Part value, freight and schedule impact | Current quote and delivery plan |
| Decision | Selected SKU and approval conditions | Signed sample or test record |
This worksheet does not assume that a higher-priced film always wins. It makes the tradeoff reviewable for the actual part, lane and receiving process.
Shorter lanes and controlled indoor storage may support a different film choice from long or uncertain programs. The quote should still name the SKU and assumptions so the buyer can compare the options against the same receiving and replacement inputs.
Ask for the film SKU on the line item, the producer data sheet, the applicable peel-test method and the approved temperature and dwell conditions.3 Tell us the lane and dwell window and we will identify the sample checks needed for the proposed film.
Related guides
Footnotes
-
ASTM D3330 / D3330M-04 — Standard Test Method for Peel Adhesion of Pressure-Sensitive Tape — a test method for peel adhesion of pressure-sensitive tape. ↩
-
International Safe Transit Association. ISTA 3A — General Simulation Performance Test for Packaged Products. https://ista.org/test_procedures.php — a buyer may name this or another agreed method when defining the final packout test scope. ↩
-
ASTM D903-98 — Standard Test Method for Peel or Stripping Strength of Adhesive Bonds — a peel or stripping-strength test method for adhesive bonds. ↩
Frequently Asked Questions
How do you remove protective film from acrylic?
Let the part reach room temperature, set it on a clean soft surface, lift one corner with a fingertip or the edge of a plastic card, then pull the film slowly and evenly at about 90° to the surface. If it tears, restart from the nearest corner. Never use a knife, razor blade or fingernail along a flat edge, because that scratches the acrylic the film was protecting.
How do I get protective film residue off acrylic?
Wash the area with mild dish soap and lukewarm water on a soft microfiber cloth, rinse and blot dry, and repeat with a little more contact time if needed. Do not use acetone, ammonia glass cleaner, razor blades or abrasive pads; they can craze or scratch acrylic. If residue remains, photograph the film label and the surface and contact the supplier.
What is acrylic protective film and why do shipped displays use it?
Acrylic protective film is a removable carrier with an adhesive selected to shield the approved acrylic surface during fabrication, packing, shipping and handling. Ask for the film SKU, its producer data sheet, the named acrylic surface and an agreed removal test.
How long can acrylic protective film stay on the surface before peel becomes a problem?
There is no universal clean-peel period. The acceptable dwell time depends on the named film, acrylic grade and finish, temperature exposure and storage conditions. Put the expected window in the brief and approve removal on a representative sample.
Why does the cheapest anti-scratch film cost more in the end?
A lower film price can be offset by removal labor, residue investigation or damaged parts if the SKU is not matched to the approved surface and lane. Compare quoted film cost with your own labor and scrap assumptions, then validate the chosen film before production.
Can floor staff peel acrylic protective film themselves, or does it need a pro?
The buyer should approve a removal method for the named film and surface, then provide that instruction to receiving staff. Start from the approved edge or tab, use the tested pull direction and speed, and keep unapproved solvents or sharp tools away from the acrylic.
Should I ask my acrylic supplier which film SKU they use?
Yes. Ask for the exact SKU, producer data sheet, test method and conditions, rated temperature range, compatible surfaces and removal guidance. A generic 'PE film' description is not enough to approve a shipping specification.
Need a film spec callout on your next acrylic order?
Tell us the lane, dwell time, acrylic grade and finish. We will identify the proposed film SKU and the sample checks needed before production approval.