How Is Acrylic Made Into Custom Products: Factory Guide
Most buyers treat acrylic as a commodity and underestimate what it takes to go from a PDF drawing to a finished product that survives international freight — here is every stage, explained.
Key Takeaways
- Acrylic fabrication has nine distinct stages — most quality problems trace back to skipping or rushing stage 4 (edge finishing) or stage 7 (QC against the approved sample).
- Laser cutting is the standard method for shapes under 20mm thick; CNC routing takes over above that and for tight-tolerance interior cuts.
- Edge finishing — flame or diamond polishing — adds 15–30% to fabrication time but is what separates a professional product from a raw-cut piece.
- Before shipping, we check each order against the buyer's approved sample — caliper-verifying key dimensions and eyeballing clarity, edges, and print — plus a plain drop-check on a loaded sample case for fragile assemblies.
- From approved drawing to shipped product, realistic timelines are 3–5 days for samples and 15–20 days for production runs of 50–500 pieces.
On this page
- What Actually Happens Between Your Drawing and the Shipped Box
- Stage 1: Quote, Spec Review, and Drawing Approval
- Stage 2: Material Selection and Sourcing
- Stage 3: Cutting — Laser or CNC
- Stage 4: Edge Finishing — Flame and Diamond Polishing
- Stage 5: Shaping — Bending and Thermoforming
- Stage 6: Decoration — Printing, Engraving, and Hot Stamping
- Stage 7: Assembly and Solvent Bonding
- Stage 8: Quality Inspection — Checked Against the Approved Sample
- Stage 9: Packaging and Freight
- What This Means for Your Next Project
What Actually Happens Between Your Drawing and the Shipped Box
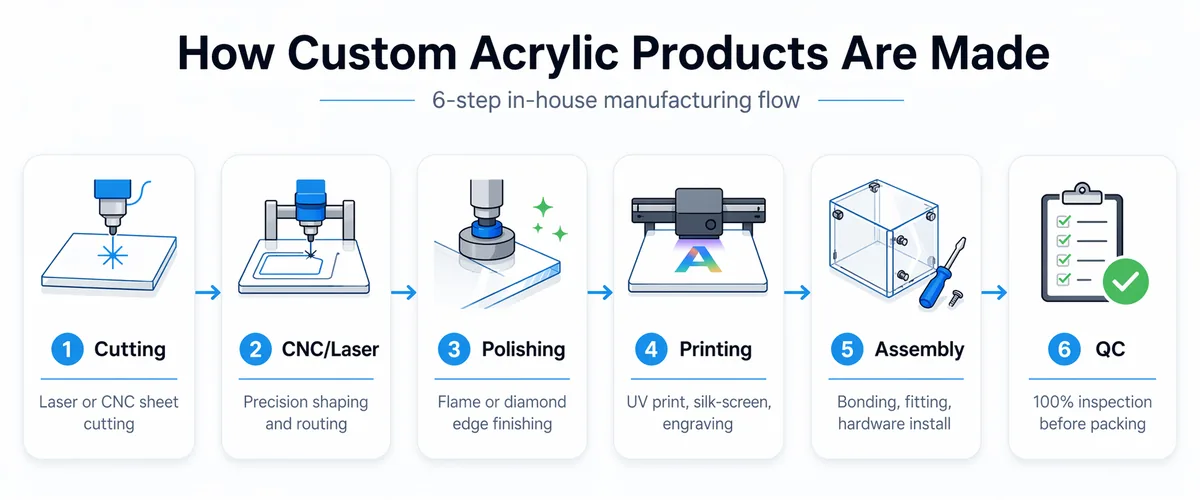
Custom acrylic fabrication follows nine stages — and how is acrylic made into finished product depends on decisions made at each one. The stages are: quote and spec review, material selection and sourcing, sheet cutting (laser or CNC), edge finishing (flame or diamond polishing), shaping (bending or thermoforming), decoration (printing, engraving), assembly and bonding, quality inspection, and packaging for freight. Skipping or rushing any stage is where defects originate. Understanding how acrylic products are made also gives you a practical framework for evaluating any supplier — the questions to ask, the specs to check, and the timeline to expect.
I’ve been on the factory floor for 12+ years, and the question I hear most from first-time B2B buyers is some version of “how does this actually get made?” — usually after a disappointment with a previous supplier who delivered something that looked right in photos but arrived scratched, out of tolerance, or with cloudy edges. This walkthrough maps every stage so you know exactly what to expect and what to ask your fabricator before you sign off on an order.
Stage 1: Quote, Spec Review, and Drawing Approval
Before any material is touched, we review your drawings for fabricability — checking dimensions, tolerances, material thickness, and finish specifications against what the production line can actually deliver. In our production experience, this stage is where most of the problems that would otherwise surface at final check — or, worse, after the product ships — get caught and resolved on paper, before a single sheet is cut.
The most common issues I catch at this stage: a tolerance of ±0.05mm on a 400mm panel (laser cutting holds ±0.1mm — anything tighter needs CNC and a price adjustment), a specified thickness that doesn’t match stocked sheet sizes (asking for 6.35mm when the supply chain stocks 6mm means custom procurement and extra lead time), and assembly details that assume gaps of zero between glued panels (solvent bonding needs a 0.1–0.2mm gap to flow correctly). We mark up the drawing with a redline, return it for sign-off, and do not cut material until the buyer approves the revised spec. This step takes 24–48 hours. For a detailed look at how we handle the inquiry and quote process, see our customization and quoting overview.
Stage 2: Material Selection and Sourcing
Custom acrylic products are fabricated from PMMA (polymethyl methacrylate) sheet — the material commonly sold under brand names such as Plexiglas (Evonik) or Optix (Plaskolite). Wetop sources sheet externally; we are fabricators, not raw material producers. Material selection at this stage affects every downstream stage: clarity, polishability, thermoforming behavior, and cost.
The two main types are cast and extruded PMMA. Cast acrylic is made by polymerizing liquid monomer between glass plates — it has higher molecular weight, better optical clarity, and polishes to a glass-like finish. Extruded acrylic is pushed through a die in a continuous process; it’s cheaper and dimensionally uniform but lower molecular weight, which shows up as micro-stress marks under diamond polishing and a tendency to craze when drilled. For most display cases, award bases, and anything above 10mm, we specify cast. For thin signage, mass-produced sign holders, and thermoformed parts where cost is priority, extruded is fine. Optical clarity for both runs 90–92% light transmittance, measured per the ASTM D1003 standard for haze and luminous transmittance1. Tensile strength for cast PMMA typically runs 70–80 MPa, per the ASTM D638 tensile test method2.
Color options at this stage cover clear, tinted (any Pantone), frosted, mirrored, and anti-static variants. Anti-static grades are specified for electronics displays to prevent dust adhesion.
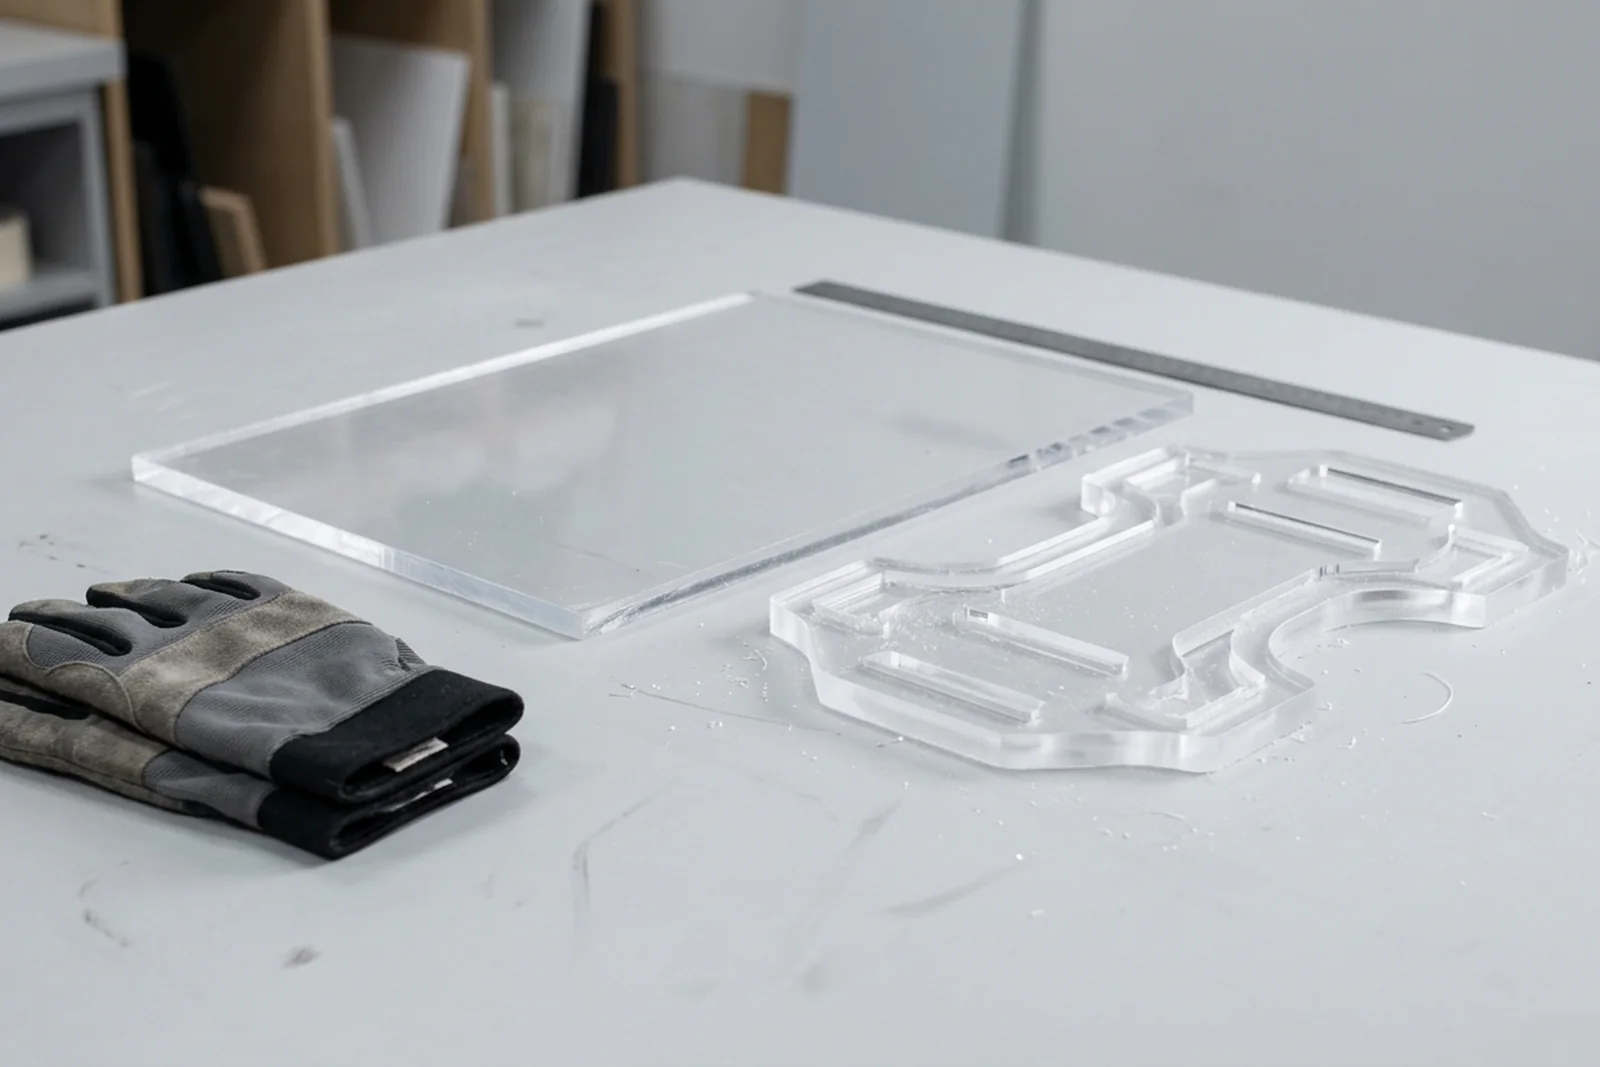
Stage 3: Cutting — Laser or CNC
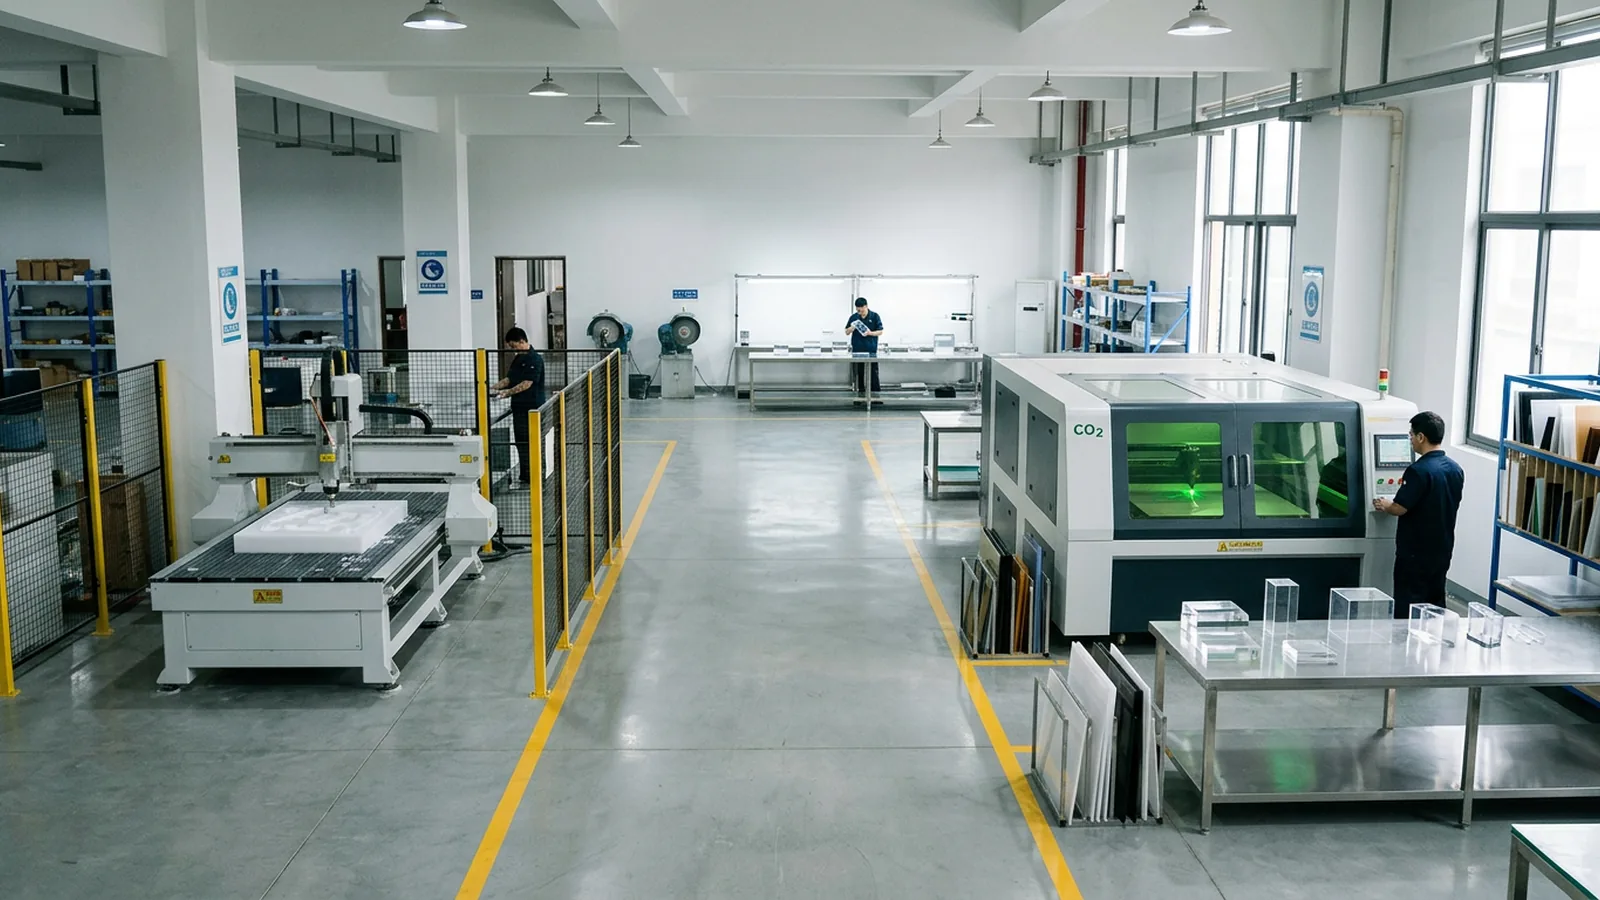
Sheet cutting is where the flat shape is created. We operate both laser cutters and CNC routing machines in-house at our 5,000 m² facility. The choice between them depends on material thickness, shape complexity, and tolerance requirements.
Laser cutting uses a focused CO₂ beam to vaporize material along a programmed path. It’s the standard method for acrylic up to 20mm thick — cutting speeds run 15–40 mm/s depending on thickness, tolerance holds ±0.1mm, and the cut edge is semi-polished (often described as “fire-polished”) directly out of the machine. Laser cutting is clean and fast for straight lines, curves, and complex 2D profiles. One limitation: the heat-affected zone on very thick material (above 15mm) can introduce micro-stress near the cut edge, which is why parts above that thickness move to CNC.
CNC routing uses a rotating carbide or diamond-tipped bit to mechanically mill material. It’s slower than laser but handles material above 20mm, produces lower internal stress at the cut edge, and allows interior cutouts with radii that a laser beam can’t follow cleanly. We use CNC for thick block material, structural parts in large display cases, and any tolerance below ±0.05mm. CNC cut edges require more post-processing — they come out matte and rough — so the next stage matters more after CNC than after laser.
Stage 4: Edge Finishing — Flame and Diamond Polishing
This is the stage I see underestimated most often on new buyer inquiries. Raw-cut acrylic edges — even laser-cut ones — are not optically clear. They’re translucent at best, showing a white haze that scatters light and looks unfinished. Edge polishing restores the optical clarity and gives the product its “glass” appearance. There are two methods — diamond vs flame polishing — and the choice depends on thickness and quality tier.
Flame polishing passes a controlled propane or hydrogen flame 5–10mm from the cut edge at a controlled speed. The surface layer melts and reflows, eliminating surface scratches and restoring transparency. It’s fast — a typical 300mm edge takes under 30 seconds — and effective for edges up to about 8–10mm thick. The limitation: flame polishing only affects the outermost 0.2–0.5mm, so if the underlying cut has micro-cracks or saw marks, they remain visible in certain lighting. For signage, lighter display stands, and standard retail product, flame polishing is the correct specification.
Diamond polishing uses a rotating diamond abrasive wheel to progressively cut and buff the edge through multiple grits, finishing at a sub-micron surface roughness. It produces a glass-clear, optically flat edge — the standard for premium display cases, acrylic awards, trophy bases, and anything where the edge is a visible feature. Diamond polishing takes roughly 3–5x longer than flame polishing per edge and costs proportionally more. On a 12mm edge, diamond polishing can add 25–35% to the per-piece fabrication cost, but it’s the right call when clarity is part of the product’s value proposition. We run a dedicated diamond polishing line separate from the flame station, which is one reason we can process both in parallel without cross-contamination.
Stage 5: Shaping — Bending and Thermoforming
Flat-cut acrylic becomes three-dimensional in the shaping stage. For simple right-angle bends — common in display stands, sign holders, and box sides — we use strip heaters that heat a narrow line across the sheet, making it pliable enough to bend without distortion. Bend radius is a function of thickness: a 5mm sheet bends cleanly to a 5mm minimum inner radius; below that, the material develops stress whitening at the bend. Bending is fast and tooling-free.
For complex curved shapes — cosmetic display risers with compound curves, custom packaging forms, presentation cases with sculpted profiles — we use thermoforming. The sheet is heated evenly to approximately 160–180°C in an oven, then draped or pressed over a machined mold (aluminum or MDF, depending on production volume) and allowed to cool. Thermoforming requires a physical mold, which adds a tooling cost of roughly $150–$500 depending on complexity and size, plus 3–5 additional days for mold fabrication. We typically amortize tooling cost over the run quantity — at 500+ pieces, the mold cost per piece becomes negligible.
Stage 6: Decoration — Printing, Engraving, and Hot Stamping
Decoration turns a fabricated acrylic form into a branded product. We run five decoration methods in-house; the right choice depends on the graphic type, durability requirement, and surface.
UV printing on acrylic jets UV-curable ink directly onto the acrylic surface and cures it instantly under UV light. It handles full-color photography, gradients, and fine detail — and it bonds to acrylic without the adhesion issues that plague some solvent inks. UV printing is the most versatile decoration method we offer and the default for cosmetics displays, retail POS pieces, and branded award bases.
Silk-screen printing uses a stencil and squeegee to push ink through a mesh onto the surface. It’s cost-effective for simple 1–3 color graphics at high quantities, produces a slightly raised ink layer that feels tactile, and holds color well over UV exposure. For high-volume retail signage and simple logo applications, silk-screen is the most cost-effective option.
Laser engraving removes material from the surface to create a permanent, recessed mark — logos, text, serial numbers. The engraved area reads white or frosted against the clear background. It’s permanent, requires no consumables, and is ideal for awards, commemorative pieces, and anything requiring anti-counterfeiting traceability.
Hot stamping presses a metallic or pigmented foil onto the surface under heat and pressure, producing a metallic gold, silver, or solid-color accent. Common on luxury packaging, award bases, and corporate recognition pieces where metallic finish is part of the premium positioning.
Stage 7: Assembly and Solvent Bonding
Multi-part acrylic products are assembled using solvent bonding — a process where a low-viscosity solvent (typically methylene chloride or ethyl acetate) is applied to the mating surfaces with a fine applicator. The solvent partially dissolves both PMMA surfaces, and as it evaporates, the molecular chains from each part interpenetrate and cross-link, forming a bond that is chemically part of the material — not an adhesive layer sitting on top of it. A properly made solvent bond is stronger than the surrounding acrylic and optically nearly invisible.
The critical process variables: joint gap (0.1–0.2mm for solvent to flow by capillary action — too tight and the solvent doesn’t penetrate, too loose and the bond line shows), fixturing (parts must be held square and under light pressure for 10–15 minutes while the solvent evaporates), and full cure time (24–48 hours before the assembly handles transit stress). I pay close attention to the cure time step in particular — the most common cause of field joint failure on complex assemblies is releasing the fixture too early and stressing the bond before it reaches full strength. Our production schedule builds 24 hours of cure time into every multi-part assembly before it moves to QC.
Stage 8: Quality Inspection — Checked Against the Approved Sample
Before an order ships, we check it against the buyer’s approved sample — not a specification sheet, but the physical sample the buyer signed off on before production. Dimensional checks with a caliper, surface clarity, edge polish quality, print color and registration, assembly fit, and hinge or mechanism function (where applicable). Comparing finished work back to the retained approved sample is the only reliable way to catch the inevitable production variation before it leaves the building — a specification sheet alone can’t do it.
The check sequence: dimension check against drawing (±0.2mm tolerance for standard production), visual check against approved sample (surface scratches, edge clarity, print registration), function check on assemblies (lid fit, hinge operation, stability on flat surface), and final confirmation of quantity and labeling. For fragile assemblies — large cases, thin frames — we also run a plain drop-check on a loaded sample case before packing. Pieces that fail any check are either re-polished (for surface issues), reprinted (for decoration issues), or remade from scratch (for dimensional or structural issues). Rework adds lead time — which is why catching the spec at Stage 1 is far cheaper than correcting it at Stage 8. The mechanism is simple: a spec error caught on a redline costs a markup and a day; the same error caught after cutting, printing, and bonding writes off all the material and labor already sunk into the piece. Our Stage 1 redline process exists specifically to move that catch as far upstream as possible.
Stage 9: Packaging and Freight
A display case that arrives scratched or cracked is a failed project regardless of how well it was fabricated. Our packaging standard: each piece individually wrapped in PE foam or bubble film, separated by foam dividers inside the carton, double-wall corrugated outer box sized to allow 50–80mm of foam on all six sides. Fragile assemblies — large cases, thin frames, mirror-surface pieces — get additional corner protection and “FRAGILE / THIS SIDE UP” labeling on every face of the outer carton.
Default shipping term is FOB Shenzhen. We can also arrange EXW, CIF, or DDP on request. Sea freight from Shenzhen to a US West Coast port typically takes 14–20 days for LCL (less-than-container load) shipments; air freight is 3–5 days. Most B2B buyers with regular order cadence consolidate at least quarterly to reduce freight cost per unit. For projects with tight launch deadlines, we can schedule production to hit specific vessel departure dates — flag this in your inquiry and we’ll build the timeline backward from your in-market date.
What This Means for Your Next Project
The nine-stage process above is why we ask for detailed drawings before quoting, why we send a physical sample before production, and why our lead times are 3–5 days for samples and 15–20 days for production. Each number reflects a real process with real constraints — not padding. When you know what happens at each stage, you can make smarter decisions: specify the right edge finish for your product’s visual tier, flag any thermoformed shapes early so we can factor mold time, and build your launch timeline around the actual freight transit, not an optimistic estimate.
We’ve run 2,000+ custom projects across display cases, cosmetics stands, trading card cases, awards, organizers, trays, and dozens of other product types. If you have a drawing — or even a rough sketch — send it to inquiry@wetopacrylic.com and we’ll walk you through the spec review within 24 hours. No commitment, no deposit — just a clear picture of what your project actually takes.
For related product details and specifications, see our pages on acrylic display cases, acrylic awards, acrylic boxes, and acrylic trays. For a factory-to-floor example of the full fabrication process applied to a real retail program, see the shelf-edge sign holders supermarket chain case study. For an industry where fabrication precision is directly visible to end customers, see our cosmetics and perfume display use cases — those buyers scrutinize every edge polish and seam.
Footnotes
-
Acrylic light transmittance per ASTM D1003 — Plaskolite OPTIX datasheet — manufacturer datasheet listing OPTIX acrylic total light transmission at 92% (Light Transmission – Total, ASTM D1003), the optical-clarity figure cited for cast and extruded acrylic. ↩
-
Acrylic tensile strength per ASTM D638 — MakeItFrom PMMA data — materials database listing PMMA tensile strength at 71 MPa and elastic modulus at 3.2 GPa (test method ASTM D638), confirming the 70–80 MPa range cited for cast acrylic. ↩
Frequently Asked Questions
How long does it take to make a custom acrylic product?
Sample lead time is 3–5 days from drawing approval. Production runs of 50–500 pieces take 15–20 days. Lead time increases at 500+ pieces or for complex assemblies with LED integration, multi-color printing, or thick cast material above 15mm, which requires longer raw material sourcing.
What machines are used to cut acrylic?
Laser cutters handle most acrylic work up to 20mm thick — they're fast, precise to ±0.1mm, and leave a clean edge on cast and extruded PMMA. Above 20mm, or for interior cutouts requiring tight-tolerance routing, we switch to CNC machines. Both methods are in-house at our 5,000 m² facility.
What is the difference between flame polishing and diamond polishing acrylic?
Flame polishing passes a controlled flame across the cut edge, melting the surface layer to restore transparency — fast and effective on edges under 10mm. Diamond polishing uses a rotating diamond bit to cut and buff the edge mechanically — slower but produces a glass-clear finish on thick material (10mm+) and is standard for premium display cases and awards.
Can you make any shape in custom acrylic fabrication?
Standard flat shapes — rectangles, circles, custom polygons — are handled by laser and CNC cutting. Curved and 3D forms use thermoforming (heating the sheet and pressing or draping over a mold). Compound curves require a tooling mold, which adds cost and 3–5 days lead time. Irregular flat shapes with no curves add no tooling cost.
How do you quality-check custom acrylic products before shipping?
Before an order ships, we check it against the buyer's approved sample — caliper-measuring the key dimensions and visually checking clarity, surface finish, print registration, and assembly fit. Fragile assemblies also get a plain drop-check on a loaded sample case. Pieces that don't match the approved sample are reworked or remade before shipping.
Have specs in hand? Get a quote for your specific project.
Send us your drawings, reference photos, or a description of what you're making. We reply within 24 hours with a material recommendation, thickness, fabrication method, and a per-unit quote.