---
title: "LED Light Box Frames — Spec Guide for Brands & Signage"
description: "Edge-lit vs backlit anatomy, panel stacks, graphic swaps, driver certs, and real lead times — an LED light box frame spec guide from the factory floor."
category: "Manufacturing"
author: "Dillion Chen"
authorCredential: "Production Manager at Wetop Acrylic — running laser, CNC, polishing, and UV printing lines since 2014, 1,500+ custom projects personally overseen"
datePublished: 2026-07-06
dateModified: 2026-07-06
primaryKeyword: "led light box frame"
url: https://wetopacrylic.com/guide/led-light-box-frame-spec-guide/
---
## What an LED light box frame is — edge-lit vs backlit anatomy {#what-is}
An LED light box frame is an illuminated display frame that lights a printed graphic from inside. Two architectures exist: edge-lit frames run an LED strip along the edge of an acrylic light-guide panel and stay slim, around 25 mm deep; backlit boxes place LED arrays behind a diffuser and trade depth for higher brightness.
The last stop on my bench yesterday was a lit panel in the darkest corner of our workshop, first-article inspection for an LED light box frame batch. I check three things before releasing production: light bleed at the corners, hotspots along the LED edge, and brightness uniformity across the face. A powered panel hides nothing. The spec you order against shouldn't either.
Most of what ranks for this search is retailer category grids: size, price, add to cart. That works if you need one stock unit. It doesn't answer what a signage OEM or brand buyer ordering a branded batch actually needs to know: what's inside the panel stack, how graphics get swapped in the field, and what the electronics mean at customs. The acrylic fabrication underneath is the same work that goes into our [custom acrylic frames](/products/acrylic-frames/) — cutting, polishing, bonding, assembly — with light and power added. This guide covers the frame-level spec, section by section, the way we build it.
## Inside an edge-lit frame — the panel stack {#panel-stack}
An edge-lit LED light box frame is a sandwich of five functional layers: a clear acrylic front panel, the printed graphic film, an acrylic light-guide panel (LGP) with an etched extraction pattern, a white reflector sheet, and a rear housing that carries the wiring and back plate. The LED strip runs along one or more edges of the light-guide panel, firing light into it sideways.
The five-layer edge-lit stack: light enters the 8 mm light-guide panel from the edge, scatters off the etched dot pattern, and exits forward through the graphic. The whole frame stays around 25 mm deep.
Each layer earns its place. The light-guide panel does the real optical work: its laser-etched dot pattern grows denser away from the LED edge, scattering more light where less arrives so the face reads evenly. The reflector sheet catches light headed backward and sends it forward again; on our test panels, running without it visibly dims the face. The front panel protects the graphic and squares up the face.
The layer buyers never ask about is the one my team spends the most time on: the light-guide panel's entry edge. When my operators polish that edge, they are not chasing cosmetics: a diamond-polished edge couples light into the panel cleanly, while a rough saw-cut edge scatters it at the entry point and shows up later as a bright band near the LEDs and a dim center. Ask any light box supplier how they finish the LGP edge; the answer says a lot. When I sign off a first article, that entry edge is the first thing under the loupe.
Two spec decisions live in this section of the order: single-sided or double-sided (a double-sided frame carries a graphic on both faces with the light-guide panel in the center), and how many edges carry LEDs. Small frames run fine on one edge; large formats usually need two or four for uniformity.
## Acrylic light box construction — why cast PMMA is the light guide of choice {#acrylic-light-box}
Acrylic light box construction standardized on cast PMMA for one reason: light budget. Clear cast acrylic transmits up to 92% of visible light[^plexiglas-transmission], takes a diamond-polished edge that couples LED output into the panel with minimal loss, and machines cleanly on laser and CNC lines. Glass is heavier and won't take an etched extraction pattern economically; cheaper plastics yellow and haze.
We fabricate every layer of the acrylic light box in-house (laser and CNC cutting, diamond polishing, bending and thermoforming for wrapped profiles, then assembly), which is why we can hold the edge quality that edge-lighting depends on. The same fabrication chain runs the LED acrylic work in our [floating-effect LED display stand project](/case-studies/led-acrylic-display-stand-floating-effect/), where edge-lit acrylic had to read as a clean glow with no visible hotspots on a retail counter. For the frame-format version of that work, see the [LED light box frame kits we built for a signage OEM](/case-studies/led-light-box-frames-signage-oem/).
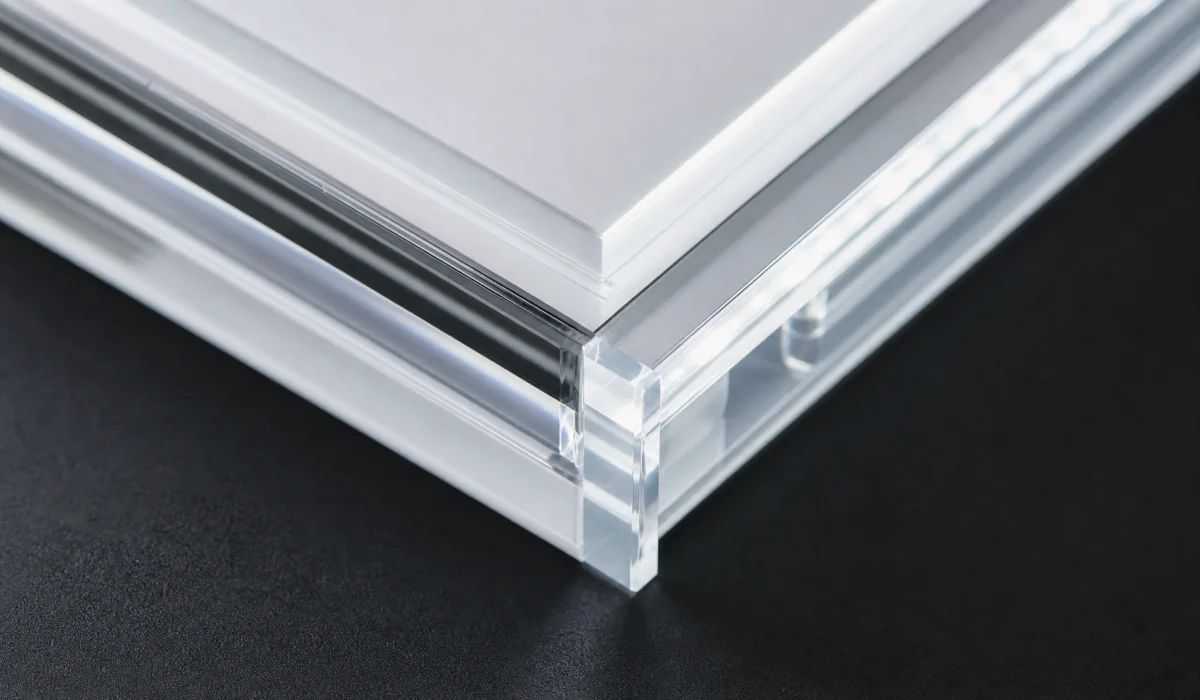
Corner detail of an edge-lit frame: the polished acrylic edge is the light's entry door. Finish quality here decides face uniformity more than the LED strip brand does.
We cover the material layer in depth (cast vs extruded PMMA for edge-lighting, optical grades, and why cast wins the spec) in our [edge-lit acrylic material guide](/guide/edge-lit-acrylic-cast-pmma-led-spec/). This guide stays at the frame level: how the panels, graphics, and electronics come together as a product you can order, brand, and service in the field.
## Backlit poster frame vs edge-lit frame — which fits which use {#backlit-vs-edge-lit}
A backlit poster frame puts an LED array behind a diffuser panel and the graphic in front of it; an edge-lit frame feeds light in from the side through a light-guide panel. Backlit wins on raw brightness and very large formats. Edge-lit wins on depth, weight, and the clean slim look brands ask for at eye level.
| Factor | Edge-lit frame | Backlit poster frame |
| --- | --- | --- |
| Typical depth | Slim, around 25 mm | Deeper, often 80 mm+ |
| Face brightness | Moderate to high | Highest — suits bright retail halls |
| Uniformity driver | LGP etch pattern + edge polish | LED spacing vs diffuser distance |
| Graphic format | Thin film print | Backlit film or duratrans-style print |
| Weight per m2 | Lower | Higher (housing + more panels) |
| Best fit | Corridors, elevators, fitting rooms, brand walls | Window displays, menu walls, large-format ads |
The honest rule we give buyers: pick by mounting depth and ambient light, not by catalog photos. We build both architectures on the same lines, so we have no horse in this race; the recommendation follows the wall, not the product list. In a bright storefront window competing with daylight, a backlit box earns its depth. In a corridor or beside a doorway where the frame must sit nearly flush, edge-lit is the only comfortable answer. The LEDs themselves are the least of the problem either way. LED sources run efficient and long, using at least 75% less energy than the incandescent lamps they replaced and lasting far longer[^doe-led], so the architecture choice is really about optics and installation, not lamp life.
One more variable I flag on every RFQ: ambient heat. Backlit arrays concentrate more diodes per frame, and in an enclosed housing that means more thermal load on the driver. It rarely matters in normal retail interiors, but for enclosed outdoor pylons or sun-facing windows, flag it in the RFQ so we spec the driver and housing for the load.
## Graphic swapping — magnetic fronts, snap frames, and film types {#graphic-swap}
How the graphic comes out of the frame matters more over the product's life than how the frame looks on day one. Three swap systems dominate: magnetic front panels that lift off without tools, snap-open rail frames that hinge along each side, and fixed fronts that require partial disassembly, acceptable only for permanent graphics.
Magnetic fronts are what we recommend for campaign-driven retail programs. The front acrylic panel seats on concealed magnet pairs; store staff pull it off, swap the film, and reseat it in under a minute, with no tools touching the polished face. Snap rails suit larger poster formats where a full lift-off panel would be unwieldy: the aluminum or acrylic rails hinge open one side at a time.
The film itself is a consumable, so spec it with the hardware. Edge-lit frames take thin translucent film prints; backlit boxes usually run heavier backlit film that diffuses the denser light behind it. Two rules I give every film order: buy spares with the first batch (we print them alongside the frames for a fraction of a separate later run), and confirm the film's trim tolerance against the frame's graphic pocket, because a film cut loose rattles and a film cut tight bubbles. If a program needs the graphic printed directly on the acrylic instead of on swappable film, that's a different product decision, and it trades away every future campaign change.
## Power and safety specs for import — drivers, certification, wiring questions to ask {#power-safety}
The acrylic frame clears customs as a plastic article. The LED driver, strip, and plug are electrical components, and they carry the compliance burden of the destination market. Before production starts — not at the port — get written answers on four points: driver certification, input voltage, plug type, and low-voltage wiring layout.
Here is the checklist we walk buyers through:
- **Driver certification for your market.** North American signage falls under safety standards such as UL 48 for electric signs[^ul-48]; EU/EEA-bound electrical components need CE marking under the applicable directives[^ce-marking]. Ask your supplier, including us, to state in the quote which listings the driver and power supply carry, and ask for the certificate documents with the pre-shipment paperwork.
- **Input voltage and plug.** 110 V and 220–240 V regions need different drivers and plugs. A frame wired for the wrong region is not a defect an adapter fixes on-site.
- **Low-voltage layout.** Most LED light box frames run the strips at 12 V or 24 V DC off an external or bay-mounted driver. Confirm where the driver sits (in-frame bay vs inline brick), cable exit position, and cable length against the mounting plan.
- **Serviceability.** Ask whether the strip and driver are replaceable without destroying the frame. On our builds the wiring channel is accessible from the back plate for exactly this reason.
I won't list component brand names or certification claims here that I can't put on your specific quote. LED sourcing shifts, and the real version of this section is a set of questions we, or any supplier, must answer in writing per order and per market. A supplier who resists putting driver certification in the quote is telling you in advance how the warranty conversation will go.
## Lead time reality for made-to-order LED frames — no stock, and why {#lead-time}
We do not keep LED light box frames in stock, and after twelve years running these production lines I can tell you no factory doing genuinely custom illuminated work does. Samples ship in 3–5 days, production runs 15–20 days, and our MOQ is 50 pieces. Anyone quoting "in stock, ships tomorrow" is selling a fixed-size catalog unit.
The reason is that almost nothing on an LED light box frame order is generic. Size sets the light-guide panel cutting program and the LED edge count. Single vs double-sided changes the whole stack. Your graphic format sets the pocket depth and swap hardware. Your power region sets the driver and plug. Building those combinations ahead of demand would mean warehousing the wrong frames, so the industry builds to order, and a straight quote says so.
Buyers still email us the same message every month: "Do you have 150 of these available — what's the earliest you can ship?" The useful answer is a real timeline, so here it is. Day 0: confirmed spec and deposit (30% down, with the 70% balance due before shipment). Days 3–5: sample in hand. Power it on a real wall, check uniformity and edge bleed, approve the swap system. Days 5–25: production and 100% inspection, every unit powered on before packing. If the deadline is tighter than the roughly 4–6 week door-to-door sea lane (3–5 weeks port-to-port) allows, air freight or an air-first split shipment closes the gap; that costs real money, and we will price it straight rather than promise stock that doesn't exist.
The one shortcut that works: approve the sample fast. Sample approval is the gate production waits behind, and in my experience it is where deadline orders lose the most days, not on the cutting tables.
## How to spec your LED light box frame order {#spec-checklist}
A complete LED light box frame spec fits in ten lines, and a factory that gets all ten can quote accurately in one pass. Send us these ten lines (they are the exact intake I quote from) and we skip two rounds of clarification email:
1. Overall frame size (visible graphic area, or outside dimension — say which)
2. Edge-lit or backlit — or the mounting depth limit, and we'll recommend
3. Single-sided or double-sided
4. Graphic swap system: magnetic front, snap rails, or fixed
5. Graphic count per frame per year (drives spare-film order)
6. Quantity, and whether this is a pilot for a larger rollout
7. Power region and plug type
8. Mounting: wall, ceiling-hung, or freestanding
9. Branding: printed logo, engraved mark, or none
10. Deadline — the real one, so we can tell you exactly what fits
Send the list, a sketch, or even a photo of a frame you want to improve on through our [project inquiry form](/contact/?source=led-light-box-frame-spec-guide), and you'll get a spec-level answer, not a catalog link. If the choice between an illuminated frame and another custom build is still open, our [customization page](/customization/) shows what the same fabrication lines can do beyond light boxes.
[^doe-led]: [LED Lighting — U.S. Department of Energy, Energy Saver](https://www.energy.gov/energysaver/led-lighting) — DOE reference stating LED products use at least 75% less energy and last far longer than incandescent lighting, supporting the lamp-efficiency and lifetime statements in the edge-lit vs backlit comparison.
[^ul-48]: [UL 48 — Standard for Electric Signs (UL Standards & Engagement)](https://www.shopulstandards.com/ProductDetail.aspx?productId=UL48) — the safety standard covering electric signs, cited where this guide discusses the certification questions importers must ask about LED drivers and sign electricals for the North American market.
[^ce-marking]: [CE marking — European Commission, Internal Market](https://single-market-economy.ec.europa.eu/single-market/ce-marking_en) — the official EU page on CE marking requirements, supporting the statement that electrical components bound for the EU/EEA must carry CE marking.
[^plexiglas-transmission]: [Light transmission — PLEXIGLAS (Röhm)](https://www.plexiglas.de/en/service/product-info/light-transmission) — manufacturer data showing clear-transparent PMMA transmits up to 92 percent of light in the visible range, the value behind this guide's light-budget statements.