---
title: "Reduce Cost Custom Acrylic Display: 7 Levers"
description: "Use seven levers to reduce cost in custom acrylic display programs: thickness, joinery, edge polish, print, packaging, SKU pooling, and their tradeoffs."
category: "Buyer Guide"
author: "Amy Liu"
authorCredential: "Client Account Manager at Wetop Acrylic — coordinating B2B orders from first inquiry through delivery since 2020, 500+ custom projects handled"
datePublished: 2026-08-08
dateModified: 2026-08-08
primaryKeyword: "reduce cost custom acrylic display"
url: https://wetopacrylic.com/guide/custom-acrylic-display-value-engineering/
---
## Where a target-cost conversation actually starts {#lever-order}
The email I open two or three times a month has the same shape: the design is approved, the quantity is fixed at 500, and the quote sits a dollar and change above what finance will sign. The buyer doesn't want a different display — they want to know what would have to move on the materials side to close the gap. That request is what this guide answers: the seven levers we use to reduce cost custom acrylic display programs carry at a fixed quantity, in the order a quote conversation actually explores them, with what each one trades away stated plainly.
The seven, in order: wall thickness, footprint and height trims, joinery, polish level per edge, artwork method, packaging cube, and multi-SKU pooling. Quantity is deliberately off this list. Volume tiers, tooling amortization, and the unit-cost curve from 100 to 10,000 pieces are their own subject, and we've written that math up separately in our [custom acrylic display cost guide](/guide/custom-acrylic-display-cost-100-to-10000-pcs/). This guide assumes the quantity is set and the [custom acrylic display](/products/acrylic-displays/) design is one worth keeping.
One ground rule before the levers, because it addresses the most common frustration I hear from display buyers: every price move should trace to a named spec change. When a quote drops 15%, the buyer should be able to point at the lines that moved — thinner back panel, laser-finish hidden edges, flat-pack carton — and when a revision quote comes back higher, the same rule applies in reverse. A fabricator who can't show the line that moved is asking you to negotiate against a number instead of a spec.
---
## Lever 1 — thickness step-downs, priced against the stiffness you give up {#thickness}
Thickness is usually the first lever we reach for because material is the largest single cost block on most display quotes, and sheet cost tracks thickness almost linearly: a 5 mm to 4 mm step removes roughly a fifth of that panel's material cost. It is also the lever with the most honest tradeoff attached, so it deserves the most careful handling.
The tradeoff is not linear — it's cubic. A panel's bending stiffness scales with the cube of its thickness, because the moment of inertia of a rectangular section is proportional to t³; the elastic modulus of cast acrylic itself sits around 2,400-3,450 MPa and doesn't change with gauge.[^modulus] Run the cube math on the 5-to-4 step and the panel keeps only about 51% of its stiffness (4³/5³ = 0.512). Spend 20% of the material line, lose 49% of the panel's resistance to flex. Whether that trade is safe depends entirely on span and support: a 4 mm wall in a boxed riser section barely notices, while a 4 mm shelf spanning 400 mm under product weight visibly sags. The span-by-span math lives in our [acrylic thickness engineering guide](/guide/acrylic-thickness-engineering-load-math/) for anyone who wants to run the numbers on a specific shelf.
In practice we almost never step a whole display down one gauge. We step panels down selectively: back panels, dividers, and boxed walls take the thinner gauge; unsupported shelves and any panel a customer's hand will press on keep the original. I once had a buyer ask whether a thinner front panel would still leave a deep enough well for the product it holds — exactly the right question, and one I now raise myself before buyers do. Any thickness change on a fit-critical panel should trigger a revised sample before bulk, not after.
---
## Lever 2 — footprint and height trims that respect sheet nesting {#footprint}
The second lever is dimensional, and it works differently than most buyers expect: acrylic parts are cut from standard sheets — 1220 × 2440 mm is the common gauge — so part cost falls in steps, not slopes. A 10 mm trim that lets one more part row nest across the sheet cuts real money; a 40 mm trim that doesn't change the nesting count cuts almost nothing.
This is why we ask for tolerance on dimensions rather than proposing arbitrary shrinkage. If a riser tread is 260 mm and four columns of parts nest across the sheet with waste, nothing happens until the tread reaches the width where a fifth column fits — at which point the same sheet yields 25% more parts and the material line drops accordingly. Height works the same way against the sheet's other axis, and so does wall layout on multi-panel builds, where our production team nests every panel of the display across shared sheets like a puzzle.
What this lever gives up is usually small but real: a slightly shallower tread, a slightly shorter header. The discipline is to ask the question in the right direction. Don't ask "can we make it smaller to save money" — ask "which dimension, moved by how little, changes the parts-per-sheet count." Sometimes the answer I have to give is that the dimensions already nest cleanly and this lever has nothing to offer, which is worth knowing in itself: it sends the conversation to the next lever instead of shaving millimeters for no return.
---
## Lever 3 — joinery: bonded seams vs slot-fit vs hardware {#joinery}
Joinery decides two cost lines at once — bonding labor and freight cube — which makes it the biggest structural lever on the list. Fully bonded seams give a seamless, furniture-grade look and ship assembled. Slot-and-tab construction cuts most of the bonding labor and lets the display flat-pack. Hardware assembly (standoffs, screws) trades bonded labor for parts cost plus field assembly.
Solvent-bonded seams are hand labor: each joint is aligned, bonded, and cured, one display at a time. On a multi-panel counter unit, bonding can rival material as a cost block. A slot-and-tab version of the same display is cut with the joints in the parts themselves — tabs on one panel, slots on the mating panel — so most of the hand-bonding drops out of the labor line, and the display can ship as flat panels the store assembles in a couple of minutes.
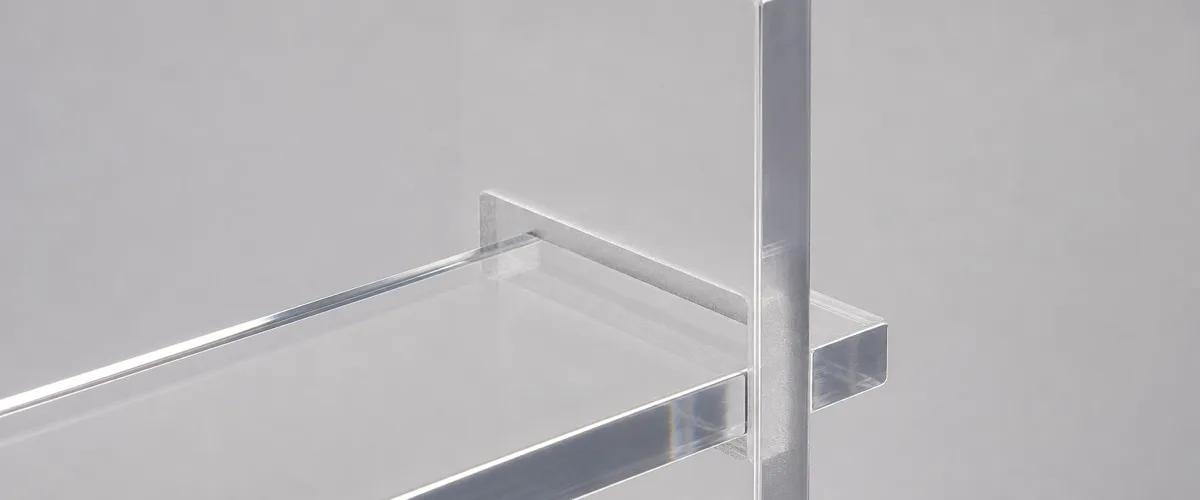
A slot-and-tab joint seats the mating panel without hand bonding. The tab shows at the joint line — the look traded for lower labor and a flat-pack carton — while the mirror-polished visible edge next to the satin slot interior previews the per-edge finish logic of Lever 4.
The tradeoff is visible and you should decide it with your eyes, not on a call: slot-and-tab joints show their tabs at the joint line, and a knock-down display will never read quite as seamless as a bonded one. For a premium beauty counter, that's often disqualifying; for a supermarket or trade-show unit that lives three months, it's frequently invisible in context. Hardware assembly sits between the two — clean look, replaceable parts, but every screw and standoff is a purchased component plus a labor touch. We build all three constructions, so this lever is a genuine choice rather than a push toward whatever the factory prefers.
---
## Lever 4 — polish level, edge by edge {#polish}
Edge finishing is priced per meter of edge, which means the cheapest way to cut the polishing line isn't a cheaper polish — it's polishing fewer edges. At typical retail-display volume, our edge-cost ranking runs about $0.40 per meter for the CO2 laser-cut edge itself, $0.80 for diamond polishing, $1.20 for flame polishing, and $2.50 for CNC-machined edges that need a follow-up polish.
The useful fact inside that ranking: on cast acrylic, a CO2 laser leaves a near-polished edge straight off the machine — no second operation, no extra cost. So the question on every panel becomes which edges a shopper will actually see. Front edges, top edges, anything at eye level: keep the mirror finish. Back panel edges, bottom edges, internal slots, anything facing a wall or another panel: let them ride the laser finish. On a display with 3-4 meters of total edge per unit, specifying finish per edge instead of per display routinely halves the finishing line with zero change to what the shopper experiences. The full method-by-method breakdown, including where geometry forces flame over diamond, is in our [acrylic edge quality guide](/guide/acrylic-co2-laser-cutting-edge-quality/).
What you give up: nothing visible, if the per-edge map is honest — that's what makes this the closest thing to a free lever on the list. The risk is a lazy map. An edge you classified as hidden that turns out to sit at a sightline in the actual store fixture will read as unfinished. When we quote a per-edge polish spec, we mark the edge map on the drawing and ask you to confirm it against how the display actually sits in the store, because "hidden" is a claim about the store, not about the part.
---
## Lever 5 — artwork and print method {#artwork}
Branding method is a quiet lever because buyers tend to treat the artwork as fixed once the design is approved. It isn't. The same logo can land on the display as full-color UV print, a one- or two-color silk-screen pass, a laser-engraved tone-on-tone mark, or nothing at all — and those routes carry meaningfully different setup and per-unit costs at volume.
Full-color UV printing earns its cost when the artwork genuinely uses it: gradients, photography, multi-color brand systems. But a large share of display artwork is a single-color logo and a strapline, and a one-color silk-screen pass produces that at lower per-unit cost once the screen is made, with the screen itself a one-time setup that amortizes across the run and any reorder. Laser engraving removes the ink question entirely — a permanent frosted mark with no consumables — at the cost of color: it's tone-on-tone or nothing. And the extreme end of this lever is the blank display: if the brand presence can live on a printed card or the product packaging itself, deleting print from the acrylic removes the whole line.
The tradeoff is brand fidelity, and it's not ours to judge — some brand teams will trade a gradient for a clean one-color mark without blinking, others won't, and both are right for their programs. What we can do is quote the same display with two artwork routes side by side, so the per-unit delta is a number on paper instead of a guess. When the artwork changes route, plan one revised proof or sample: print method changes how the mark sits on the material, and sign-off should happen on the real thing.
---
## Lever 6 — packaging and the freight cube {#packaging}
Packaging is the lever buyers see last because it isn't on the display at all — but freight is priced substantially by volume, and a display program ships a lot of air. Courier and air freight bill by dimensional weight whenever a shipment's volume outruns its actual mass,[^dimweight] and sea freight prices per cubic meter. Shrink the packed cube and the freight line follows it down.
Two packaging plays do most of the work. The first is the knock-down pack from Lever 3: a display that ships as flat panels packs into a carton a fraction of the assembled height — on a typical counter unit, well under half the assembled cube. The second is nesting: open-top displays and graduated sizes can stack one inside the next, the way mixing bowls do, so five units occupy little more volume than one. Both plays are design decisions made at the drawing stage, which is why we raise packaging in the quote conversation rather than at booking time, when the cube is already locked.
What you give up depends on the play. Knock-down costs the assembled-seamless look (the Lever 3 tradeoff again — the two levers are really one decision viewed from two sides), and nested packing needs interleaving protection so stacked units don't scratch in transit, which adds a small materials line while removing a much larger freight one. The honest accounting is landed cost: FOB unit price plus freight plus duty, compared spec to spec. A packaging change that adds $0.15 of protective sheet and removes $0.90 of freight per unit is a good trade that a quote-to-quote comparison would completely miss.
---
## Lever 7 — pooling SKUs to make MOQ economics work {#pooling}
The last lever isn't on the display at all — it's in how the order is structured. Our minimum is 100 pieces per design, because programming, setup, and first-article inspection are fixed costs per geometry. But related designs don't have to carry those fixed costs alone: same-process families are quoted together, nested across shared sheets, and run in one production window, and that structure prices far better than the same SKUs ordered separately.
A worked shape of this: a brand needs a counter unit in three sizes, 300 total pieces. Quoted as three separate POs, each geometry carries its own sheet ordering, scheduling, and setup overhead in isolation. Quoted as one family of 3 × 100, the panels of all three sizes can share a production window while each design still meets its own minimum. The full reasoning behind the floor is in our [MOQ economics guide](/guide/moq-50-pieces-economics/). The pattern scales: we built a 650-unit, three-SKU counter display program for a beauty brand using one family, shared production, and a staggered store rollout, documented in our [beauty brand counter display case study](/case-studies/beauty-brand-counter-display-program/).
The tradeoff is coordination, not money. A pooled family works when the designs genuinely share process — same material family, same finishing route, compatible artwork method — and when your team can approve the family's samples on one cycle rather than trickling decisions across months. If one SKU needs four revision rounds while two are ready, the family waits for its slowest member or splits back into separate runs, and the pooled economics soften. Pool what's truly parallel; split what isn't.
---
## Worked example: one counter riser, two build specs {#worked-example}
Here is the arithmetic of several levers pulled together, on a deliberately generic spec: a 250 × 200 × 300 mm three-tier clear counter riser at 500 pieces. The numbers below are illustrative engineering math on round figures — not a quote, not a client project — but the structure of the saving is exactly what a real value-engineering pass looks like on paper.
Spec A is the display as first briefed: 5 mm cast acrylic throughout, fully bonded seams, diamond polish on all edges, full-color UV brand panel, shipped assembled in a foam-fitted carton. Spec B keeps the same silhouette and pulls four levers: 4 mm walls where the boxed geometry carries it, slot-and-tab joinery, polish on visible front edges only, a one-color screen print, and a flat-pack carton.
Four levers pulled on one generic riser spec: thickness where the geometry carries it, slot-fit joinery, per-edge polish, and a flat-pack carton. The blue deltas are what the buyer gains; the orange one is what the design gives up.
Line by line, the illustrative arithmetic runs like this. Spec A at 500 pieces breaks down to roughly $4.20 material, $1.60 cutting and machining, $1.90 edge polishing, $1.70 bonding and assembly, $0.80 print, $0.60 packaging, $0.60 amortized setup — about $11.40 FOB per unit. Spec B: material falls to about $3.40 with the stepped 4 mm walls, polishing to $0.80 with the per-edge map, bonding labor nearly disappears at $0.30, the one-color screen runs about $0.45, the flat carton $0.35, cutting and setup roughly unchanged — about $7.40, a 35% reduction before the freight line shrinks another way entirely with the smaller cube.
Read that result with the right caution. Few programs pull every lever at once, and few should: the tabs are visible, the walls flex more, the brand mark is one color, and someone in the store spends two minutes assembling each unit. Most real conversations I coordinate land on two or three levers and a 10-20% move — enough to close a budget gap without changing what got the design approved in the first place. The point of the example isn't the 35%; it's that every dollar of it traces to a named line.
---
## What we refuse to cut {#what-not-to-cut}
A value-engineering pass has edges, and naming them is part of the service. There are cuts we'll push back on because they save money in the quote and spend it in returns, damage, or a display that undermines the product it holds.
We won't step thickness down on fit-critical or load-bearing panels without a revised sample — a wall that holds your product's weight, a well your product sits in, a shelf a shopper leans on. The cube-law math above is exactly why: the cost saving is linear and the stiffness loss isn't. We won't drop polish on edges that sit at a sightline, because an unfinished edge at eye level reads as a defect, not a saving. And we don't swap material grades silently: if a spec change would move your display onto a different sheet type, that appears on the quote as a named line with its own tradeoffs, never as an invisible substitution behind a lower number.
The same honesty applies in the other direction — when a lever has nothing to give, we say so. Some designs already nest cleanly, already carry minimal edge meterage, already ship dense. Finding two dollars in a quote that doesn't contain them helps nobody; you'd pay for it later in a sample that disappoints.
If you're holding a quote and a target number that don't yet meet, [send us both](/customization/) along with the quantity. We'll walk the seven levers against your actual geometry and return a revised quote with each lever priced as its own line — take the ones that work for your brand, leave the ones that don't. And if you're still at the napkin stage, [send a sketch or reference photo](/contact/?source=custom-acrylic-display-value-engineering) instead; pointing the design toward the budget from the start beats engineering cost out of it afterward.
[^modulus]: [Cast acrylic tensile/flexural modulus 350,000–500,000 psi (≈2,400–3,450 MPa), per ASTM D638/D790](https://www.ipolymer.com/pdf/Acrylic.pdf) — acrylic-PMMA property datasheet listing the modulus range behind the panel-stiffness math; modulus is a material constant, so stiffness changes with geometry (thickness cubed), not with the grade of a thinner sheet.
[^dimweight]: [FAQ: How Do I Calculate Dimensional Weight? — eFulfillment Service](https://www.efulfillmentservice.com/2012/11/how-to-calculate-dimensional-weight/) — fulfillment-industry explainer of carrier dimensional-weight pricing, under which parcel and air freight bill by package volume when it exceeds actual weight — the reason knock-down and nested packs cut the freight line on display programs.