---
title: "Acrylic Table Numbers: Bulk Event Order Guide"
description: "Acrylic table numbers for event planners and stationery studios: thickness that stands, print vs engrave cost, color-matched samples, event-date planning."
category: "Buyer Guide"
author: "Amy Liu"
authorCredential: "Client Account Manager at Wetop Acrylic — coordinating B2B orders from first inquiry through delivery since 2020, 500+ custom projects handled"
datePublished: 2026-08-11
dateModified: 2026-08-11
primaryKeyword: "acrylic table numbers"
url: https://wetopacrylic.com/guide/acrylic-table-numbers-wedding-event-guide/
---
## What an 800-piece table number order actually looks like {#short-answer}
A brief I received from a stationery studio last season read, in full: "acrylic table numbers, gold, about 850, event in June." Acrylic table numbers are laser-cut acrylic panels or blocks, printed or engraved with numerals, built to stand on banquet tables — and a bulk run in the hundreds needs five specs that one-line brief never contains: build route, thickness, print method, color reference, and the true count-back date. Our minimum is 100 pieces per design, samples ship in 3-5 days, and production runs 15-20 days after sample approval.
The 850 was the easy part. What turned that brief into a production file was everything around the number: whether the panels stand in bases or stand alone, whether "gold" meant gold print, gold mirror sheet, or a gold-engraved fill, and whether June meant June 1 or June 28. This guide walks those decisions in the order I walk them with planners and stationery studios — the buyers running 100-900 piece programs, for whom a table number is inventory, not a craft project.
One framing note before the specs. The search results for this category are consumer listings sold in sets of ten. A planner outfitting a season or a studio reselling a signage line is buying something different: repeatable files, batch color consistency, and a factory that answers for the whole run. That is the order this guide is written for.
---
## Thickness that stands: standing is a footprint problem {#thickness-stands}
The most common spec question I get on acrylic table numbers — what thickness stands up? — has a slightly sideways answer: none of them, alone. A flat panel on a banquet table stays upright because of its footprint, not its gauge. Thickness buys flatness, edge presence, and weight in the hand; the standing is done by a base, a bend, or a block.
That sorts our table number work into three build routes, and every program we quote lands in one of them:
| Build route | Typical spec | How it stands | Best for |
|---|---|---|---|
| Panel + slotted base | 3mm panel, 4-5mm premium; base 18-20mm tall | Slot grips the panel; base depth resists knocks | Most programs — swappable numbers, flat-pack freight |
| L-bend self-standing | 3mm sheet, heat-bent 90 degrees | Its own bent foot | Fast resets, no loose parts to lose |
| Solid block | 15-20mm slab, polished edges | Stands as a slab | Premium single-venue looks, engraved or printed |
The panel-and-base route dominates for a reason planners care about: the number and the base pack flat, and a damaged panel is replaced without replacing the base. In the slot itself the gauge earns its keep — we cut base slots a hair over the measured thickness of the panel stock, enough clearance to seat without rattling, and a 4-5mm panel seats with a firmness that 3mm cannot fake. Sizing conventions come from the stationery world: 4 x 6 inches is the standard table number size, displayed in a holder so it reads across the table[^theknot-numbers], and 5 x 7 is the step up venues with longer sightlines ask for.
The three build routes for acrylic table numbers, side-on: a 3-5mm panel in a slotted base, a 3mm L-bend on its own foot, and a 15-20mm block standing as a slab. Footprint, not gauge, keeps a number upright through a six-hour reception.
The L-bend deserves one honest caveat: it trades the premium edge-on look of a based panel for operational simplicity, and a bent 3mm number will always read lighter than a 5mm panel in a polished base. Venues that reset tables nightly love it anyway — there is no base to orphan. The block route sits at the other end: a 15-20mm slab reads as a signature object, engraves with real depth, and prices like the material it consumes. The same footprint logic runs everything we build in our [acrylic display line](/products/acrylic-displays/), from risers to [sign holders](/products/acrylic-displays/acrylic-sign-holders/) — a table number is a small sign with a hard deadline.
---
## Print vs engrave: the cost logic at 100-900 pieces {#print-vs-engrave}
The second spec that moves an event-quantity quote is the marking method, and the honest way to choose is by how each method's cost behaves as the count climbs. Laser engraving prices on machine time per piece with zero setup. UV print prices on the area of ink coverage per piece. Screen print front-loads a per-color screen charge and then runs cheap per piece.
That behavior sorts the use cases cleanly. A single-tone numeral set — frosted-white numbers on clear, the most-ordered look in this category — is engraving territory: the laser spends seconds per digit, the mark is permanent, and there is no ink to scratch, lift, or mismatch between batches — our laser line has been cutting and marking acrylic since 2008. The moment the design adds a second color, a painted-style motif, or a photographic texture, UV print takes over; it lays full-color artwork directly on the sheet in one pass, and the process mechanics are covered in our [UV printing on acrylic guide](/guide/uv-printing-on-acrylic/). Screen print earns its setup fee only when one color runs in the many hundreds — a 900-piece single-color program is exactly where it starts to beat UV per piece.
Two things surprise buyers here, and I flag both on every quote call. First, numerals barely move the price: the difference between "1" and "28" is milliseconds of laser time or a fingernail of ink, so a 1-30 set quotes nearly flat per piece — it is the shared motif, border, or logo that sets the per-piece cost. Second, engraving and printing combine well: an engraved numeral with a UV-printed accent band gives the permanent mark and the brand color in one panel, and the two operations run on our production line back to back — laser, print, polish, and inspection all happen [under one roof](/customization/) rather than across subcontractors.
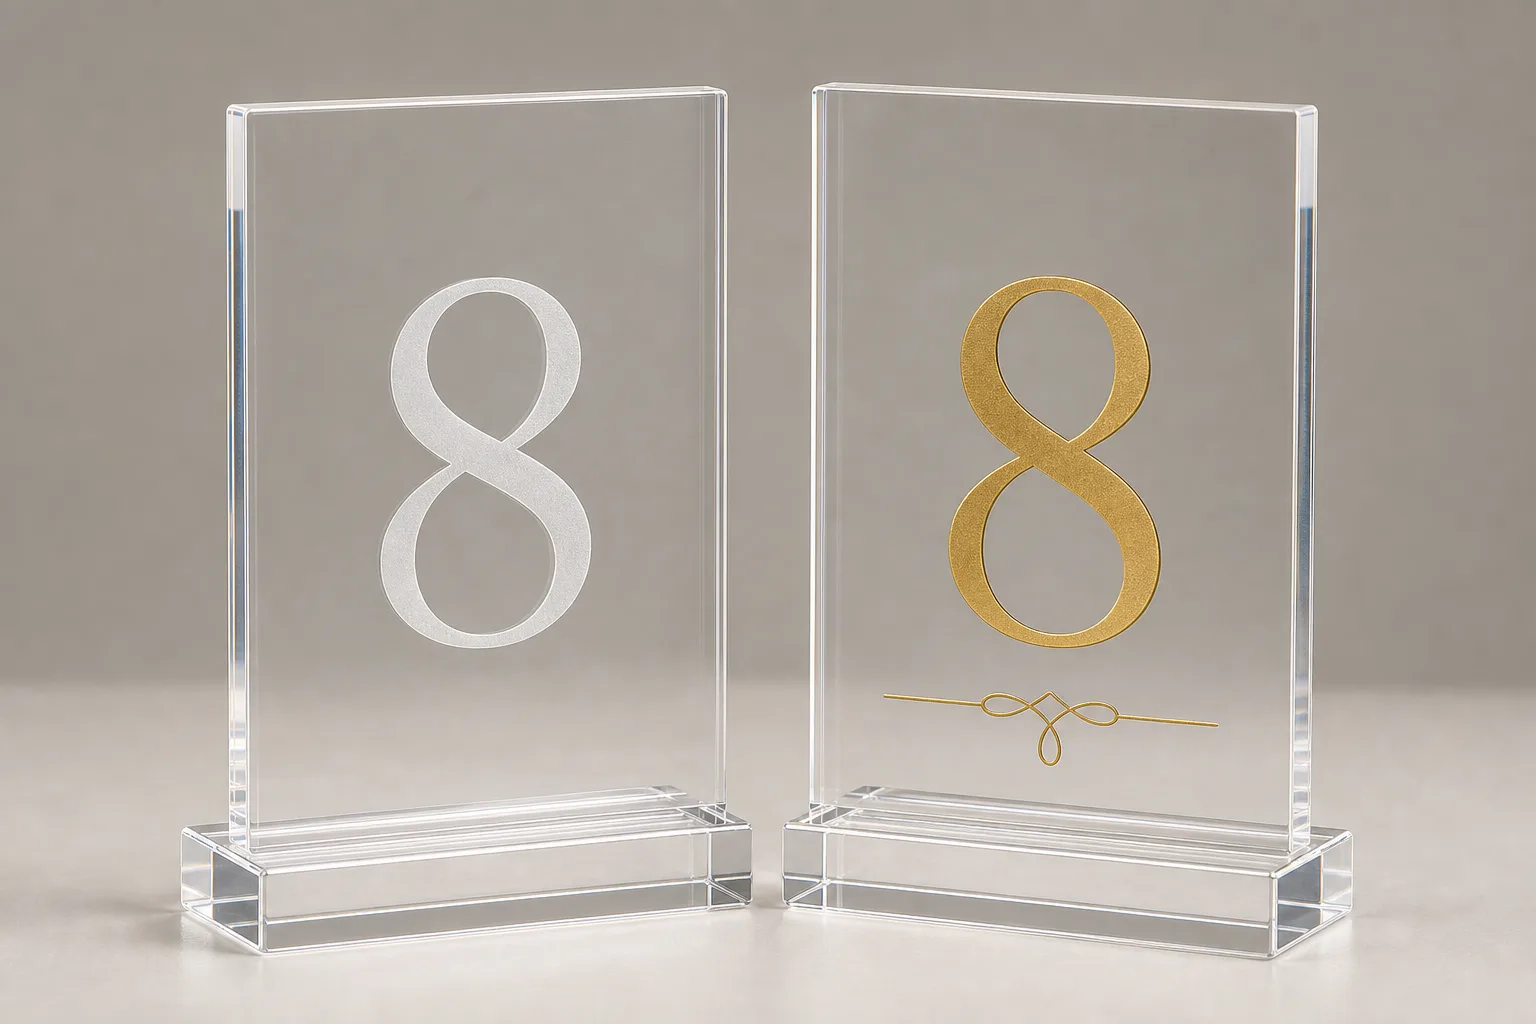
The two marking routes side by side: a laser-engraved frosted numeral (left) and UV-printed color artwork (right). At 100-900 pieces, engraving prices on machine seconds, print on covered area — the motif, not the numeral, drives the difference.
---
## Color matching and the sample gate before bulk {#color-sample}
Here is the part of a bulk event order I refuse to rush, because it is the part that has no repair path: color. A color-matched, physically shipped, written-approval sample before bulk production is the single gate that protects an 800-piece run. Skip it, and "blush" interpreted 5% too pink becomes 800 wrong pieces with an event date behind them — a re-run, not a touch-up.
The gate works like this on our side. You send a color reference — a Pantone number, a printed swatch, a ribbon, even a photographed linen sample. We match it two ways depending on the build: as a printed color laid down by UV (calibrated against your reference, then locked for the batch) or as a tinted sheet. Standard sheet colors — clears, frosts, black, white, common tints — come from stock. An exact custom sheet tint means a one-time color-matching run, quoted per project — worth it for a studio's signature shade that will reorder, rarely worth it for one event. Then a finished sample ships to you in 3-5 days, you approve it in writing under the lighting that matters, and that physical piece becomes the standard every one of the 800 is inspected against.
I added "under the lighting that matters" from experience: ballroom tungsten, marquee daylight, and warehouse LED render the same gold three different ways. A planner who checks the sample at the venue, or at least under warm light, catches in one evening what no screen proof can show. This is the same approve-then-produce discipline in our [pre-production process](/customization/), and it is why we quote the sample round inside the timeline rather than as an optional extra — on color-critical event work it is not optional in any way that protects you.
---
## Invitations and name cards from the same file set {#invitations-name-cards}
Once the table numbers are specced, the rest of the acrylic suite costs almost nothing to add to the same order — and keeping it in one order is where the quality argument lives. Acrylic invitations in bulk, name cards at guest-count volume, and table numbers cut from the same color batch stay consistent in a way three separate purchases never will: same sheet lot, same print calibration, same inspection standard.
The specs shift by role. Invitations mail flat and never stand, so they drop to 2-3mm — thick enough to feel like an object rather than a card, thin enough to keep mailing weight sane — and they are sized against the envelope, not the eye: the standard A7 invitation envelope measures 5 1/4 x 7 1/4 inches[^searles], so a 5 x 7 invitation panel ships in the envelope stationery suites already use. Name cards run smaller and thinner still, and their quantity logic is different: guest-count, not table-count, which is how a 15-table event becomes a 150-name-card line on the same PO. Printed or engraved, we run both on the same machines as the numbers, from the same artwork family.
For studios, the suite is also a packaging decision — an acrylic invitation presented in a fitted box is a different product from one in a padded mailer, and that fork is its own topic; the builds and box specs are in our [wedding card box guide](/guide/acrylic-wedding-card-box-ideas/), the same vertical this guide extends. The commercial proof that the wedding-stationery suite works as a manufacturing program is real: a US stationery brand runs its card-box line with us at fleet scale, documented in the [wedding stationery card box program case study](/case-studies/wedding-stationery-card-box-program/). Table numbers and name cards ride the same rails.
---
## Backward planning from the event date {#timeline}
Every event order I coordinate gets planned backward from one immovable date, and the arithmetic is short enough to do here. Samples ship in 3-5 days. The color-approval round adds courier time plus your decision. Production runs 15-20 days after written approval. Freight adds 3-10 days depending on mode. Book 5-7 weeks back from the event and the schedule breathes; book 3 weeks back and every step must go right the first time.
Freight is where bulk quantity stops being abstract. Cast acrylic has a density of about 1.18 g/cm3[^azom-pmma], which puts a 5 x 7 inch number in 5mm at roughly 130g — trivial alone, but a 900-piece program lands around 120kg before bases and packing. At that weight the freight decision is real money: express courier is fastest and priciest, standard air freight saves meaningfully at a few days' cost, and we only put sea freight on the table when the order ships two-plus months out. My rule of thumb for planners: if the event is inside six weeks, price air and express side by side and buy the buffer, not the discount.
The payment rhythm is built for this cadence: 30% deposit starts production, the 70% balance clears before shipment, and every piece passes 100% inspection in our ISO 9001-certified factory against your approved sample before it is packed. What the schedule buys is one free mistake — a revision to artwork, a second sample under different light — absorbed by the buffer instead of the event date. Programs that come to us with seven weeks get to spend that slack when they need it. Programs that come with three weeks are betting they won't need it at all.
---
## Ordering: five decisions in one message {#ordering}
A quotable brief for custom acrylic table numbers fits in one message: piece count and number range, size (4 x 6 or 5 x 7 for most programs), build route (based panel, L-bend, or block), marking method and color reference, and the event date. With those five, we return a per-piece budget range and a backward schedule within 24 hours.
And if you do not have final artwork — most buyers do not — send what exists. A font preference, a screenshot of a reference look, a logo file, or nothing but "modern serif, gold" is a workable start; we prepare the production drawing and numbered artwork layout for written approval before anything is cut, and dimensions stay flexible until that approval locks them. Vector files are welcome but not required — turning a direction into a drawing is part of our job, not a surcharge. That drawing round is where studios discover the suite question too: the same file family that produces 30 table numbers prices out invitations and name cards in the same pass.
Send the brief through our [customization page](/customization/) or straight to a quote via the [contact form](/contact/?source=acrylic-table-numbers-wedding-event-guide). Production runs from 100 pieces to the high hundreds ship on the same 15-20 day line, and the first thing you will get back is not a price — it is the schedule that tells you how comfortable your date really is.
[^theknot-numbers]: [Wedding table numbers for your reception — The Knot](https://www.theknot.com/content/wedding-table-numbers) — documents the 4 x 6 inch standard table number size and the holder-display convention this guide's sizing recommendations build on.
[^searles]: [Envelope sizes: a comprehensive guide — Searles Graphics](https://www.searlesgraphics.com/envelope-sizes/) — publishes the A7 envelope dimension (5 1/4 x 7 1/4 inches), the standard wedding-invitation envelope the acrylic invitation sizing in this guide is cut against.
[^azom-pmma]: [Polymethyl methacrylate (PMMA, Acrylic) — AZoM](https://www.azom.com/article.aspx?ArticleID=788) — displays the 1.18 g/cm3 density of PMMA used for the per-piece weight and freight-mode math in the timeline section.