---
title: "Acrylic Fabrication Techniques: The 6 Core Methods"
description: "A factory engineer's catalog of acrylic fabrication techniques — cutting, machining, polishing, forming, printing, bonding — and how they combine on a real custom order."
category: "Manufacturing"
author: "Dillion Chen"
authorCredential: "Production Manager at Wetop Acrylic — running laser, CNC, polishing, and UV printing lines since 2014, 1,500+ custom projects personally overseen"
datePublished: 2026-04-29
dateModified: 2026-04-29
primaryKeyword: "acrylic fabrication techniques"
url: https://wetopacrylic.com/guide/acrylic-fabrication-techniques/
---
## What Acrylic Fabrication Techniques Actually Cover {#what-it-covers}
Acrylic fabrication techniques are the methods used to cut, shape, finish, decorate, and assemble acrylic into custom products. The six core techniques are laser cutting, CNC machining, edge polishing, bending and thermoforming, surface printing and decoration, and assembly bonding. Every custom acrylic product uses some combination of these six.
In 12+ years running our production lines I've watched buyers come in with the same drawing and walk out with quotes that vary by 2-3x — and the reason is almost never the material. It's the technique stack. One supplier specs flame polishing where another specs diamond. One assumes silk-screen will hit the brand color where another insists on UV printing with a white underlayer. The drawing doesn't tell you which they picked. This guide is the technique catalog so you can read a quote and know what you're paying for.
For the cornerstone overview of how all of this fits together on a real RFQ, see our [acrylic fabrication and customization](/customization/) capabilities page. If you are still working out what acrylic fabrication actually is — definition, history, who buys it, how it differs from injection molding — start with [what is acrylic fabrication](/guide/what-is-acrylic-fabrication/) before this technique catalog.
---
## 1. Laser Cutting {#laser-cutting}
Laser cutting is the most-used of the six acrylic fabrication techniques on our floor — roughly 70% of every order passes through a CO2 laser at some stage. Laser cutting acrylic uses a CO2 laser — typically 80W to 300W — to vaporize a programmed path through sheet material with a focused 10.6 micrometer infrared beam. The beam melts and re-solidifies the cut edge in the same pass, producing a semi-polished "fire-polished" finish that needs no secondary edge work on most thin sheet. We run eight CO2 laser cutters on our floor, sized for production volume from prototype runs up to 2500 x 1300 mm sheet.
What it can do: 2D profiles in cast and extruded sheet from 1.5mm to about 20mm thickness, with plus or minus 0.1mm tolerance on standard parts. Tight inside radii, fine text cutouts, intricate decorative profiles — the beam handles geometry that no rotating tool can match cleanly. Cast acrylic vaporizes especially well because the high molecular weight of [cast vs extruded acrylic](/guide/cast-vs-extruded-acrylic/) produces a cleaner edge under the beam.
What it cannot do: 3D operations of any kind. No chamfers, no pockets, no countersinks. No reliable cutting above 25mm — heat input grows non-linearly with thickness and the edge loses optical clarity. Extruded acrylic chars rather than vaporizing cleanly, leaving a matte edge that requires secondary polishing.
Cost driver: thickness and total cut length. A 5mm display panel runs at 25-35 mm/s on a calibrated machine; 15mm runs at 7-10 mm/s; 25mm becomes economically uncompetitive against CNC. Buyers who default to laser for everything — including thick award blocks where CNC is faster and produces a flatter edge — overpay routinely. PMMA's behavior under CO2 laser is documented across the industry; the Wikipedia entry on poly(methyl methacrylate)[^pmma-wikipedia] covers the polymer chemistry that drives this.
Common buyer mistake: specifying "laser cut precision" without checking thickness — laser is precise on thin sheet, slow and stress-prone on thick stock. Match the technique to the gauge. For the deeper comparison, see our guide on [CNC vs laser cutting acrylic](/guide/cnc-vs-laser-cutting-acrylic/).
---
## 2. CNC Machining {#cnc-machining}
CNC machining uses a rotating carbide or diamond bit on a 3-axis or 4-axis router to mechanically remove material from acrylic stock. Unlike laser cutting, CNC works in three dimensions: it routes 2D profiles, drills holes, mills pockets, cuts chamfers, counterbores, and machines compound features that a beam cannot reach. We run four CNC routers alongside the laser line — they share floor space because most orders use both.
What it can do: full 3D operations on cast and extruded sheet up to and including thick block stock (50mm and beyond), with plus or minus 0.05mm tolerance achievable on rigid material. Chamfered award bases, pocketed display feet, recessed name plates, drilled mounting holes, and machined assembly surfaces — every 3D feature on an acrylic part is a CNC operation. The international tolerance standard is governed by ISO 286[^iso-286], which defines the IT grades cited on engineering drawings.
What it cannot do: produce a polished cut edge directly. The carbide bit leaves a matte, slightly scored finish that requires flame or diamond polishing as a secondary step on visible edges. Extremely fine inside radii are limited by bit diameter — you cannot route a corner sharper than the radius of the smallest tool you can fit.
Cost driver: tool path length and number of tool changes. A simple rectangular block with chamfered edges runs in minutes; a multi-pocket display base with three different bit profiles takes hours. CNC also locks up a machine for the duration of the part, so high-volume runs benefit from optimized programs and fixturing.
Common buyer mistake: specifying CNC on thin 5mm display panels because "CNC sounds premium." On thin sheet with 2D profiles, CNC is slower than laser and leaves an edge that needs polishing — laser is the correct call. Match the operation to the geometry, not to the perceived prestige of the machine.
---
## 3. Edge Polishing {#edge-polishing}
Edge polishing is the technique that takes a freshly cut acrylic edge — matte from CNC, slightly rough from a sawn cut, or fire-polished from laser — and brings it to optical clarity. The three production methods are diamond polishing (CNC-controlled mechanical skim), flame polishing (hydrogen-oxygen torch surface melt), and sanded-and-buffed (manual progressive grit work). On the shop floor I default to diamond polishing for any visible edge above 6mm and any application where the case will be cleaned with isopropyl alcohol.
Diamond polishing uses a CNC-controlled diamond cutter to skim 0.1-0.3mm off the edge mechanically, producing a glass-mirror finish without applying heat. Flame polishing uses a torch tuned to roughly 2,000 degrees C to melt and re-flow the surface — fast and cheap on thin cast acrylic, but introduces residual stress that can release as crazing when the edge contacts solvents. Sanded-and-buffed is a budget alternative that produces a slight milkiness no machine method shows; acceptable on hidden interior edges, not on premium visible faces.
What each can do: diamond handles 3-50mm+ on straight or gently curved edges, no thickness penalty. Flame handles 1.5-6mm cleanly, struggles above 8mm with heat haze. Both require [cast acrylic](/guide/cast-vs-extruded-acrylic/) — extruded flame-polishes poorly because its locked-in stress releases unevenly under heat. The full breakdown is in our guide on [diamond vs flame polishing acrylic](/guide/diamond-vs-flame-polishing-acrylic/).
Cost driver: linear inches of polished edge per piece, plus method. Diamond runs faster per inch at volume but carries higher tooling cost; flame is operator-paced and cheaper at low volume. The break-even sits somewhere around 100-200 pieces depending on edge length per part. Surface finish quality is governed by standards like ASME B46.1[^asme-b46-1] for those who specify roughness numerically rather than visually.
Common buyer mistake: writing "polished edges" on the RFQ with no method specified. That single phrase covers a 4x cost spread between hand-buffed and diamond-polished. Specify the method, or ask the fabricator to recommend one based on cleaning environment and finish target.
---
## 4. Bending and Thermoforming {#bending-thermoforming}
Bending and thermoforming are the techniques that take flat acrylic sheet and reshape it into curves, angles, and 3D forms — the only category in this catalog that fundamentally changes the geometry of the stock. Three methods cover most production work: line-bending (heat a single line, fold), oven thermoforming (heat the whole sheet, drape over a mold), and vacuum forming (heat sheet, pull over a mold with vacuum suction).
Line-bending uses a strip heater to soften a narrow line across the sheet — typically 6-12mm wide — until the acrylic plasticizes at around 160 degrees C. The operator folds along that line to a programmed angle, then holds it cool. Used for sign holders, brochure stands, and any part with a clean 90-degree or 45-degree fold. Oven thermoforming heats the whole sheet uniformly in a forced-air oven to 160-180 degrees C, then drapes the soft sheet over a male mold or into a female mold to take the new shape. This is how curved display cases, dome covers, and compound-curve parts get made. Vacuum forming adds suction to pull the heated sheet tight against the mold — used for higher-detail, higher-volume formed parts where the slight texture of suction-formed surface is acceptable.
What it can do: simple bends and folds on cast or extruded sheet 1.5-12mm thick (line-bend); dome covers, formed lids, and curved display geometries on cast sheet 2-8mm (oven and vacuum). Cast acrylic forms predictably and cleanly because of its high molecular weight; extruded reveals its directional grain after forming as faint stress lines.
What it cannot do: sharp inside corners (the radius is set by sheet thickness — typically 1-2x the gauge), and re-flatten once formed without inducing stress. Geometry has hard limits: a thermoformed part with a deep draw and tight inside radius will thin disproportionately at the corners.
Cost driver: tooling. Every thermoformed shape needs a mold — typically aluminum or MDF for low volume, hardened tool steel for production. Mold cost is amortized across the run, so thermoforming is uneconomic below 200-500 pieces unless the alternative (assembling from flat panels) costs more in labor.
Common buyer mistake: assuming any 3D shape can be thermoformed. Compound curves with sharp corners and tight radii fight the physics — usually it is cheaper and cleaner to laser-cut flat panels and solvent-bond them at 90 degrees.
---
## 5. Printing and Surface Decoration {#printing-decoration}
Surface decoration is where brand identity lands on the acrylic — logos, color graphics, text, photographic imagery, decorative finishes. Four techniques cover almost every order: UV digital printing, silk-screen printing, hot stamping, and laser engraving. Each one has a different cost structure, durability ceiling, and visual signature, and choosing the wrong one is one of the most expensive mistakes I see on RFQs.
UV digital printing uses a flatbed inkjet to deposit CMYK plus white ink directly on the acrylic surface, cured instantly by UV-LED lamps. Best for full-color photographic work, short runs (under 500), and frequent design changes — no setup cost per piece. Adhesion depends on surface prep more than on the ink. Silk-screen printing pushes ink through a tensioned mesh, one color per screen — high setup cost per color, very low per-piece cost above 500 units, and superior outdoor UV resistance to digital. Hot stamping uses a heated die to transfer metallic foil onto the surface — gold, silver, holographic — at one color per pass, ideal for premium logo accents on awards and gift boxes. Laser engraving vaporizes a controlled depth into the surface, leaving a frosted-white permanent mark that needs no ink and never fades.
What each can do: UV handles full-color graphics on any flat acrylic surface at up to 1440 dpi. Silk-screen handles 1-3 spot colors at high volume with strong outdoor durability. Hot stamping handles single-color metallic accents. Laser engraving handles permanent monochrome marks. For the deeper UV-print analysis, see our guide on [UV printing on acrylic](/guide/uv-printing-on-acrylic/). UV ink performance is documented through trade bodies including the Plastics Industry Association[^plastics-industry].
What it cannot do: UV print does not survive outdoor sun without a UV-protective topcoat (visible color shift in 12-18 months). Silk-screen cannot do photographic gradients or quick design changes. Hot stamping cannot do full-color. Laser engraving has no color.
Cost driver: UV is per-square-inch of coverage; silk-screen is per-screen setup amortized across volume; hot stamping is per-die-strike; laser engraving is per-vector-length. Each has a different break-even crossover.
Common buyer mistake: speccing UV printing for outdoor signage that will sit in direct sun for years. Screen-printed UV-resistant inks or laser engraving filled with paint last 3-5x longer in that environment. Match the technique to the use environment.
---
## 6. Assembly Bonding {#assembly-bonding}
Assembly bonding is the final technique stack — how individual machined and finished panels become a single product. Four methods cover virtually every joint type: solvent welding, adhesive bonding, mechanical fasteners, and thermal bonding. The choice is driven by joint visibility, structural load, and disassembly requirements.
Solvent welding uses methylene chloride, Weld-On 4, or similar solvent to chemically dissolve the surface molecules of two acrylic panels. The polymer flows together at the joint and re-solidifies as a single fused piece — joint strength approaches 80-90% of base material strength, and the joint reads optically clear when both surfaces are properly prepared. This is how display cases get invisible corners. Solvent bonding requires cast acrylic — extruded crazes around the joint due to internal stress release. Adhesive bonding uses two-part acrylic adhesives (typically methacrylate-based) that cure through chemical reaction rather than solvent action. Slower but stronger; used on structural assemblies where load matters. Mechanical fasteners — stainless screws into threaded inserts, snap-fit brackets, or magnetic latches — are used when the assembly must come apart for cleaning, refilling, or service. Thermal bonding fuses panels through controlled heat without solvents; rare in our shop, used on chemical-sensitive assemblies.
What each can do: solvent welds give optically clear, permanent joints on cast acrylic 3mm and up. Adhesive bonds give load-bearing structural joints with some line visibility. Mechanical fasteners give serviceable, removable joints. Thermal bonding gives solvent-free joints in regulated environments.
What it cannot do: solvent welding does not work on extruded sheet, painted surfaces, or contaminated edges — surface prep is everything. Adhesive joints leave a faintly visible bond line. Mechanical fasteners introduce visible hardware that breaks the all-acrylic aesthetic.
Cost driver: joint count, joint length, and surface prep time. A 4-corner display case with 4 solvent-welded edges runs in minutes; a 12-panel multi-tier display with internal reinforcements is hours of fixture work.
Common buyer mistake: assuming every joint should be solvent-welded for the "premium" look. On an [acrylic display case](/products/acrylic-cases/) where the bottom panel needs to come off for refilling, mechanical fasteners are the correct call — the buyer just doesn't see them when the case is closed.
---
## How Acrylic Fabrication Techniques Combine on a Real Custom Order {#how-techniques-combine}
The acrylic fabrication techniques above are a catalog. A custom order is a stack — usually 4-6 of them, sequenced in order. The cost, lead time, and finish quality of any acrylic product is set by which techniques the design forces in and which it allows out.
One representative custom order - six techniques sequenced over 15-20 days. Drop any of the first five and the part downgrades; drop the sixth (inspection) and the rejects show up at the buyer's dock.
A worked example: a buyer orders a 12 x 8 x 10 inch retail display case with brand graphics, polished beveled base, and invisible corners. The technique stack is laser cutting (5mm wall panels), CNC routing (20mm base with chamfered edges), diamond polishing (visible base perimeter), UV printing (brand logo with white underlayer on the front panel), solvent welding (four corner joints, walls to base), and 100% inspection before pack. Drop the diamond polish and the base looks unfinished. Drop the white underlayer and the brand red reads pink against any dark shelf. Drop the solvent weld and you're back to silicone-glued seams that crack within a year. Each technique earns its place.
---
## Which Acrylic Fabrication Techniques Drive Cost the Most {#cost-drivers}
Not every one of the six acrylic fabrication techniques adds equal cost to the quote. Three of the six dominate the price difference between a $40 and a $120 unit on the same drawing. The full pricing-variable breakdown lives in our [acrylic fabrication and customization](/customization/) page, but the headline order is consistent across orders.
Diamond polishing and thermoforming are the two cost peaks; laser and solvent welding are the two valleys. CNC sits in the middle on cost but wins on tightest dimensional tolerance.
The biggest single cost lever on most custom orders is whether the design forces diamond polishing on long edge runs. A 24 x 18 inch [acrylic display case](/products/acrylic-cases/) with diamond-polished perimeter on top and bottom panels carries roughly 84 linear inches of polished edge per piece — at production diamond-polish rates, that is real money compared to flame polishing or hidden-edge construction. The second biggest lever is whether the part needs thermoforming (one mold per shape, amortized across the run) or can be built up from flat laser-cut panels and solvent-welded. The third is UV printing coverage — full-bleed photographic graphics with white underlayer cost 30-50% more per piece than spot-color logo work.
For [cosmetics and perfume display](/applications/cosmetics-perfume-displays/) projects where premium edge clarity and brand-accurate color are non-negotiable, the technique stack drives the quote — not the acrylic. We spec what the application demands, then walk the buyer through the cost breakdown so the line items make sense before production starts.
---
## What This Means for Your RFQ {#what-this-means}
The first thing I check on an incoming RFQ is which techniques the design forces in and which the buyer left ambiguous. "Acrylic display case, polished, with logo" is technically a brief — but it is also a $40-$120 spread depending on how the fabricator interprets it. Specify the technique stack, or accept that quotes will vary 2-3x for reasons that have nothing to do with material cost.
The cleanest RFQs I see name three things: cutting method by part (laser for thin walls, CNC for thick base), polishing method by visible edge (diamond on the perimeter, flame on curved cutouts, hidden sawn elsewhere), and decoration method with white-underlayer flag (UV print with white underlayer on clear stock for brand color). Add the use environment (indoor retail, outdoor signage, IPA-cleaned cosmetics counter) and assembly intent (permanent solvent welds, or serviceable mechanical fasteners on the access panel). That is enough for any competent fabricator to quote without follow-up, and it is enough to compare quotes apples-to-apples across suppliers.
For [acrylic display](/products/acrylic-displays/) projects we run all six techniques in-house — eight laser cutters, four CNC routers, dedicated diamond polishing line, thermoforming line, UV-LED flatbed printers, silk-screen station, and solvent-bonding fixtures, all on a 5,000 m² floor with 65+ employees. That means standard 15-20 day production lead times regardless of which techniques the order needs, and no outsourcing markup or coordination delay between steps. For supporting context, see our guide on [acrylic thickness](/guide/acrylic-thickness-guide/) — gauge selection is upstream of every technique decision in this catalog.
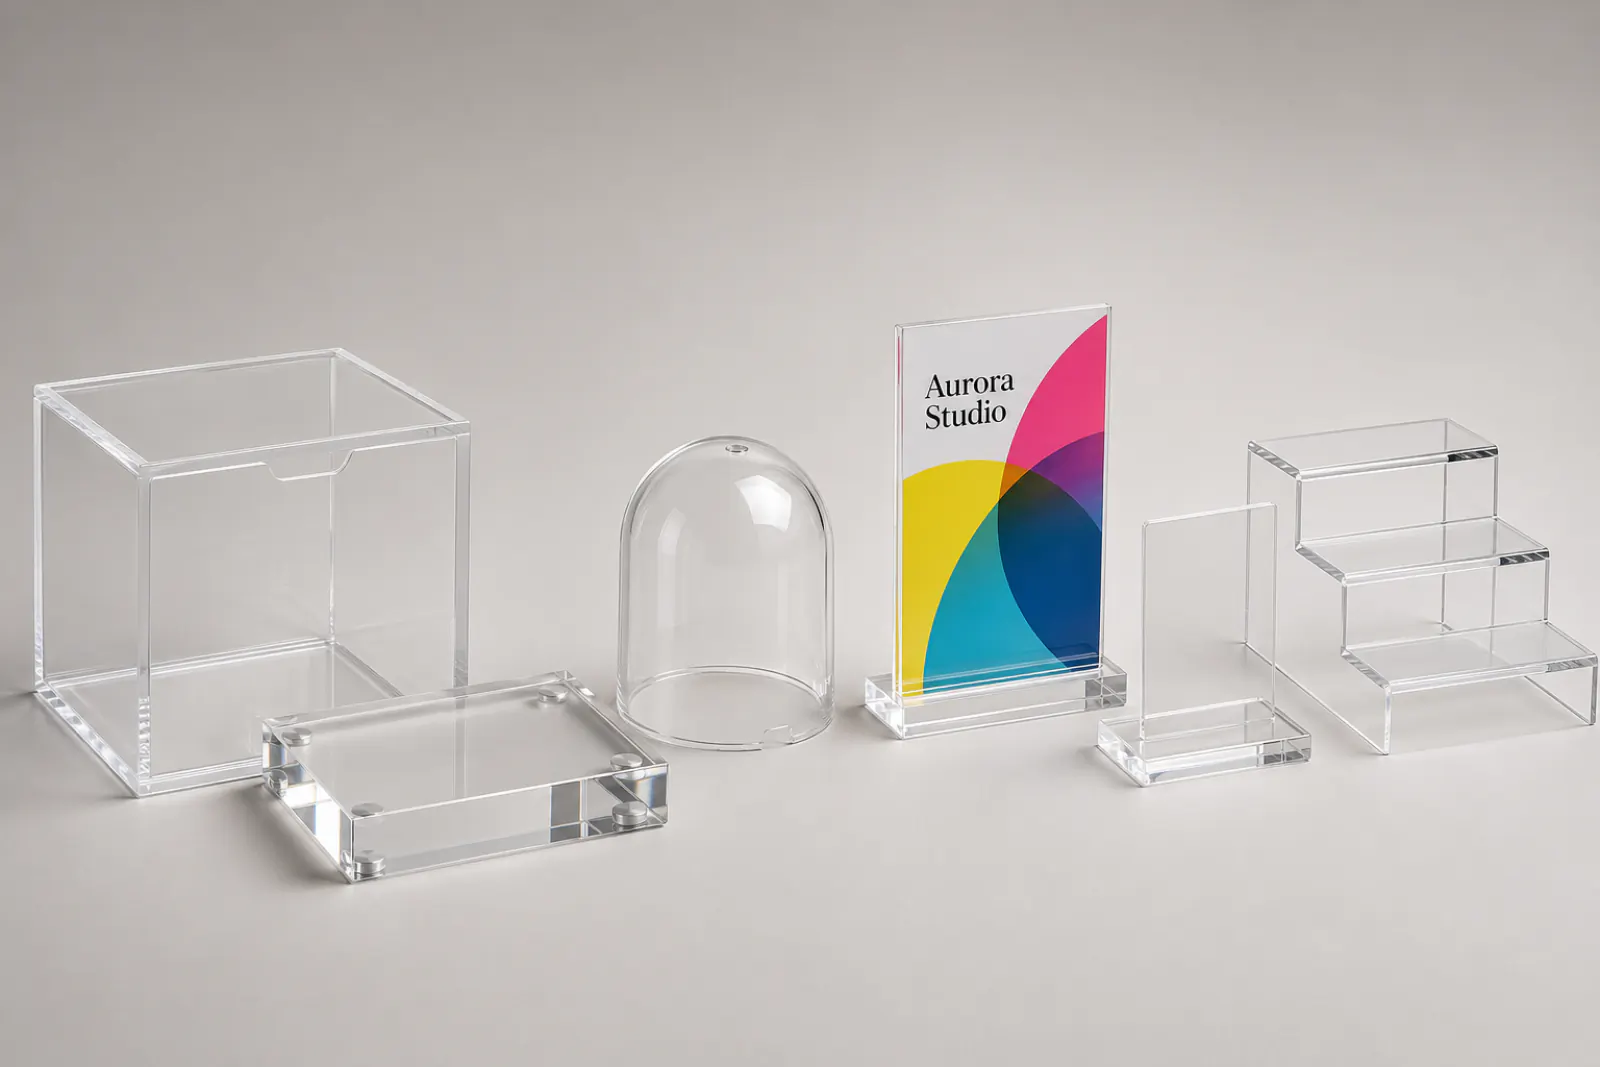
Finished acrylic products show why technique selection matters: laser-cut panels, CNC-machined blocks, diamond-polished edges, thermoformed covers, UV printing, and solvent-bonded joints all show up in the final lineup.
Send your drawing or photo reference plus quantity and use case to inquiry@wetopacrylic.com. We respond within 24 hours with a technique-by-technique quote and a recommendation on any ambiguous specs — including the calls where a cheaper technique combination delivers the same finished part.
[^pmma-wikipedia]: [Poly(methyl methacrylate) — Wikipedia](https://en.wikipedia.org/wiki/Poly(methyl_methacrylate)) — polymer chemistry behind PMMA's clean vaporization under CO2 laser, cited in §1 Laser Cutting.
[^iso-286]: [ISO 286 — geometrical product specifications](https://www.iso.org/standard/40711.html) — international tolerance standard cited for the ±0.05 mm CNC machining spec in §2 CNC Machining.
[^asme-b46-1]: [ASME B46.1 — surface texture standard](https://www.asme.org/codes-standards/find-codes-standards/b46-1-surface-texture) — surface roughness benchmark referenced for diamond-polish quality in §3 Edge Polishing.
[^plastics-industry]: [Plastics Industry Association](https://www.plasticsindustry.org/) — trade-body source for UV ink performance and outdoor-durability claims in §5 Printing and Surface Decoration.